|
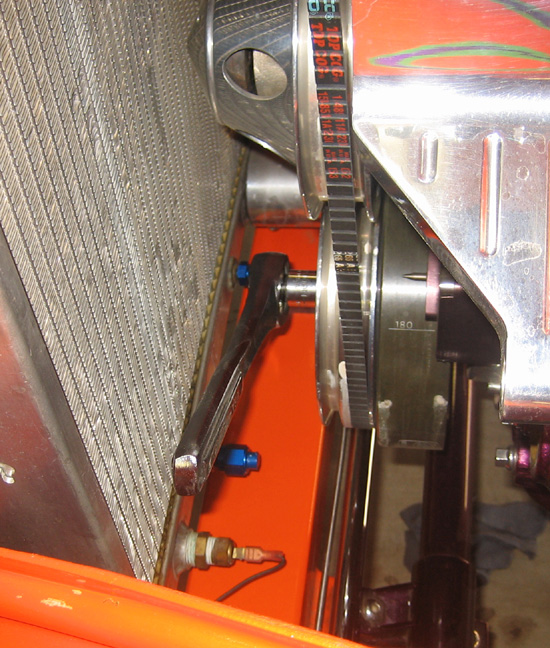
The next thing to do was to bolt up the scatter shield and then check
to see if the large center hole where the trans locates is within .005"
of center. To do this I thought I'd try bumping the motor over with my
starter and remote starter switch. In order to have the starter move the
engine I would need a flywheel so I bolted on my old one. This didn't
work well because when I engaged the starter, no mater how quick I was
on the button the indicator moved. The starter was too violent for this
delicate work so on to plan B.
|
|
 |
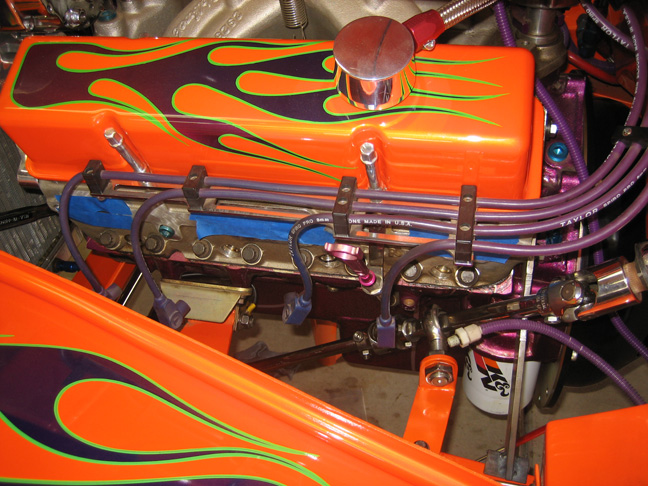
I decided to pull all the spark plugs out and crank over
the motor by hand. You can see all the plug wires dangling if you look
close. And those spark plugs looked pretty bad because they've been in
there for a long time. It will do me good to replace them.
|
|
 |
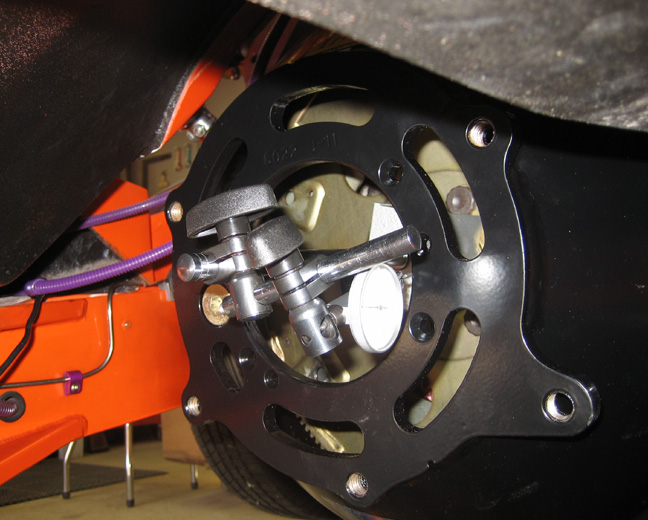
I used my 1/2" drive ratchet and cranked the motor over a small amount,
then got back under the car and looked at the indicator. What I wanted
to do was rotate the engine 90 degrees and then note the reading. If it
wasn't enough I'd move it a little more till I had it right and then
repeat the process all the way around. This worked pretty good and the
hole on the scatter shield was in specification. I was aloud .005" off
center or .010" total indicator reading (TIR) and mine was at .007" TIR
so I was in good shape. If it was more than .005" off center then you
would have to buy off-set dowel pins and then repeat this process again
till you were in spec. Finally something went pretty easy for a change.
|
|
 |
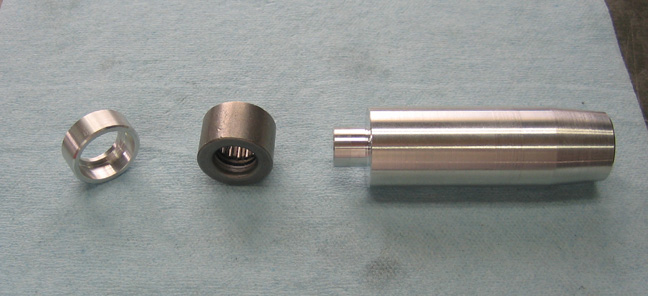
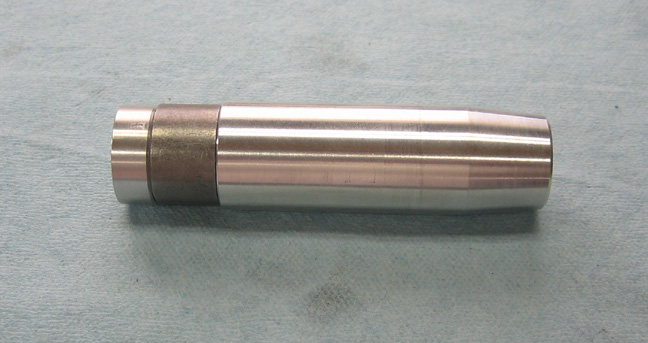
Now that the scatter shield and clutch were ready to bolt on I decided
to install my new roller pilot bearing before I reinstalled the
flywheel. I figured with the flywheel out of the way, it should make the
bearing install that much easier. The paper work said to make sure that
the end of the pilot bearing didn't go in to far and should be flush
with the end of the crankshaft. To make sure I didn't end up going to
far I measured the depth of the pilot bearing hole and it was .400"
deeper than the bearing. I didn't want to over-shoot so I made a couple
of things to help me out. The piece on the right is my installation tool
and it's made out of aluminum so it doesn't damage the bearing. The ring
on the left is also made out of aluminum and is .005" smaller than the
bearing O.D. All this is insurance so I don't install the bearing to
deep. The ring measures at .400" thick and notice the recess in the I.D.
which is clearance in case I have to use a puller to get the bearing out
someday. This way I'll have room for it.
|
|
 |
|
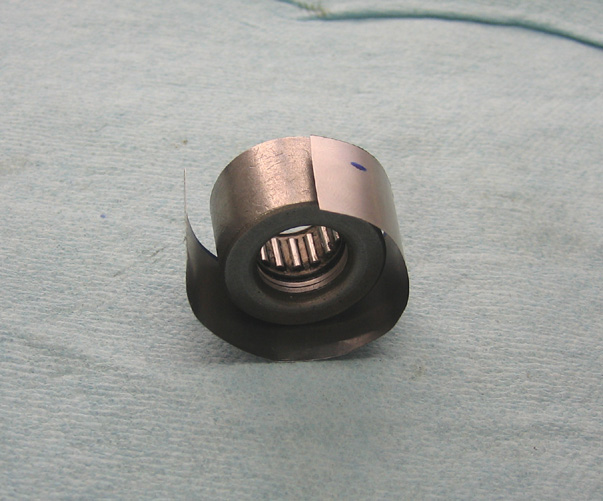
Here is how it will look when I start to install the bearing. It should
be pretty easy because all you do is hammer on the end of the tool till
the bearing and ring bottom out and then your done. Once I placed the
ring inside the pilot bearing hole and was ready to press in the
bearing, things went down hill. The bearing fell inside the hole and
went all the way down to the ring. What the hell?? Sometimes I wonder
how places stay in business. Turns out the bearing is the right size but
not the hole in the crankshaft. After measuring I found out the hole is
about .003" oversize which means no press fit....which means I'm in
trouble....again! Can't anything be easy? I'm thinking there are a few
ways to fix this - one being a new crankshaft but would mean I would
have to pull the engine out and completely rebuild it. The heck with
that!! Another way would be to increase the size of the bearing which
means making a new one out of oil-light bronze (which is what most of
them are made out of). The problem with making a new one is with the
warranty from Hurst Driveline. If you don't use all of their supplied
parts then you void the warranty.
It would be nice if I could increase the size of the existing bearing
so it would work but how do you do that?
|
|
 |
This is what I came up with to increase the O.D. of the bearing, shim
stock. I figured out that I needed .003" shim material which would
increase the O.D. by a total of .006". This should be just the right
amount of press fit which is .002" in case you were wondering. I don't
know if this will work but it sure beats the hell out of buying a new
crankshaft.
|
|
 |
|
1
2
3
4
5
6
7
8
9
10
11
12
13
14
15
16
17
18
19
20
21
22
23
24
25
26
27
28
|
|
29
30
31
32
33
34
35
36
37
38
39
40
41
42
43
44
45
46
47
48
49
50
51
52
53 |
|
54
55
56
57
58
59
60
61
62
63 |