|
The console is held down with five screws on each side but once I cut
the hole in the floor (for the transmission) I lost three of the five.
What I'm doing here is adding places to hold it down using riv-nuts. The
two that you see here are for the middle clamps on the console (one for
each side) and I did the same thing on the smaller piece behind this one
with two more. Once I had the console installed using my new threaded
aluminum blocks, I found where these new screw locations needed to be.
These are 6-32 riv-nuts that were installed from the other side on both
panels. The last and most rearward screw locations were in the floor of
the car and I used riv-nuts for those as well. Now that I have a place
to screw down my console again, it's time to make a new center section
for it.
|
|
 |
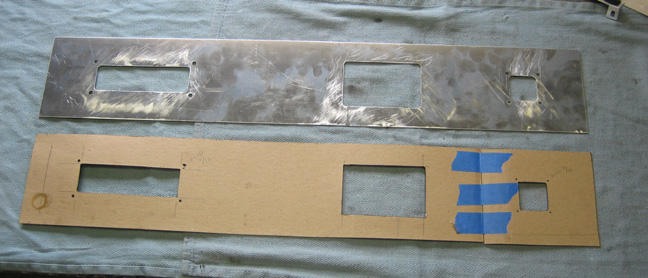
| What you see here is the new piece that will go between
the sides of the console. I started with a cardboard template and
transferred all of the dimensions to the metal one which was left a
little long. The new center piece is made out of 6061-T0 aluminum that
is .050 thick and is very soft. What I mean by soft is aluminum comes in
many different grades and heat treatments.
The grade 6061-T6 for instance is a very common grade of aluminum and
is widely used in the aerospace industry, automotive, etc. The T6 on the
end determines the hardness and is easy to machine when in this
condition. On the other hand the material I used is a T0 (zero)
condition which means no heat treat at all. The good news here is that
it will be very easy to bend compared to a piece in a T6 condition. The
bad news is that it can dent and bend very easily.
The piece I had in the car previously was 6061-T6 and was very hard
to bend properly. It took me hours to end up with the shape I had and to
be honest it was never really right. After I worked on it to the point
of frustration, I finally said it was close enough but one little area
didn't come out right and it has bothered me ever since. Nobody ever
noticed this area but I did.
|
|
 |
|
To bend the larger radius I started with a bucket but that ended up
being to large so then I used a new roll of paper towels which was much
closer. Once I had it close I ended up with that large pipe in my vise
to tweak here and there. I placed a rag over the pipe while bending so
it didn't damage the soft aluminum.
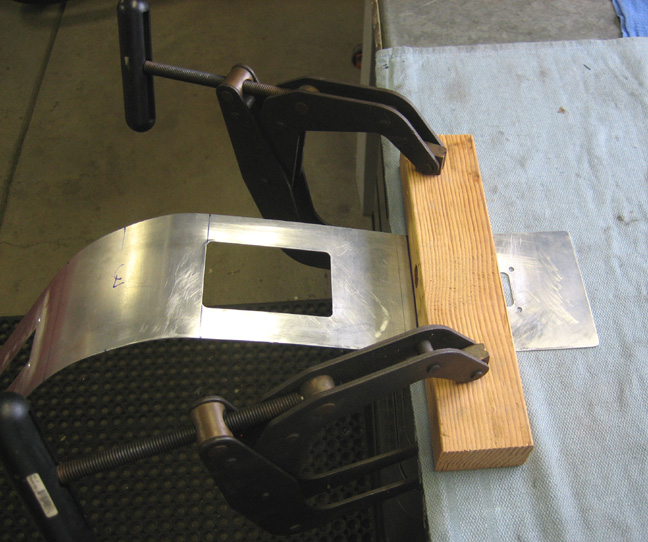
The second bend (below) was more challenging because it needed to be
in just the right place compared to the first one. The first bend was
measured from the top of the new center piece which ends up under the
dash by an inch or so. If I was off by a small amount while bending this
it would be no big deal because there would be extra material under the
dash that nobody would see. On the other hand, the second bend would
need to follow the contour of the side pieces and placed a certain
distance from the first bend. If I get this one wrong then you would see
it very easily.
To find the exact location of this second bend I marked the piece at
the starting point of the bend. Then I slowly rotated the center piece
around the stationary side piece till I had it placed at the end of the
second bend. This would mark the ending point of this radius which was
critical because I needed to find that center point between them. I
double checked my starting and ending point once more and it repeated
just to make sure. Once I had this center line I marked my piece and
went for it.
|
|
 |
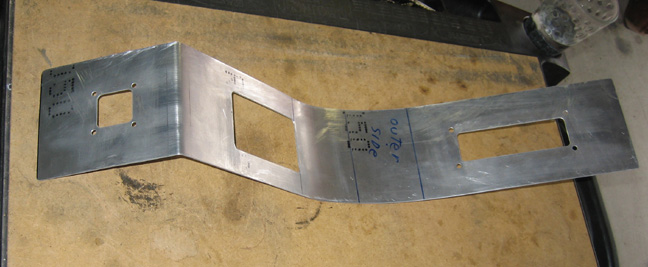
Here you can see the center piece all finished which came out pretty
good and was very easy to bend (almost to easy). The cutouts that you
see are for two switches, shifter and six switches (left to right). I
will still need to make a trim ring to go around the shifter area along
with a boot which I'm still not sure what I want yet but it's another
thing I'll be thinking about.
|
|
 |
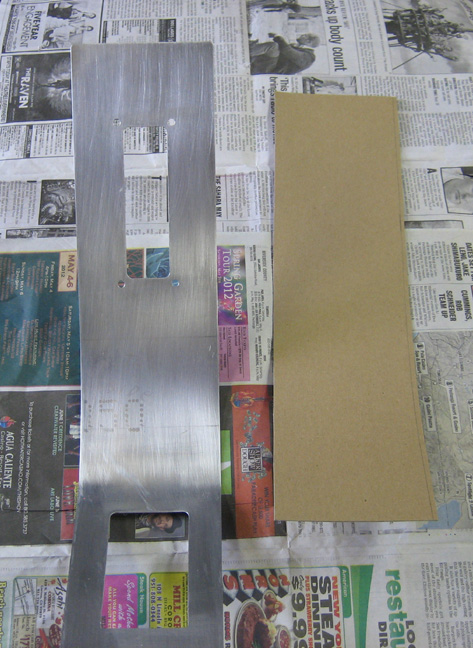
Next I'll be gluing a thin piece of cardboard onto to the aluminum. This
cardboard helps give depth to this piece and it's easier to round the
corners which I'll show you later. I gave the surface of the aluminum a
quick scuff with some Scotch-brite and then cleaned it with lacquer
thinner. I'll be gluing two pieces of cardboard instead of one (end to
end) because it's much easier this way. I also made the cardboard
oversize and it will be trimmed later.
|
|
 |
|
Here is what it looks like after gluing. I got pretty close to the edge
on the bottom side but I just made it. I should have cut the cardboard a
little larger but it came out fine.
|
|
 |
|
1
2
3
4
5
6
7
8
9
10
11
12
13
14
15
16
17
18
19
20
21
22
23
24
25
26
27
28
|
|
29
30
31
32
33
34
35
36
37
38
39
40
41
42
43
44
45
46
47
48
49
50
51
52
53 |
|
54
55
56
57
58
59
60
61
62
63 |