|
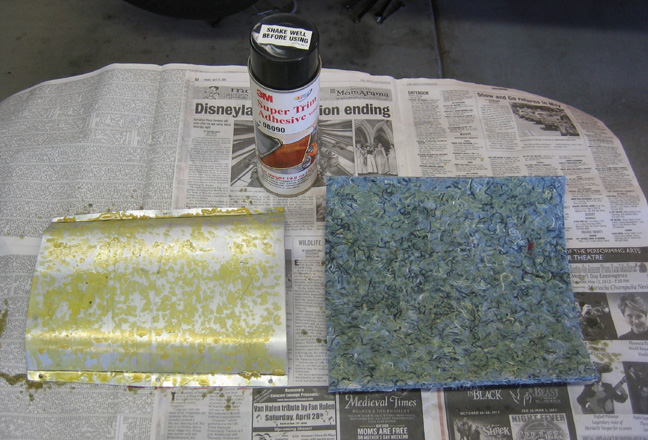
May 6th. The panels that cover the hole in
the floor need to be insulated so that's what I'm doing here. After
cutting out a piece of insulation that is a little bigger than the
panel, I'm ready to glue it on. The glue that I'm using is called Super
Trim Adhesive 8090 made by 3M. I used this glue when I did the
upholstery a few years ago and it's still going strong so I thought I'd
use it again here.
What you do is spray both surfaces that you want to bond and then
wait a minimum of five minutes before sticking them together. I've tried
doing this with less time but it doesn't work as well so follow the
instructions on the can.
|
|
 |
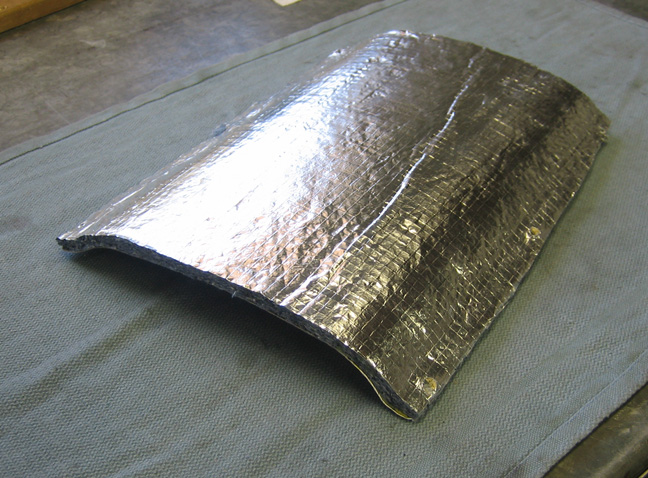
Here is what it looks like after a quick trim with some
scissors. I drilled through all the holes from the other side and then
cut away a small area around each hole so the screw head would be
visible. The only reason I did the cutting is because once I screwed
them down, I couldn't see the tops anymore. This was done on the smaller
panel as well.
|
|
 |
|
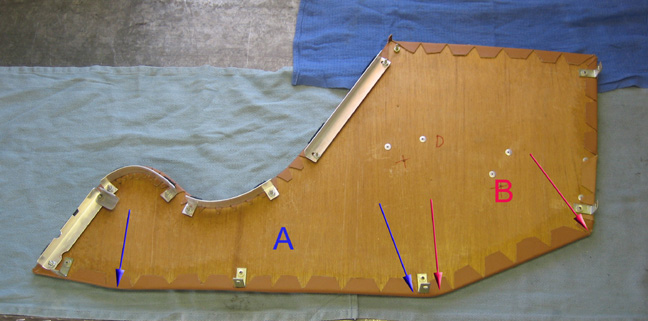
The insulation was the easy part but now I need to modify my console
because it doesn't fit anymore. What you see here is the drivers side of
my center console and after adding the insulated panels from above, the
floor sits higher in the area that the console sits on now. And with the
top of the console fitting tight against the underside of the dash
(before I added the new panels) the side pieces won't fit anymore.
If you remember the new aluminum panels that cover the hole in the
floor are raised slightly to clear the transmission but I had no other
choice in the design if I wanted them to work. The panels sit about 3/4"
higher now which will be the same amount that needs to removed from the
bottom of the console (section A). This same panel is also hitting
against another area (section B) which will require about 3/8" to be
removed as well. This was not anticipated at all but I'll have to deal
with it.
The straight and bent pieces near the edge are made out of 3/4"
aluminum angle which supported the center section of the console. I'll
need to remove most of them for what I have planned.
|
|
 |
Here you can see I've removed the leather from the wood and pulled the
material away from the padding a few inches too. I'll need to make sure
the material is completely out of the way when I do any cutting because
the last thing I want to do is to buy more leather. The reason I don't
what to buy more material is because the color runs in lots and after
this many years I'm sure I won't get the same exact color.
|
|
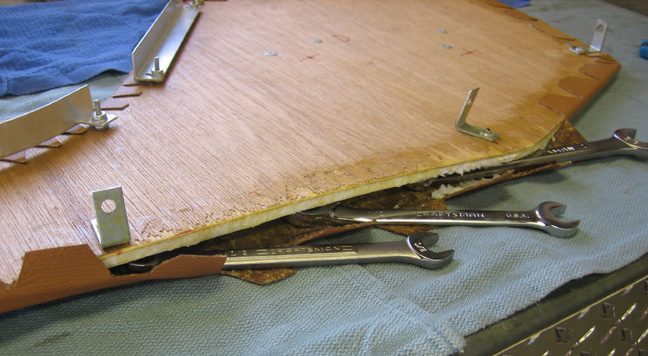 |
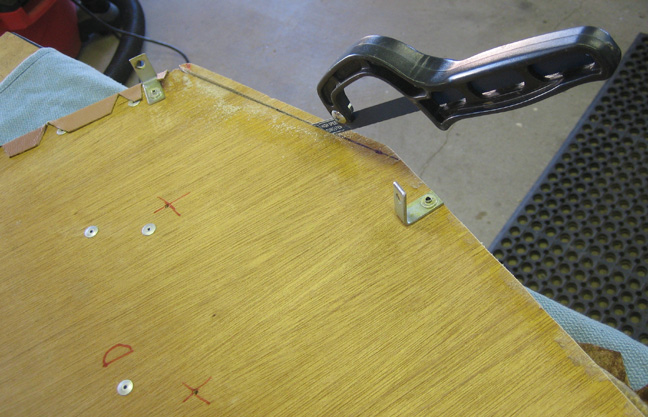
Once I laid out some lines, I used a hand saw which made quick work on
this thin piece of wood and foam. The bracket that you see near the saw
has been turned 180 degrees while I was making the cut near it. I'll
have to remove and relocate two of them (on each side) because they're
to close to the edge after cutting.
|
|
 |
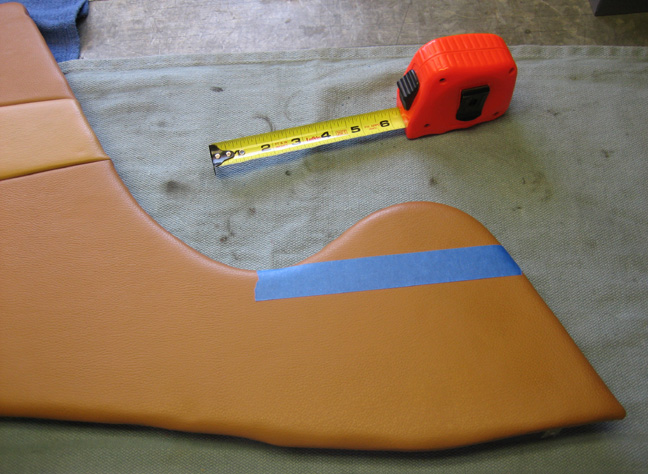
Speaking of cutting, I'll be doing more of that here. The blue tape is
about the shape I'll end up with once I'm through because the raised
area that I had with my old shifter won't work with my new one. This
area needs to be removed because the new shifter is in a different
location and it doesn't pivot like the old one did. The old one had a
pivot point a few inches below the peak but the new one pivots close to
the floor and it's in a different spot. What I'll be doing is similar to
before as I'll need to pull back the leather to make room for another
cut.
|
|
 |
|
1
2
3
4
5
6
7
8
9
10
11
12
13
14
15
16
17
18
19
20
21
22
23
24
25
26
27
28
|
|
29
30
31
32
33
34
35
36
37
38
39
40
41
42
43
44
45
46
47
48
49
50
51
52
53 |
|
54
55
56
57
58
59
60
61
62
63 |