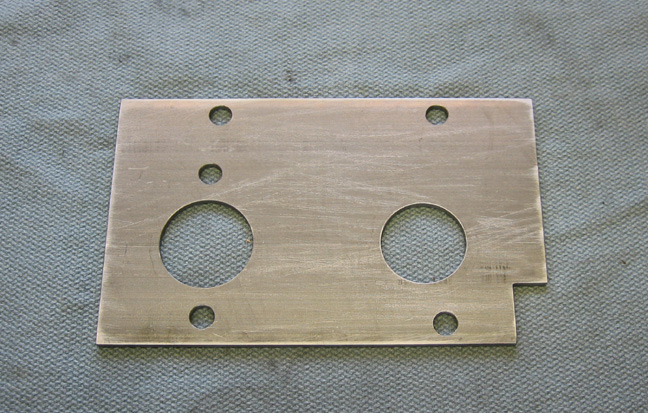
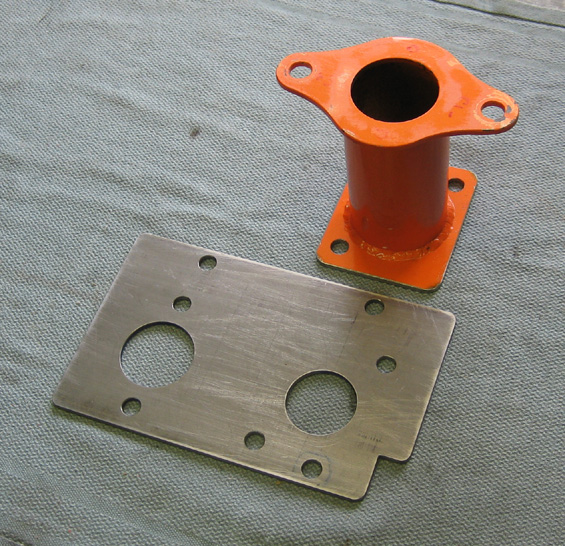
| Here is the adapter plate that I came up with. It's made
out of 1/8" steel plate and will be held on with a few bolts. The clutch
master will mount directly to this plate (on the left) and bolt up
through the two 11/32" holes at the lower left with the larger hole
having .003" clearance to locate the master just right.
The top two holes along with the lower right one are 11/32" diameter
and have the same bolt pattern as the bracket from the previous page
(which are clearance for a 5/16" bolt) but the lower left is going to
have a problem. I knew this while I was making it and it will end up
being a half-a-hole off. I'll need to modify the original 1/4" bracket
so I can use this new hole.
On the right is a clearance hole for the pushrod to pass through but
I'm not sure how I'm going to mount the brake master....yet.
|
|
 |
Here you can see how the bottom left hole doesn't line up. It will be a
quick fix with a carbide burr and my Dermal so that won't be a problem.
I've also laid out where I need to do some cutting and drilling.
|
|
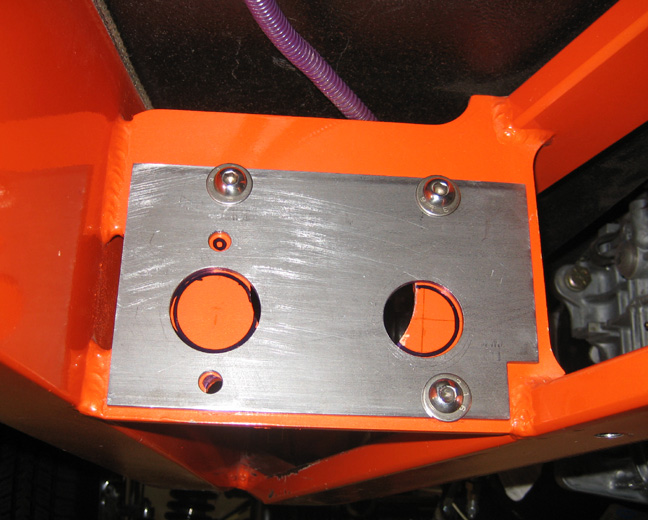 |
I used a 1 1/2" hole saw on the left and a one inch on the right. And
you can see I drilled one new 11/32 hole and elongated the bottom left
hole. The reason I went with a 1 1/2" hole is because the clutch master
has a rubber boot that needed clearance so I could still use it. The
other side is just clearance which is why I went with the smaller size.
|
|
 |
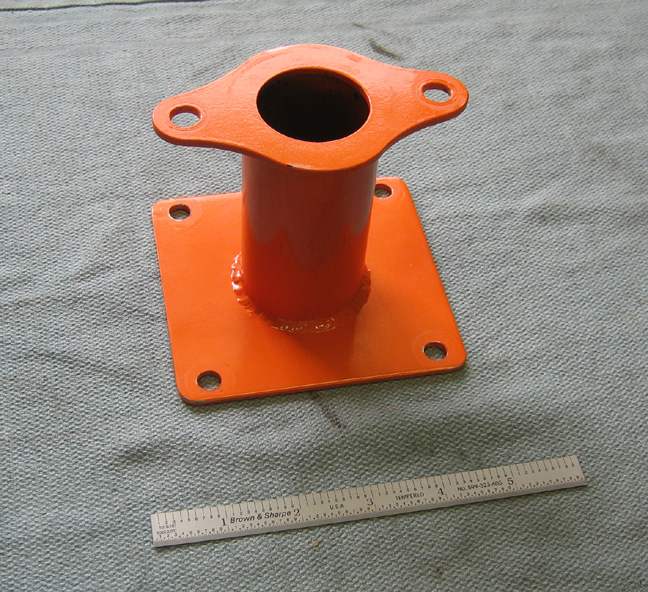
I finally came up with an idea for mounting the brake master. I thought
about cutting off the square part and then welding the tube portion to
the new adapter plate. After looking at it though, the tube would be in
the way of one bolt holes and wouldn't work so I decided to modify the
square plate instead.
|
|
 |
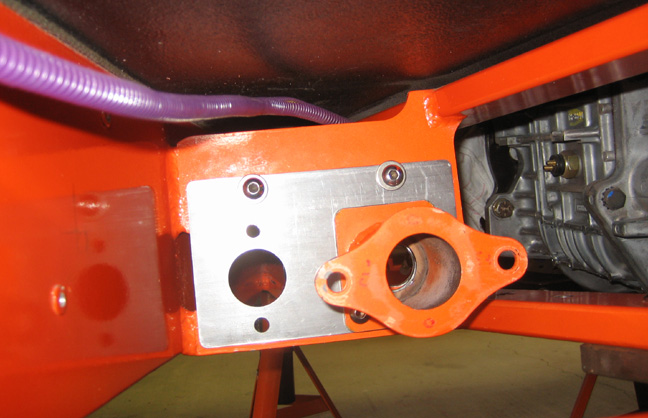
The large square plate on the old adapter is now a smaller rectangle
along with two 11/32" holes in it. These same two holes have also been
added to the new adapter plate which will hold the brake master in
place. Now I'll need to drill two more holes through my bracket on the
car.
|
|
 |
|
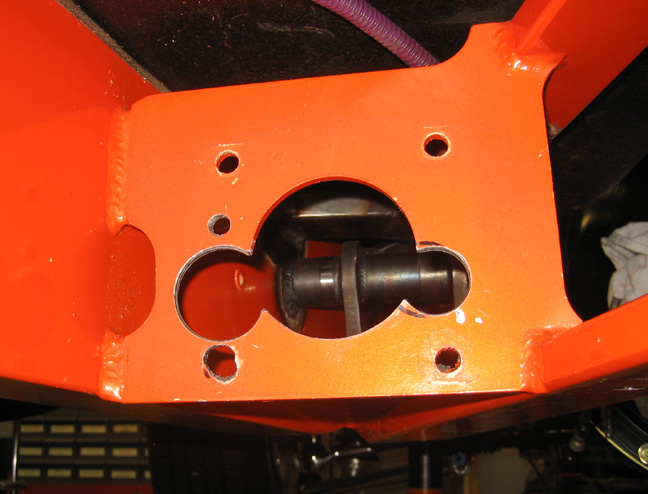
Here you can see how things will be going together which
I hope will work when I'm done. You can see how the two masters will be
staggered once they are bolted together and I rounded all the corners so
they weren't so sharp either. Looking back I really don't need those top
two bolts anymore because I have plenty more holding the new adapter
plate on. You know the old saying, if some are good then more must be
better!
|
|
|
|
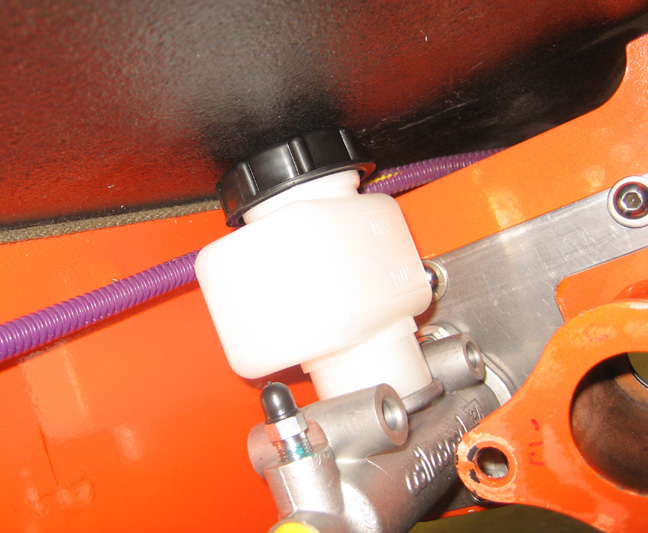
When I attached the clutch master cylinder I quickly noticed that I had
a problem. I knew this would be close to the floor but not a press fit.
I tried placing a piece of paper between the cap and floor and it
wouldn't slid through which means I need to find a solution. And just
when things were going so good (as I shake my head back and forth).
Besides finding a way to get this cap off, I'll need to make pushrods
for both masters (different lengths), spacers (for both of them) and
start making up some new brake lines for each one too. Come back next
week and see how things are coming along.
|
|
|
|
1
2
3
4
5
6
7
8
9
10
11
12
13
14
15
16
17
18
19
20
21
22
23
24
25
26
27
28
|
|
29
30
31
32
33
34
35
36
37
38
39
40
41
42
43
44
45
46
47
48
49
50
51
52
53 |
|
54
55
56
57
58
59
60
61
62
63 |