|
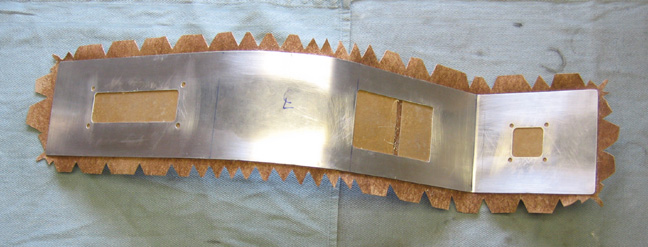
I'm no expert here but after doing this a few years ago this is what
worked for me. I've found when you're doing upholstery that you can
leave larger spaces between the notches on the straight sections but
when you come to a curved area you'll need to have the notches much
closer together. If you were to use one long section with no notches in
your straight areas it's much harder to get the material to fit right so
this is why I use more cuts. Plus when you work alone the more cuts the
better. Once you're finished you'll never know how many notches were on
the back if you make your cuts right. There's a trick to doing these
cuts because if you make your notch to close to the piece that you're
covering, you might see it once you fold it over. I find that if you
stay away with your notch by about 1/8" to 3/16" then you should be
fine. Good heavy duty sharp scissors are a must here so don't cheap out
and use the ones in the junk drawer because you won't be happy.
|
|
 |
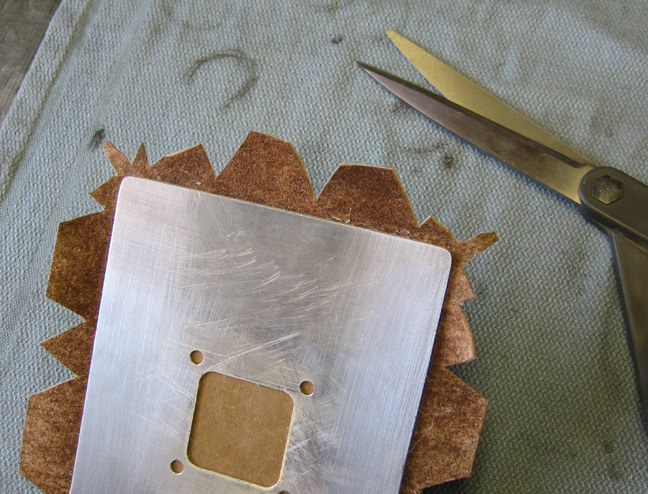
Here is a close-up of what the corners look like. I know
it looks funny but it works. I like doing all the easy areas first
(straight sections) and then come back and work on the corners. By
leaving that little tab right in the middle of the corner that will go
between the smaller pieces on either side of it. I don't know how other
people do this but it works for me.
|
|
 |
|
Here is the center piece all covered with material. I also installed my
switch panels and I did something extra to the larger one besides
polishing it.
|
|
 |
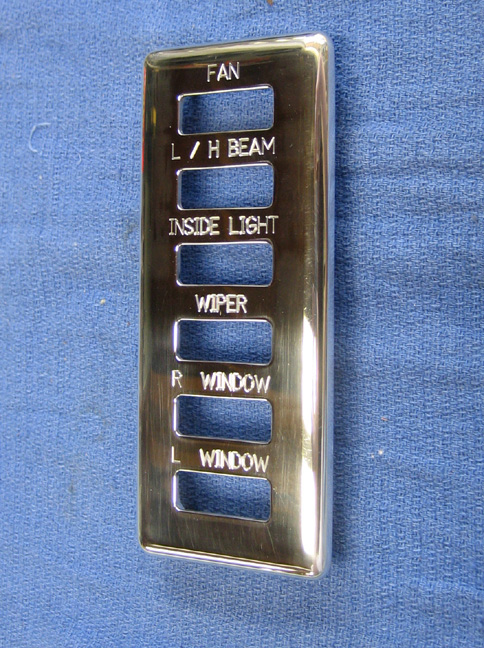
I added some engraving to my switch panel because sometimes I'll forget
what each one is for. The bottom two have always been easy to remember
because I use them all the time but the rest are a different story. This
was easy to do at my work and only took me a few minutes. It sure is
nice to have a CNC machine to use.
|
|
 |
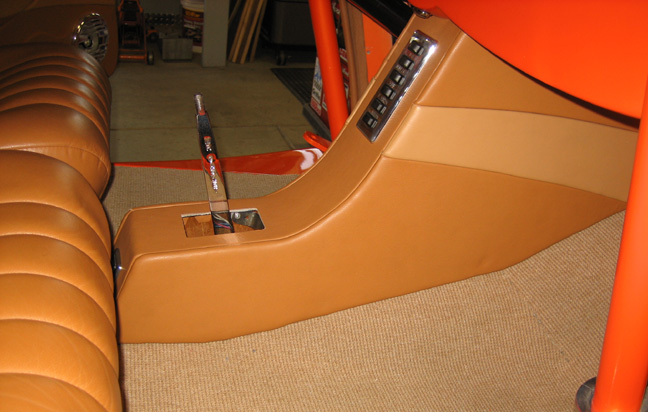
This isn't the best picture but you can see what it looks like in the
car. I still need to make a trim ring for the shifter area but I can
test drive it like this for now. Also notice the small round item above
the switch panel. This is one of the new lights I added along with the
two under the dash out of sight. It works pretty good and I'll take a
picture of them turned on soon.
|
|
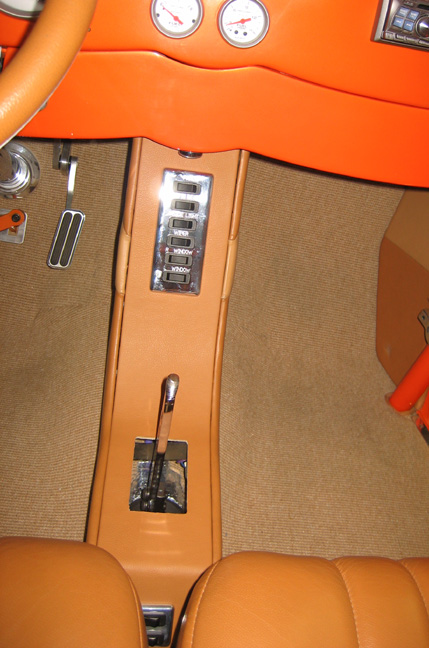 |
I'll need to get use to this new look because it's a little different. I
also need a shift knob for this temporary shifter but none of the ones I
have will fit because the thread size is to large. But I have an idea of
what I might be able to use.
|
|
 |
|
1
2
3
4
5
6
7
8
9
10
11
12
13
14
15
16
17
18
19
20
21
22
23
24
25
26
27
28
|
|
29
30
31
32
33
34
35
36
37
38
39
40
41
42
43
44
45
46
47
48
49
50
51
52
53 |
|
54
55
56
57
58
59
60
61
62
63 |