|
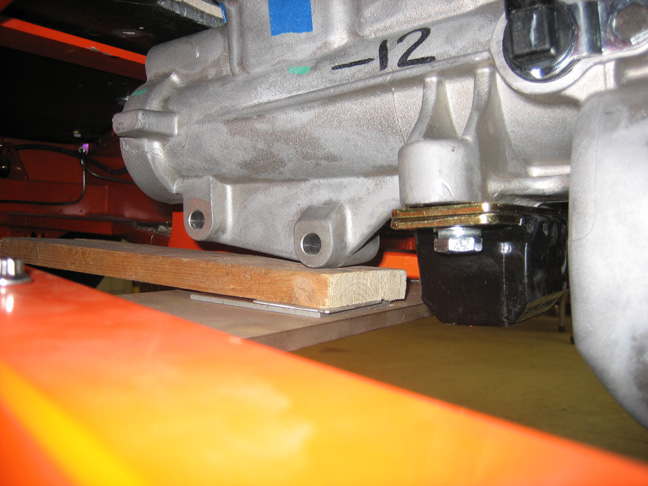
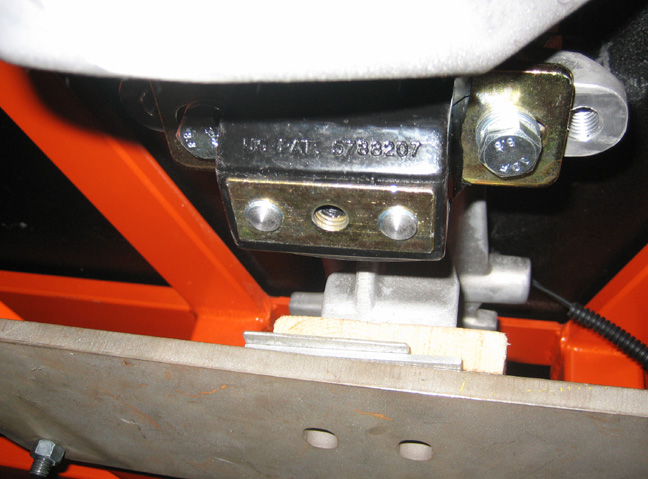
To make sure the angle stayed where I wanted it, I used some shims
made out of wood and aluminum. After trying a few different sizes, I
found just the right combination. This new trans is much shorter than my
automatic was which means my old cross member won't work now. This was
something I already new about when I was in the planning stages so it's
no surprise to me.
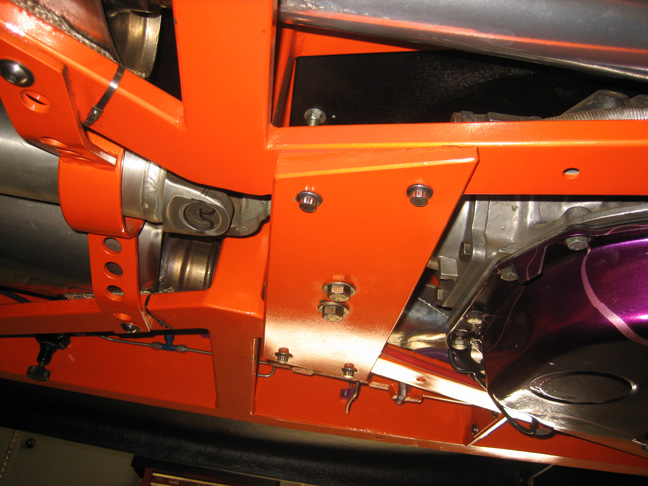
The cross member that I'm using here (unpainted) is the one that I
received with my chassis in 2003 but never used. The reason I didn't use
it was because I ordered the chassis to use a Turbo 400 trans with a
Gear Vendor setup (for an overdrive). After seeing how the chassis
turned out I changed my mind about using that setup and went with the
4L80E transmission. You can see more of what I'm talking about
here. Looks like it's time to start working on a new cross member
because the old one is way to short.
|
|
 |
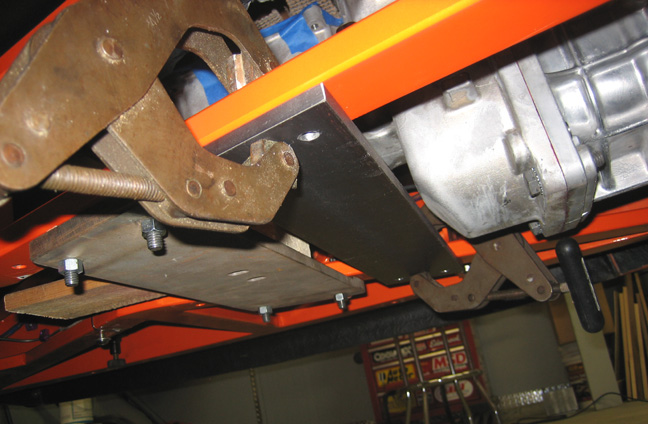
| Here is my old cross member that I made awhile back. If
you look close you can see it's made with a angle incorporated into it.
By making it this way it matches the angle of the trans mount so it can
lay flat against the cross member. If this angle wasn't there the trans
mount would be forced to sit flat once you tightened the bolts down but
would put unwanted stress on it as well. I know it's only five degrees
we're talking about here but over time the mount will crack and then
fail. To end up with a cross member like this I welded an angled piece
to both ends. This puts the whole cross member at your target angle which is good
for the trans mount but bad for the four bolts holding it in place. To
compensate for this I counter bored the plate where all the bolt
heads sit with the same angle. This was a lot of work but it seemed to
do the job just fine and I was getting ready to do the same thing to my
new one...and then it hit me. Can I get the same result but do it a
different way and with less work? Maybe, so let's go through the process
that I that I have in mind.
|
|
|
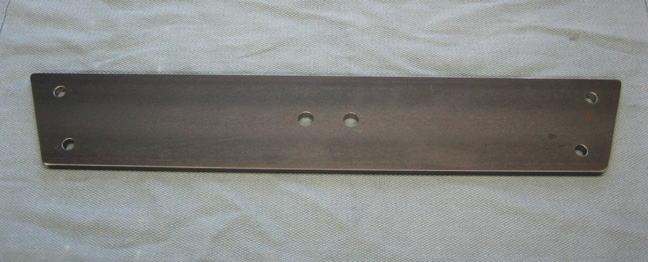
| My new cross member will be made out of 3/8" thick steel
plate and is 3 1/2" wide. I made a cardboard template to get the basic
shape and then transferred that to the steel piece. After milling the
angles on the ends to match the X member of the chassis, I laid out some
bolt holes and then drilled them. The holes sizes are 25/64" (.390) which is
just over 3/8" (.375) because I wanted a small amount of clearance for
the 3/8"
bolts.
What I'm doing here is getting ready to drill holes in the chassis by
using the cross member as a drill guide. With the plate lined up and clamped in place
I drilled through the 2" X 3/4" box tubing of my chassis. Now this took
awhile because once I was ready to start drilling, the bottom of the
drill motor was only about three inches from the ground. That meant I
couldn't get any leverage to push with so what I did was use a 2 X 4 on
the ground, placed my hand on the wood and then made a fist to raise my
hand. This small amount of movement enabled me to put pressure on the
drill so I could make some progress. I tried doing this with my arms
stretched outward but that didn't work at all which lead me to the piece
of wood. When it came time to go through the second wall of the box
tubing, I placed another small piece of wood on top of the first one and
repeated the process. If I only had a lift to raise the car with, this
would have been much easier.
|
|
 |
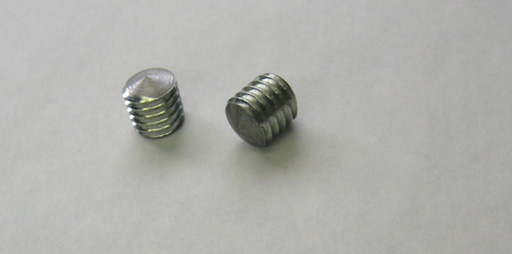
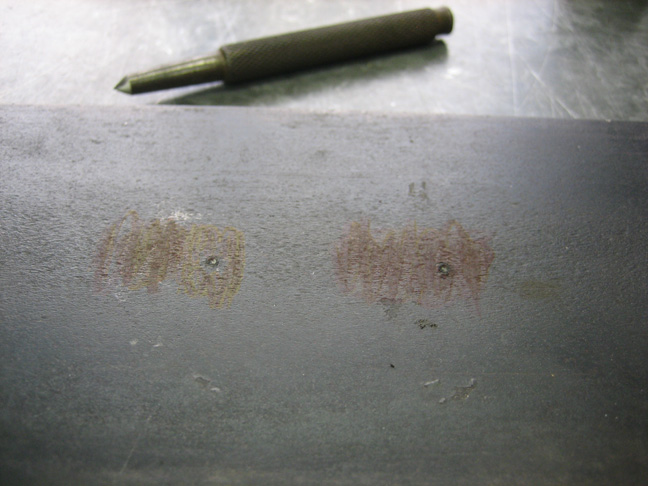
Now it's time to drill some holes for the trans mount but how do you
make sure they're in the right place? What you see here are some
transfer screws that I made from of 7/16-14 bolt. If you look close you
can see I put a slight angle on one end which comes to a point.
|
|
 |
By screwing them into the trans mount and letting them stick out a small
amount, all I had to do was bolt up the cross member and they would
leave a small impression (transfer) on the plate. This would be the
exact location without any guess work or measuring.
|
|
 |
Once I removed the cross member from the car there were two small
indentations in the plate. I used a center punch at each location and
now I'm ready to drill some holes in it. This worked out pretty good so
I'm going back to work to drill these holes and make one more thing.
Remember that idea that I had earlier?
|
|
 |
It's not much to look at but the holes are in the right spot and it
should work ok. I've been wondering what to do about protecting it from
the elements like water, rust, etc. I don't have any of my paint
leftover so that's out, powdercoating is an option but it's only one
piece. And because it's under the car, I'm not going to chrome it so I'm
not sure what I'm going to do. Anyways let's look at what else I did
while I was machining things.
|
|
 |
|
1
2
3
4
5
6
7
8
9
10
11
12
13
14
15
16
17
18
19
20
21
22
23
24
25
26
27
28
|
|
29
30
31
32
33
34
35
36
37
38
39
40
41
42
43
44
45
46
47
48
49
50
51
52
53 |
|
54
55
56
57
58
59
60
61
62
63 |