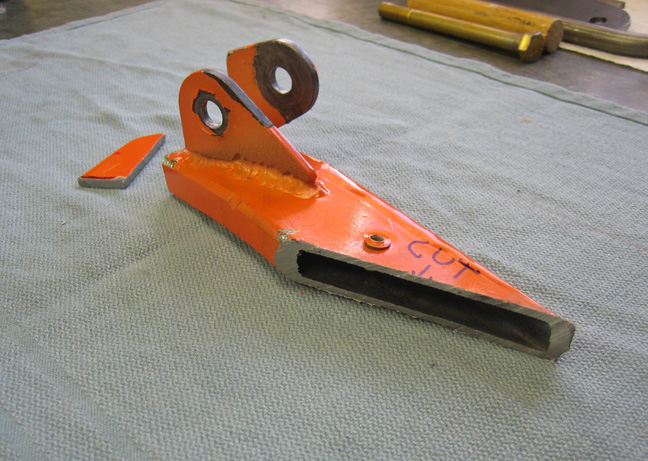
It took about five hours but I'm through cutting. To the
left is the first piece that was removed and the last cut was very long
as you can see. While I was under the car cutting this out, I took many
breaks because holding the saw up isn't the easiest thing to do. The
material is .125" thick but as you can see on the ends it's much thicker
which took longer in those areas.
|
|
 |
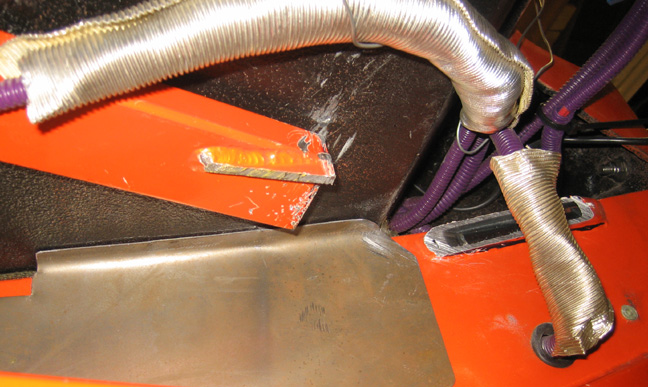
It sure does look different with that piece cut out of there. That
silver stuff is some insulation that was used near my exhaust system
that had wires running through them. I thought this would protect my
wires while I was using my grinder so I folded it around them which
worked very well.
|
|
 |
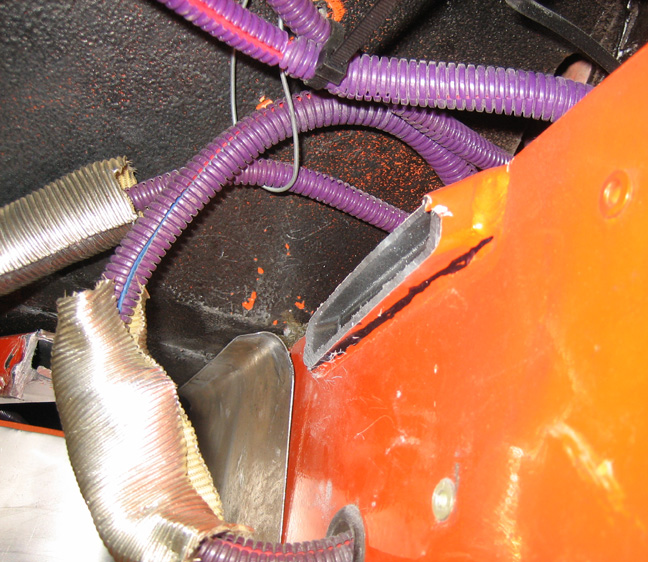
Here you can see what the floor looks like and as you can tell it
doesn't look that bad. On the other hand the saw cut doesn't look good
at all. The nasty saw cut was made by cutting from both ends and they
didn't meet in the middle like I planed. I got inpatient while cutting
from one side and decided to try from the other side. I should've stayed
on one side or the other. If you look close you can see what I mean on
the top portion which will needed a lot of grinding to clean it up. The
sheet metal is clamped in place to help protect the paint and contain
all the hot metal from going everywhere.
|
|
 |
|
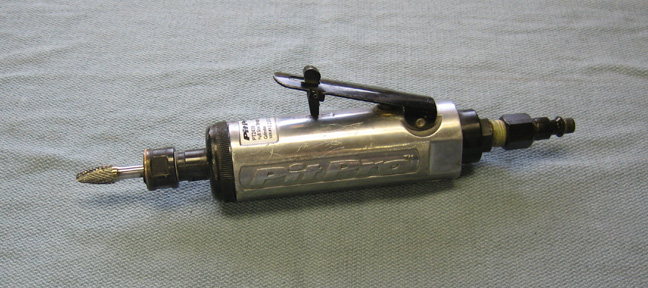
This is the longer cut area which is sticking out close to 1/2" on the
one side. Once I was finished grinding the smaller areas, I decided to
switch tools for this one.
|
|
 |
I think this rotary tool with a carbide burr should work much faster
than my grinder would. The only drawback to using this is the type of
chips that you have to deal with. If you've ever used one of these on
steel before you know what I'm talking about. But if you've never had
the pleasure of doing so, be my guest but be prepared for the sharpest
metal chips you've ever had to deal with....and ever felt too!!
|
|
 |
|
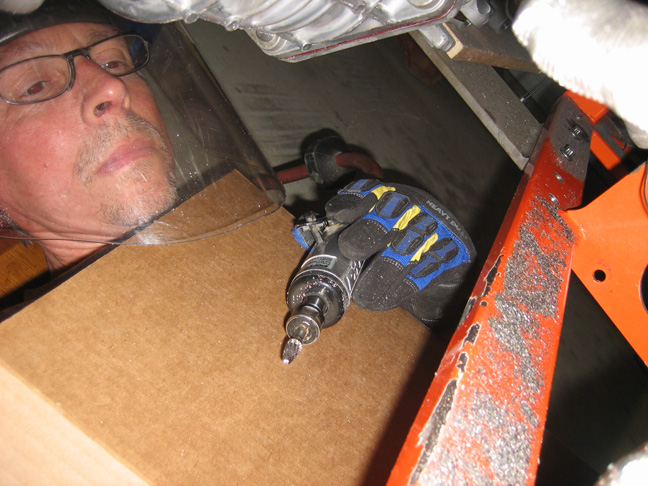
What I did here for protection is pretty silly but it
worked. The first thing I did was put in ear plugs, then a face shield,
long sleeves are a must here, gloves that you don't care about because
they are going to get filled with chips and last but not least, a big
piece of cardboard. I took a piece of cardboard and bent both sides so
it wrapped around my sides somewhat which covered me from my chin to my
knees to keep all those chips from getting into my shirt and pants. When
I was waiting for my compressor to fill back up, I'd get out from under
the car and all the chips would just slide off the cardboard when I
stood up. Although I can't say the same thing for my hands and arms
though as those sharp chips found their way to my skin pretty quick. And
sure enough I ended up with a metal splinter in the bottom of my foot,
but I didn't notice it till I was back in the house sometime later. I
guess it fell in my shoe while I was brushing myself off or something.
This method worked out really well and made quick work
of that bad saw cut. As you can see I have some paint damage which was
from the saw resting on that surface while I was cutting. A small price
to pay for getting that piece out of there without lifting the body.
Also notice all those small razor blades that have fallen onto the
bottom X member. Those things are wicked sharp so dress accordingly when
doing this kind of work. Oh...one more tip, if you were to use some tape
between your gloves and shirt sleeves that would be even better.
|
|
|
|
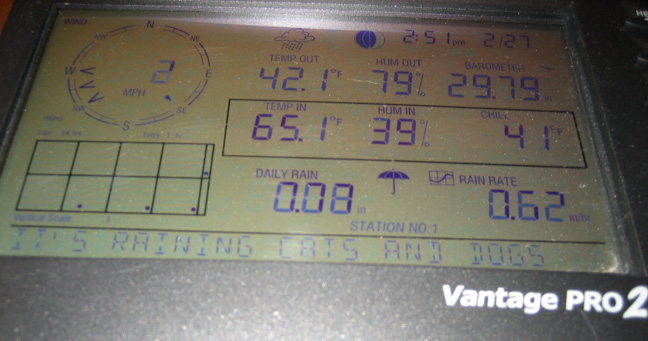
It was cold and raining that day so I took a shot of my little weather
station to show you that it has a sense of humor. Notice what it says at
the bottom when it rains hard. Next up I'll be making a piece to fill
that gap that I just made, doing some welding and I'll show you how to
do a little wiring 101....oops!
|
|
|
|
1
2
3
4
5
6
7
8
9
10
11
12
13
14
15
16
17
18
19
20
21
22
23
24
25
26
27
28
|
|
29
30
31
32
33
34
35
36
37
38
39
40
41
42
43
44
45
46
47
48
49
50
51
52
53 |
|
54
55
56
57
58
59
60
61
62
63 |