|
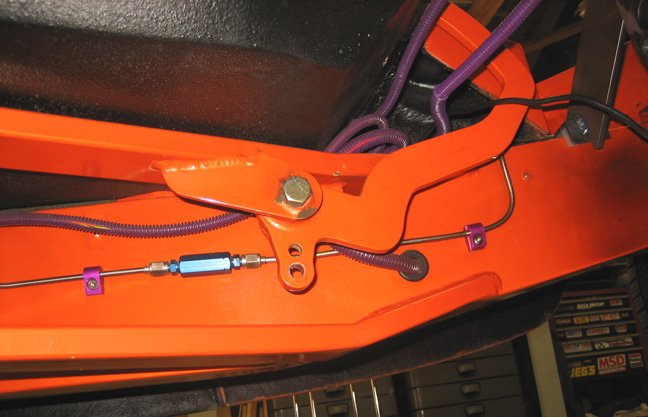
To give you an idea of what I was talking about earlier I'm going to
show you a shot that I took before I took everything apart. Here you can
see my brake pedal still attached to my X member. The style of bracket
here is different than the ones they gave me but the principal is still
the same. If I moved the hinge point back the 2.500" that I need, it
would put this new point right to the rear (left) of that bracket that you see
below. Picture if you can a cut going straight across this area and then
welding in a new piece that would go from this new cut to the larger
part of the chassis. This new piece would be very short (about 2") but
then add in the length of the X member (2.00") which would make it about
4" to 4.5".
Now remember the style of the new brackets as the would have to be
attached to this 4.5" long area which is just not long enough
because the new pedal assembly needs to be inside of those brackets. Now I
would gain my needed width as I moved the down the X member (to the
left) but by the time I had my target size of 5.5", the pedals would be
to far back. And these cuts are going to be hard to get at because of
all the things in the way like my transmission, bottom X member, wiring,
etc.
|
|
 |
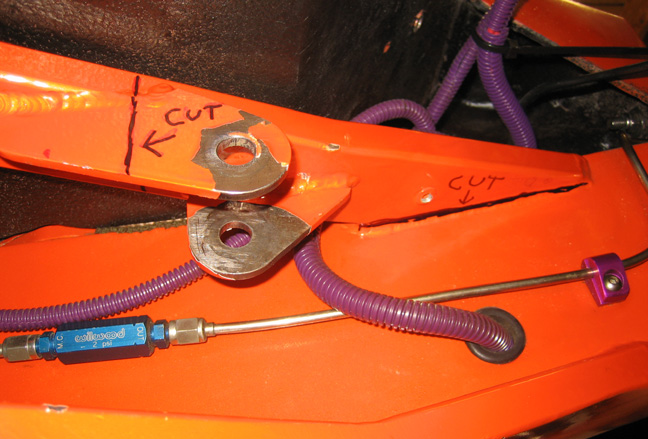
After measuring and thinking about it for awhile, this is
what I think needs to be cut out. Notice that the cut point that that
I've drawn on my existing bracket is nowhere near what I was talking
about above. Well the way I see it is that I can't use the new brackets
with my setup if I want to mount the pedals 2.5" farther to the rear.
That means I need to come up with another way of doing this.
|
|
 |
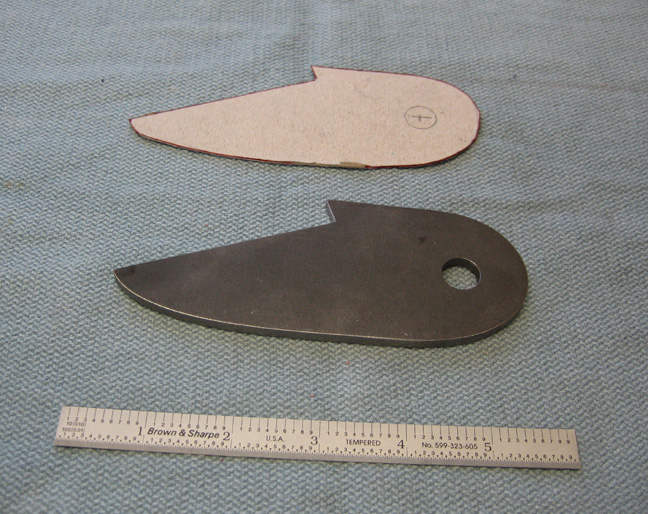
By taking a page from what my existing bracket looks like, I made one
that is similar that I hope will work. I made a few cardboard ones and
this is the shape that I liked the best. It's made out of 3/16" mild
steel like my old bracket was and will be welded like it too. What I
mean is if you look at the one above, you can see that it sticks out
from the chassis a small amount. This small amount will be just enough
to accommodate 5.5" into once it's in place. At least that's the plan
anyways. I won't be using a second bracket (like you see above) because
I'll be using that bung that I showed you earlier which gets welded to
the chassis. And yes this bracket is larger than my old one which should
give me some added welding area to make this stronger because I have two
pedals now. It's funny because when you're a machinist it seems like you
over engineer everything that you make for some reason, unlike a person
that can calculate stress analysis and make things smaller but work
correctly. As long as it doesn't break I'll be happy.
|
|
 |
|
Now that I have a plan I'm ready to do some cutting. The piece that
needs to be cut out is up against the body which is going to make it
very hard to work with so I had an idea to help me with that. What I
want to do is lift the body just a small amount so I can put a 2 X 4
between it and the chassis to give me enough room to use my saw. I
removed both aluminum trim moldings and folded back the carpet to access
the four mounting bolts on each side of the body. But before I took
anything loose, I wanted to make sure I could get things lined up again
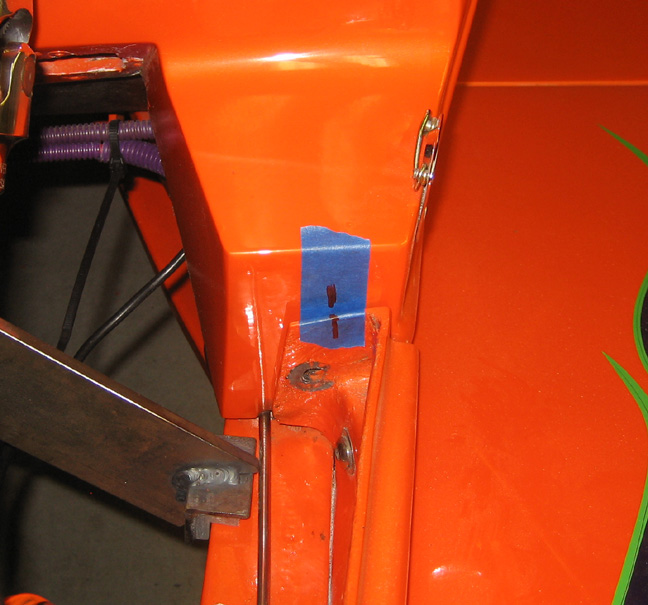
once I was finished. What you see below are two pieces of tape with a
line between them for reference. One piece is on the body and the other
is folded around my inner fender (this was done of both sides of the car). I also
did something similar to a couple more spots under the car near the back
and once I had lines on all of them, it was time to remove the eight
body bolts.
Once I had them removed I also had a few more things that needed to come
out. If you look close you can see a hole where a bolt was under the
tape which holds the body to the inner fender. I also removed four bolts
that hold the running board to the body on each side along with two
bolts holding the steering column in place.
I couldn't think of anymore items to take loose so I grabbed my floor jack and a 4
X 4 piece of wood and started to lift the body. After the wood made
contact with the floor of the car, I put a small amount of pressure on
the jack handle and was rewarded with a 'creaking' sound. Hmmmm....what
could that be? And why isn't the body coming loose from the chassis?
Standing there scratching my head I thought to myself...I must have
missed something...but what... and then it hit me, "are there bolts in
the trunk that I forgot about"? Well there's one way to find out so I
went into the house and started looking through some old pictures of the
car when I was building it. After a few minutes guess what I found?
|
|
 |
|
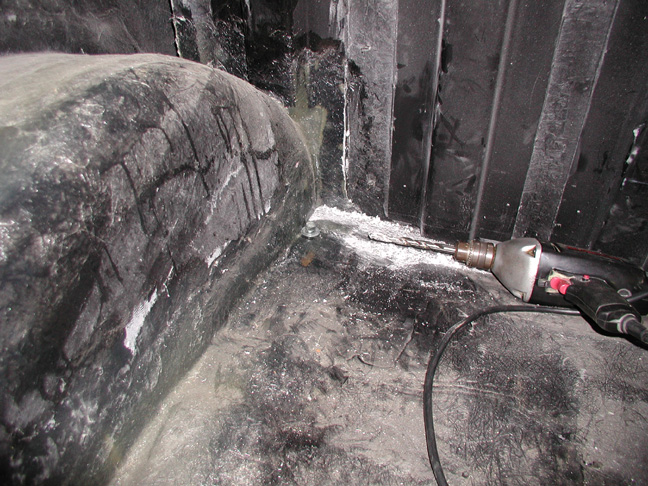
That's right - you guessed it, two more bolts were in the trunk. If you
look close my drill is pointing to one of them and it couldn't be in a
worse place. To gain access to these bolts I would have to take my trunk
apart which means removing the gas tank (drain it first), side panels,
carpet and then unbolt the trunk floor. All of those things would be
easy but removing the trunk floor is another story.
My memory was becoming very clear now as I could visualize every
piece that would need to come loose or come out to be able to remove
those last two bolts. What I'm talking about here is the car went together
like a big puzzle, you have to put this piece in before that piece and
so on and so forth. Well the piece that would need to come out before
the trunk floor could be pulled out was the down bars to my roll cage.
And to take those out I'd have to remove most of the interior and then
the entire cage first. You talk about taking the wind out of your
sails....this was it. After a few minutes of entertaining that thought, I
called it a night and went in the house. The next day
I decided to scrap the idea of getting at those two last bolts because I
wasn't going to take the cage out. It was hard enough getting it back in
there without scratching anything the first time so it looks like I'm
going to have to deal with having the body fastened to the chassis
after all. Oh and it took me the rest of the evening to put the car back
together like it was the night before. Looks like I wasted a few hours
of work.
|
|
 |
|
The following day was a different story because it was time to do some
cutting. I removed the brake master cylinder along with some brake lines
as they were in the way. Once I'm finished with all the cutting and
welding I'll need to move the master cylinder over a small amount and
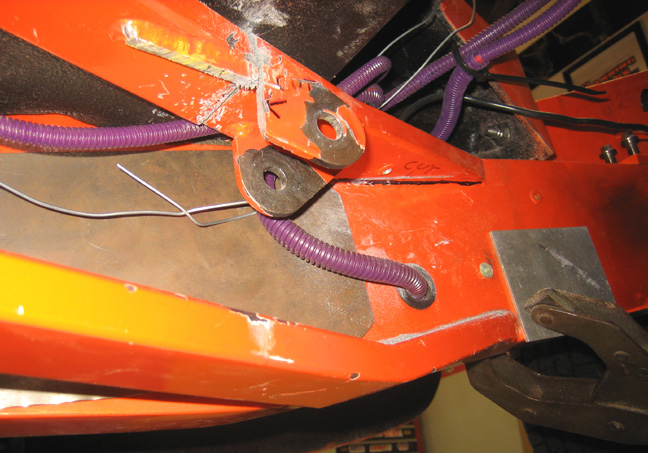
remake some brake lines. But I'll go into that when the time comes. After working for about four hours with my sawz-all, this is
how far I've gotten. As you can see I tied my wires back so I wouldn't
hit them which worked pretty good. The first cut I made was that small
piece (to the left of the hole) which needed to be removed so I could
get my saw blade at a better angle for the next cut. The second cut was
through the 2.00" section of my X member up against the body. This cut
was challenging because I didn't want the saw blade to dig into the body
but at the same time I needed it to cut through the top portion of the
2" X 3/4" box tubing. If I had the saw to far away from the body, it
would catch on the inside of the tubing and shake my teeth out. I did
this many times till I found that fine line on how to hold the saw just
right. I did run into the floor of the body a little but it was no big
deal.
The third cut was the longest and up against the frame rail. The
clamp with the piece of aluminum did two things, first it helped protect
the paint a little and it also helped with leverage. By placing the saw
on the clamp and then rocking it against the cut area, this made life
much easier for me. Before I put that clamp on there my arms would get
tired in just a few minutes but with the clamp I was able to keep the
saw cutting much longer. If you look close you can see I didn't cut that
last one very straight because it was really hard to get my saw in
there.
|
|
 |
|
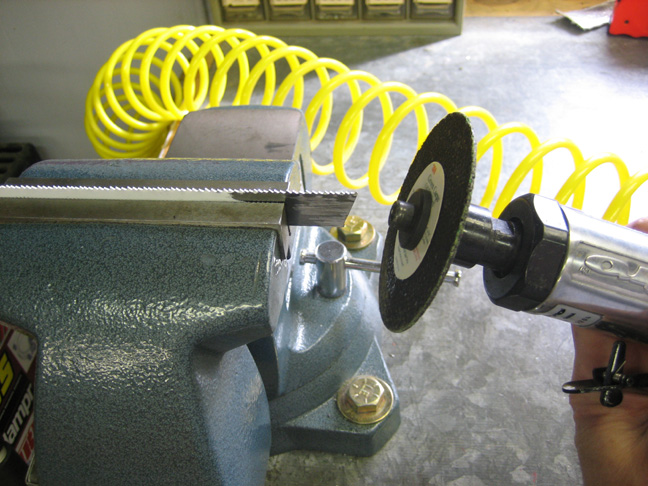
As my saw blades started to wear out, I cut about an
inch or so off the ends which was like putting on a new blade. If you
look close you can see the fresh paint not far from the end so by
cutting this worn area away I had a fresh teeth to work with and was
good to go again.
|
|
|
|
1
2
3
4
5
6
7
8
9
10
11
12
13
14
15
16
17
18
19
20
21
22
23
24
25
26
27
28
|
|
29
30
31
32
33
34
35
36
37
38
39
40
41
42
43
44
45
46
47
48
49
50
51
52
53 |
|
54
55
56
57
58
59
60
61
62
63 |