|
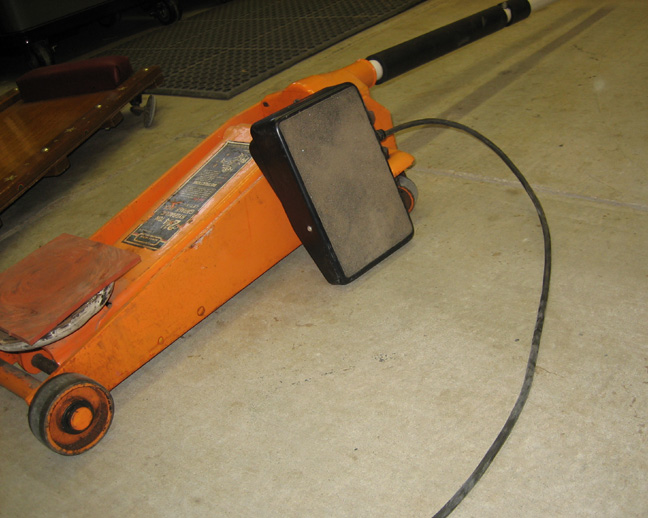
If you're new to TIG (Tungsten Inert Gas) welding I'll give you the
basic's, you use both hands and one foot. One hand is for your torch,
the other is to feed in filler rod and your foot is to control how much
heat you get. The foot pedal is just a rheostat, the more you push it
down, the more heat you get. Now normally you'd be sitting while you
weld which makes it much easier but when your in hard to reach area
(like under a car) you have to get creative. By placing my foot pedal
against my floor jack I'm able to lay down and use it without the pedal
moving. I've been in many different positions using my foot pedal
without using my foot before. For example, I've used my hip, elbow, side
of my head, knee and I even had someone else push it down for me once.
I'd let them know to give it more heat or to back off a little while I'm
welding but that's only in rare case's because I'm by myself most of the
time. Whatever it takes to get the job done you know!
|
|
 |
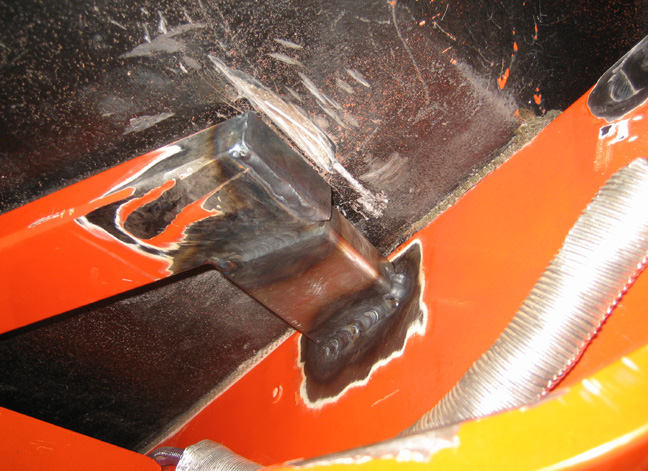
It's not pretty but here's the piece welded in place
along with the end cap too. If you're wondering if I welded the top side
of this bracket the answer is no. I had no way of getting to it but that
was the plan all along. I figure with weld on three out of the four
sides it should be plenty strong.
|
|
 |
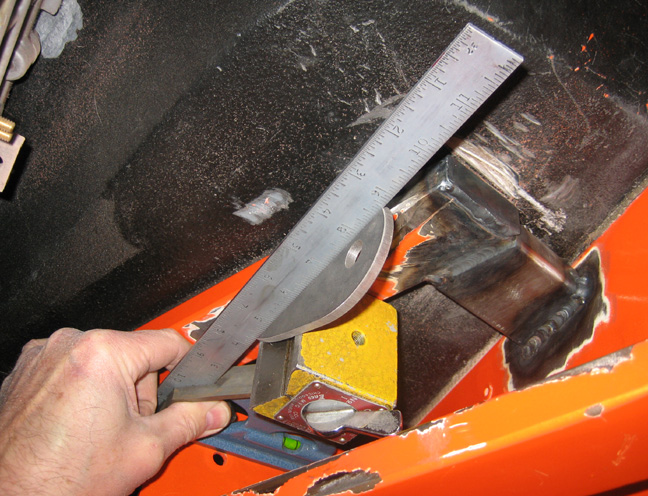
The next item to be welded is the bracket that will hold the 1/2" bolt
for my pedals. I checked the original one and it was square to the plate
the master cylinder was mounted on so I did the same for the new one. My
mag base came in handy again to hold the bracket square while I lined it
up and then tacked it in place.
|
|
 |
|
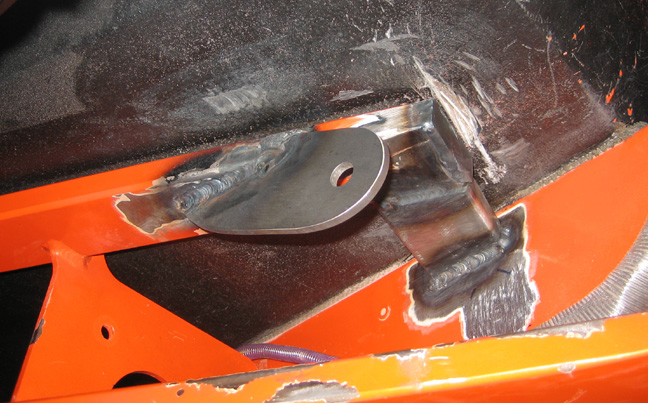
After tack welding two spots on either side, I rechecked it with my
square again to make sure it was still lined up. Everything was good to
go so I nailed it in place on both sides. Once things cooled down I
wanted to see how the pedals fit before I welded the bung in place. The
bung will go right under the new cross piece where the paint has been
removed.
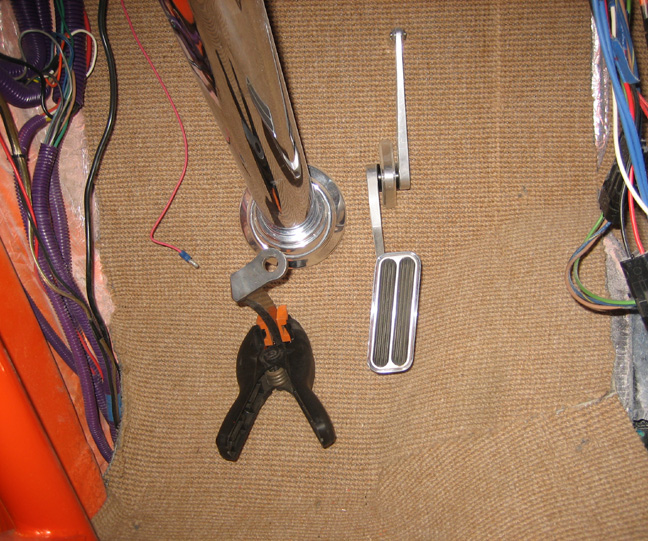
Once I had the brake pedal in place I noticed something on the inside
of the car that didn't look right. Turns out the brake pedal was right
about where my old one was which means there wouldn't be enough room for
the clutch pedal. Sounds like I've got some more work to do. And to add
to the mater I also found out that the clutch pedal was going to hit the
frame rail which means....even more work (one of these days I'm gonna
catch a break). Looks like it's time to get the pedals sorted out before
I go any farther (damn...it figures)!!
|
|
 |
|
Here is where the brake pedal ended up being, which is right where my
other one was. This won't do because there isn't enough room to the left
of it for another pedal so I've got some decisions to make. The first
thing that came to mind is if the new brake pedal was moved over to the
right a little, how much is enough? And if I do move it over I won't
have any room for my throttle pedal.
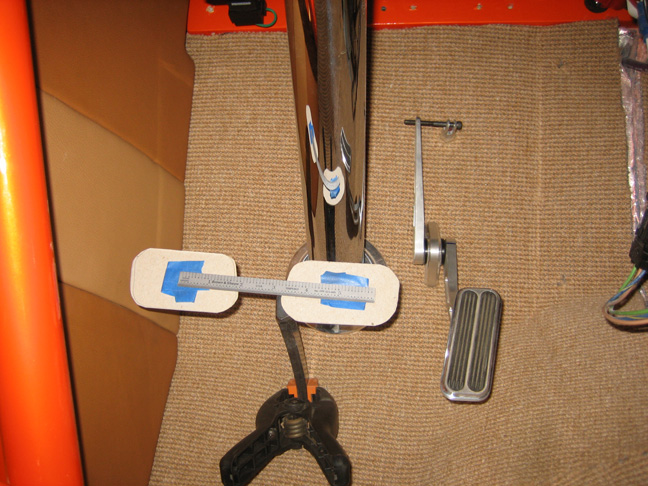
After thinking about it for awhile, I decided to move my gas pedal
over to see how that looked first. The nice thing about this Lokar pedal
is that you can reverse it without to much hassle. By removing it from
the firewall first, there is a set screw on the back which enables you
to remove the pedal. After it was out of the way I flipped the unit over
backwards and then put the pedal back on. The shaft has splines on it
that allows you to adjust it just about anywhere you'd like and after a
few minutes I had 1 1/4" difference. Notice that line in the carpet for
reference here.
|
|
 |
|
Now look at the reference line and you can see the pedal is a little
closer to it, which is the good news. The bad news is that I'll have to
figure out another way of activating my throttle linkage because it
doesn't line up anymore. Notice the small 10-32 bolt that I'm using to
get an idea of what I can come up with in the future. Heck you never
know I might just use something like this if it works. Or I could drill
another set of holes in the firewall to use the throttle in this
location but If I did drill more holes, what would I do about the other
two because they would be ugly? I'm not sure just yet but it's another
thing for me to think about. I made some pedal pads out of cardboard
and taped them in place. I wanted to see how much room I was dealing
with now that the bracket was welded in place and with the brake pedal
installed. The size of the cardboard pads are the same as my original
pad was, which I'm using as a starting point. The distance between the
two pads are 5.300" which is exactly how the pedals came.
As you can see there's not much room with the pedals like this and
those pads are a little large too. I would like them to the right a
little more which would give me more room. And for the pads to be
smaller as well.
|
|
 |
|
1
2
3
4
5
6
7
8
9
10
11
12
13
14
15
16
17
18
19
20
21
22
23
24
25
26
27
28
|
|
29
30
31
32
33
34
35
36
37
38
39
40
41
42
43
44
45
46
47
48
49
50
51
52
53 |
|
54
55
56
57
58
59
60
61
62
63 |