|
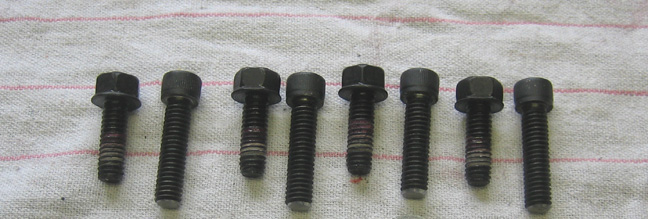
One thing I noticed was that the body of the new release bearing is a
little thicker than the bearing housing that was on the trans. I found
this out when I was ready to bolt the bearing on using the original
bolts but saw there were only two or three threads that were going to be
engaged. I didn't like that so I found some socket head cap screws that
I had and cut them so there would be a few more threads to hold things
together. I don't know what other people do here but this seems like it
would be a big problem if you used the shorter fasteners because they
could strip the threads in the transmission case. And that case is made
out of aluminum which is easy to strip threads in. Again, just a little
insurance here.
|
|
 |
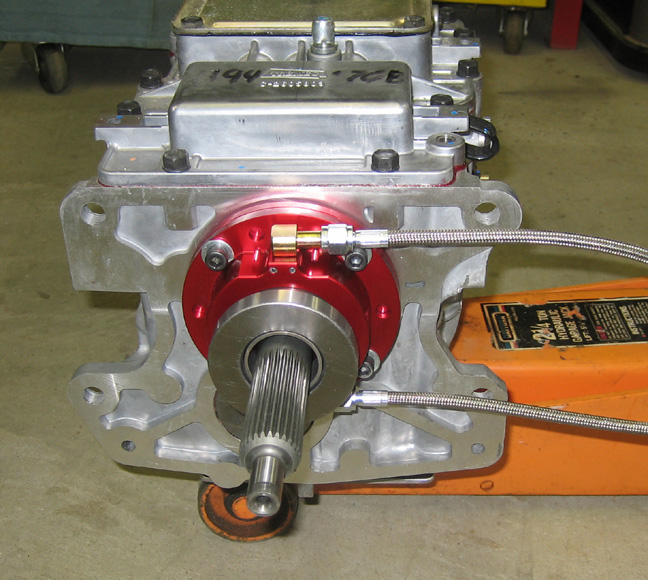
There you have it, one hydraulic release bearing attached
and ready to go. If this setup works half as good as it looks, I'll be a
happy guy. Now it's time to see if I made enough clearance for the trans
to fit or not.
|
|
 |
|
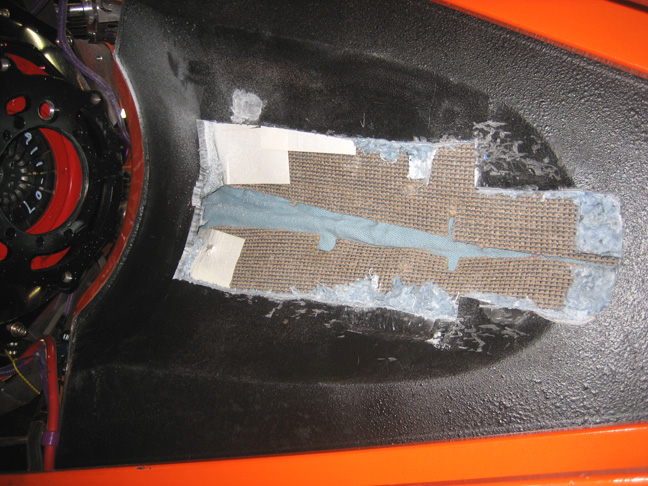
Here is a shot of the trans tunnel and floor that had to be cut away.
Yeah It's a lot bigger than I expected that's for sure but it had to be
this big to make the trans fit. At the front (left side) it's 8" wide
and 15" long. The rear is smaller which is for the shifter but had to be
a little bigger than the picture that you saw earlier where I was laying
out lines with blue tape. The Tremec transmission is shaped like a
brick and doesn't taper down like an automatic does. And with my trans
tunnel also being tapered, this is why I had to cut so much of it out.
The good news is that it fits now but on the other hand this presents
another issue, the cutout is much larger than my console is now. That means I'll have to get creative when the time comes
and another problem to solve I guess.
|
|
 |
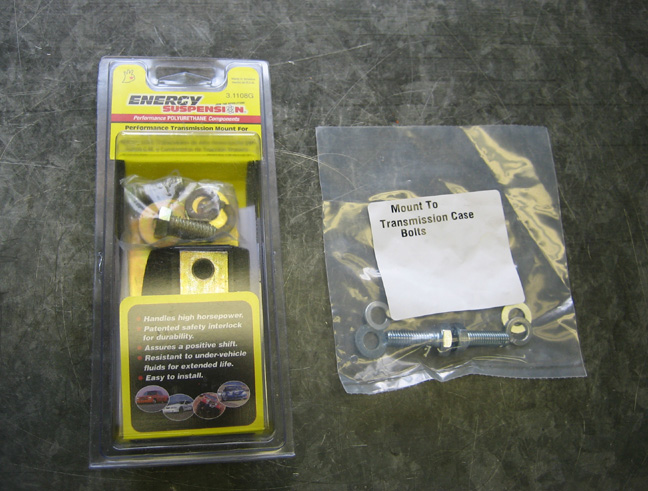
Here is another nice item that Hurst gives you in the kit, a
transmission mount made by Energy Suspension. I really like the products
that Energy Suspension has and this happens to be the exact same one
that I used for my automatic. Hurst also provides you with hardware to
fasten everything together. One package I won't be using are the cross member
bolts because they're to
short for what I'm wanting to do.
|
|
 |
|
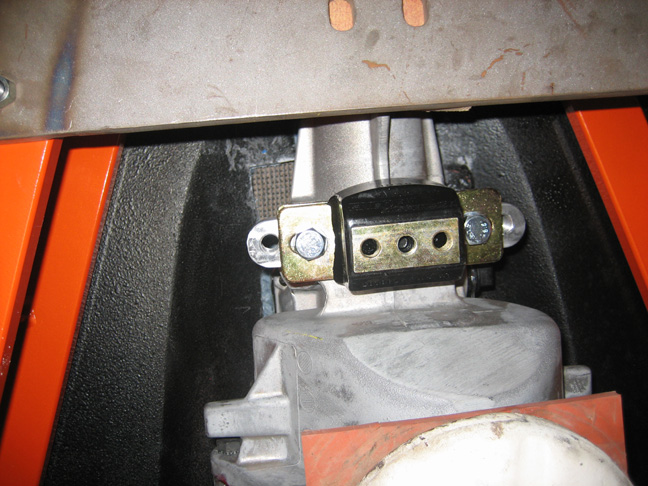
Here you can see the new trans mount bolted to the transmission. Notice
the curved area of the mount. The curve needs to be pointed towards the
rear of the car. I believe it's because of the inner structure of the
mount and how torque gets handled and displaced through it. Just
guessing here because they don't tell you why you mount it this way, they
just say it needs to be. You can also see my original cross member being
used temporarily to hold the transmission up along with my floor jack
for insurance. It's a weird feeling looking straight up at the
transmission knowing that if it fell that you'd be crushed pretty quick
so this is why I've got my jack under there. It just gives me piece of
mind.
|
|
 |
Now that the trans mount is installed, I need to make sure the engine
and transmission are at the proper angle so everything works right. What
I did before I started this project was to find out what angle the
engine was sitting at and then wrote it down. Now that the trans is installed
the angle needs to be the same as before so I'm using my angle finder again to
verify it. The angle that I'm looking for is four and a half to five degrees and after a
few pumps with the floor jack, I had it.
|
|
 |
|
1
2
3
4
5
6
7
8
9
10
11
12
13
14
15
16
17
18
19
20
21
22
23
24
25
26
27
28
|
|
29
30
31
32
33
34
35
36
37
38
39
40
41
42
43
44
45
46
47
48
49
50
51
52
53 |
|
54
55
56
57
58
59
60
61
62
63 |