|
I took these pictures a couple of weeks ago (no I didn't remove the
flywheel again) to show you what it takes to install a hydraulic release
bearing. The hydraulic release bearing (or throw-out bearing) that came
with the kit is made by RAM Clutches. I had a choice when I was ordering
all my parts and one being if I wanted to use a mechanical linkage or a
hydraulic unit for my clutch. With the limited amount of space in and
around the chassis and engine, I knew that using mechanical linkage
would be to crowded and probably wouldn't fit because of my headers
being in the way along with some other things. I've never used a bearing
like this before but after reading about them and how compact they are,
I wanted to give it a try. You have to do some measuring to make sure
that you have the correct distance between the release bearing and the
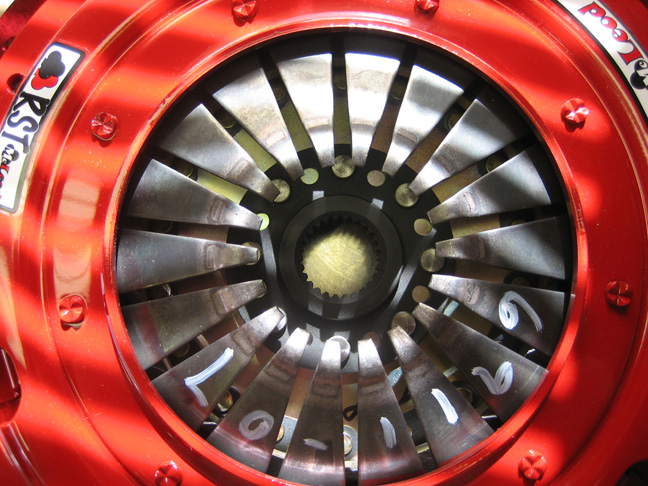
fingers on the clutch and with the RAM bearing that requires three
dimensions. The instructions said to place a metal block under the
flywheel to simulate it being against the crankshaft. With the clutch
bolted to the flywheel you need to measure from top of the clutch
fingers down to that block and take your reading.
|
|
|
|
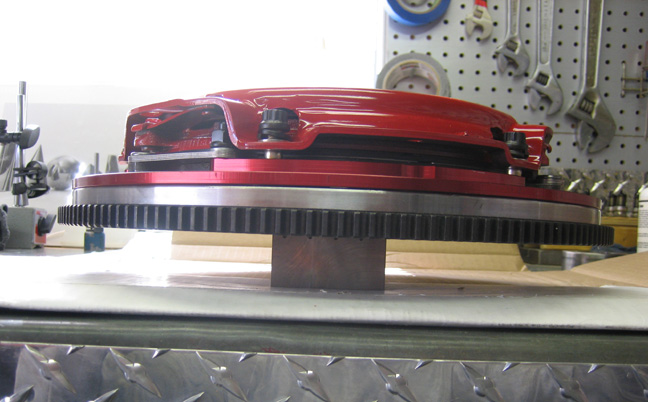
Here you can see the metal block that is under the flywheel to get a
better idea of what I'm talking about. I used a square piece of metal
that spanned across the fingers and a 6" dial caliper to take this
measurement. Call this dimension 'C'.
|
|
 |
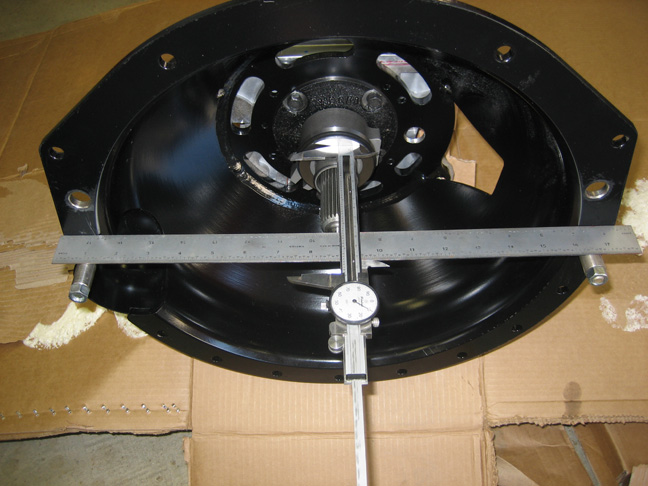
Next you need to bolt the trans to the
bellhousing/scatter shield and measure from the engine block mounting
surface to the front of the release bearing. If you look close you can
see the RAM bearing installed on the transmission. I used a rigid 18"
scale along with some bolts with sleeves over them to aid in the
measurement. And don't forget to subtract the scale width from your
reading which becomes dimension 'B'.
|
|
 |
|
The third and last measurement you need to find is from the back of the
engine block to the front flange of the crankshaft (where the flywheel
would bolt up against). Call this dimension 'A'. Now you are to
add 'A' + 'C' together and then subtract this sum from 'B'. The number
that you get is the clearance between the release bearing and fingers on
the clutch. What you want is a gap of .150 to .200 and if it's greater
than your target dimension you'll need to add some shims (they were
provided). RAM goes on to say a few other things about the correct way
to install this along with the do's and don'ts. Somewhere along the way
It got me thinking about how it wasn't all that great of a product after
comparing it to some of the others out there.
I did a little reading on different hydraulic release bearings and
almost everyone else only takes only two dimensions instead of three.
Well that seemed more like it so after talking with a guy from McLeod
about their bearings, I wanted something different. I also found out
that I needed more parts for the one I had which would be a bleeder line
and some more fittings. The other bearing was looking pretty good by now
so I called Hurst to ask them if I could send the RAM one back and get
credit for it. They said 'yes' which was nice to hear.
I went back into the garage and took the one and only dimension that
McLeod needed and wrote it down. Then I called them back and after they
asked me which transmission I was using I ordered a new one. Oh...I also
shipped the RAM one back the next day.
Stay with me because as soon as the new release bearing gets here it
won't be long before I have it installed....well... that's the plan
anyways because you know how that goes sometimes!!
|
|
 |
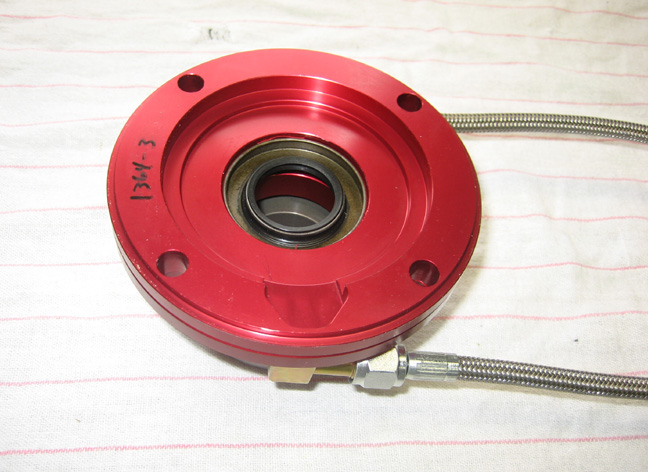
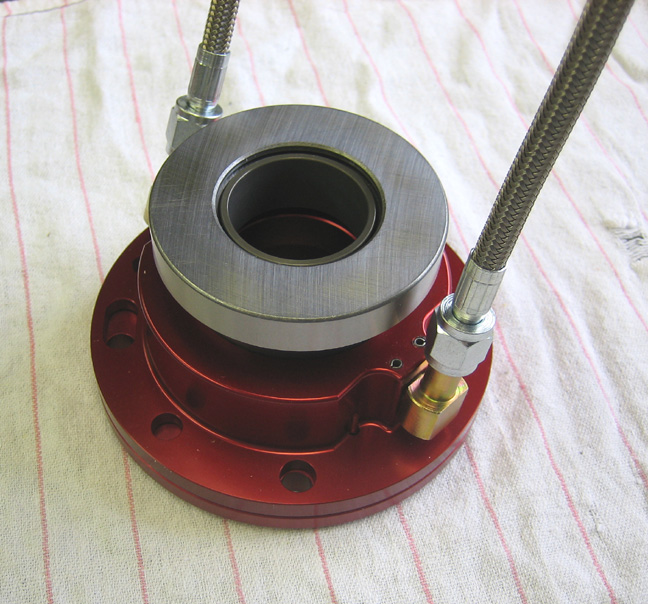
Feb. 23rd.The McLeod hydraulic release bearing
arrived only three days after ordering it and I'll have to say it's
pretty nice. Starting with the bearing it has two -3 AN lines coming
from it with one being the feed and the other the bleed. The bleeder
line will need to be on top when it's installed because the air trapped
inside will rise to the top,
making it easier to bleed.
The metal ring is used as an adapter if you're using a different
bellhousing and in my case I won't need it. Last we have some O-rings
that I'm not sure where they go yet but they seem to look 'happy'.
|
|
 |
|
The back side of the release bearing has a pocket where a bearing will
sit and the four holes are used to fasten it to the transmission which
I'll show you on the next page.
|
|
 |
The two lines can swivel 180 degrees which is pretty cool and will make
installation easier because both lines need to be routed through the
clutch fork hole on the side of the scatter shield. I'll have to say,
the quality of this piece is outstanding which seems to be a thing of
the past with manufactures these days. But after seeing some of McLeod's
products it seems like they're one of the few companies that still take
pride in what the make.
|
|
 |
|
1
2
3
4
5
6
7
8
9
10
11
12
13
14
15
16
17
18
19
20
21
22
23
24
25
26
27
28
|
|
29
30
31
32
33
34
35
36
37
38
39
40
41
42
43
44
45
46
47
48
49
50
51
52
53 |
|
54
55
56
57
58
59
60
61
62
63 |