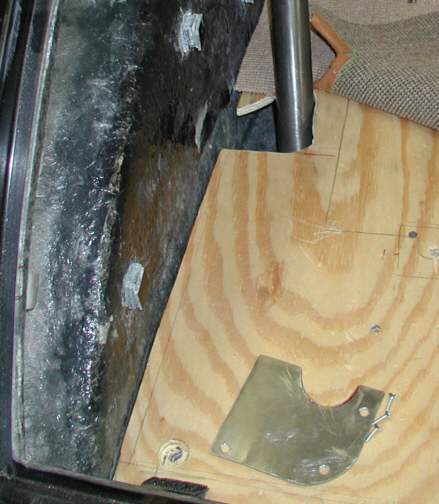
The carpet is ready to be installed in
the interior and trunk so I decided to start on the trunk first. After
laying the carpet on the floor of the trunk, I had a problem with it
laying flat around the down-bars because of the large hole that surrounded
them. I needed something that would go around the tubing to cover that
hole so I made a couple of aluminum plates and three flat head
screws.
|
|
|
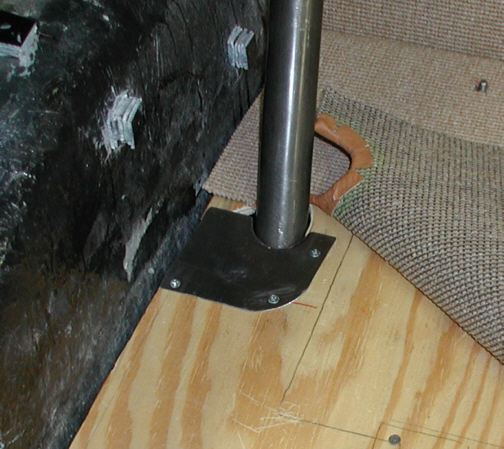
I counter-sunk the screw-heads flush
with the top of the plates so you wouldn't be able to see them once the
carpet was in place. The thickness of the plates are .040 so you
shouldn't be able to tell there's anything under there after the carpet
is laying on them. I had to do this to both sides.
|
|
|
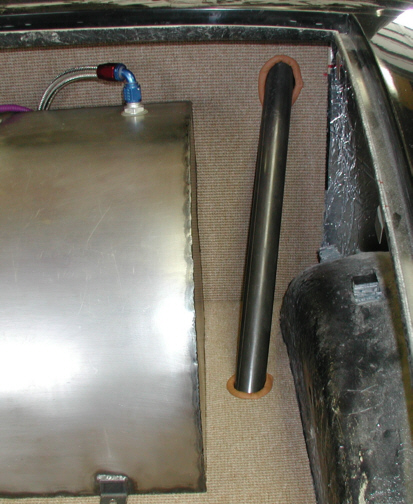
Here you can see how it looks once the
carpet is installed. And yes, there is a plate under the carpet. I sprayed
a little glue on the back of the rear piece of carpet to keep it in
place but stayed away from the edges by six inches. The reason I didn't
spray right up to the edges is because I needed to be able to get at the
area around the down-bars where they join together (couplers). Once I
had the down-bars in place, I could then fold over the ends of the
carpet and they will be held in place by the other two panels. Putting
in the fuel tank was harder than I expected but it went in.
|
|
|
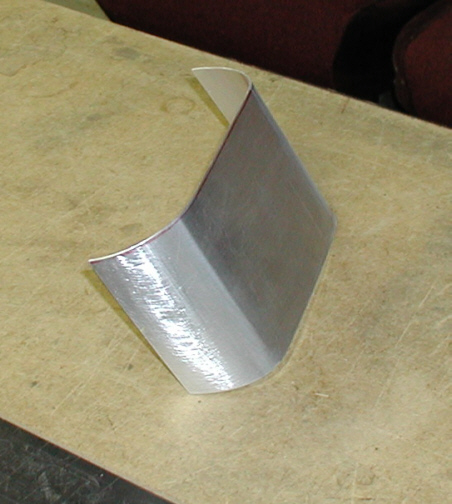
The next area of the trunk that I
wanted to work on was around the latch mechanism. Remember that I'm
using a keyless entry which means I'm using a solenoid to pull the latch
with a cable. That cable shows and I didn't like the looks of it along
with the clamp that adjusts the cables length so I wanted to cover all
that up. I started with some cardboard to see what I might look like but
didn't like the square edges that it had. I thought that because of all
the curves that were inside the trunk already that the square edges
looked out of place so I made a piece with a radius. This is .032"
aluminum which forms very easy, almost too easy really. I put the same
piece of roll bar tubing in my vise that was used for my center console
to form the corners of my new piece. After trimming and sanding here and
there, this is what I'm gonna use.
|
|
|
|
1 2
3 4
5 6
7 8
9 10
11 12
13 14 15
16 17
18 19
20 21 22 23
24 25
26 27
28 |
|
29
30
31 32
33 34
35 36
37 38 39 40
41 42
43 44
45 46
47 48
49 50
51 52 53 |
|
54
55
56 57
58 59
60 61
62 63
64 65
66 67
68 |