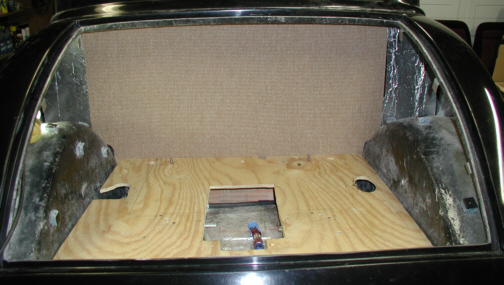
Here you can see the wood has
been covered in carpet and installed. What I have to do now is cover the floor and
then make some cut-outs for the down-bars to pass through and for the
sump of the gas tank. Making the
cut-outs for the down-bars is one area that has to look right which
means taking my time or have it look bad. Notice the clearance holes in
the trunk floor for the down-bars to pass through. I cut the left one
first and then changed how I cut the other one. I don't know what I was
thinking when I did the first one but should have made them both like
the second one. I might have to add a small piece to the left one so the
carpet will lay flat. Once the other pieces of upholstery are in place,
the area on both sides of the carpet will be hidden.
|
|

|
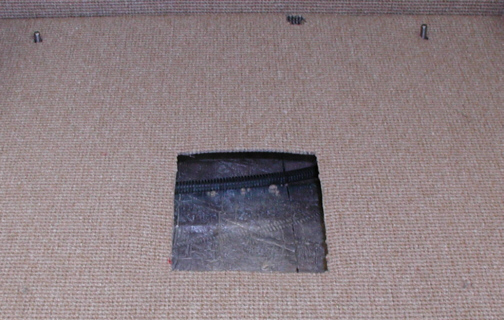
This is the floor and you can see the
cut-out for the sump on the fuel tank. I also made cut-outs for the two
studs that the fuel tank mounts too and also where the breather line
that goes to the fuel tank. I tucked the carpet around the floor of the
trunk which makes for a nice clean look. Later I'll fasten the carpet to
the floor up to the midway point only because I'll need to be able to
access the connection for the fuel line so the other end will not get
fastened. Once the fuel line is connected, I can put in the small piece
of wood that screws in which covers the area around the fuel line and
then lay the carpet over the remaining part of the floor.
|
|

|
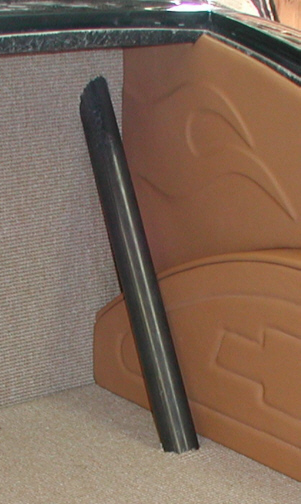
This shot shows how the down-bar looks
with the carpet trimmed around them. This is also a tease shot to show
you how it will look once the trunk panels are in place. I'll show a
better shot of the way it looks once I have the fuel tank installed
later on. Now let's start working on the rest of the cage.
|
|

|
| 11/28/04
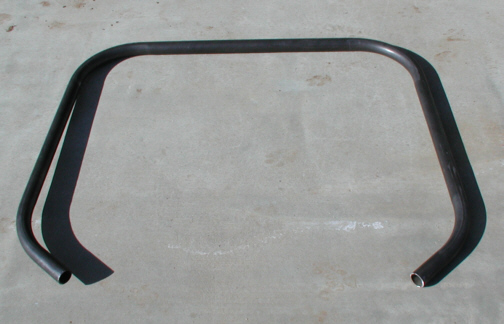
What you see below is my roof hoop that will tie
in with the main hoop. As the name implies, it will follow the contour of the roof. That means it will run along both doors and around the
front of the windshield. Notice how the shadow is different on the left
side than it is on the right side. This wasn't because of how I took the
picture or the angle that I took it at, it's because of how it was bent.
Somehow it was bent with the one side 1 1/8" different than the
other. I guess it would be too much to ask to have it flat now wouldn't
it!! Come to think of it, the main hoop was the same way so at least the
guy was consistent. I have no way of bending it flat so I'll have to
work with it. Getting this in the car is really a two person job so I'll
have to be very careful when I start fitting it because you can't just
slide it through the door. You have to put one end in first while the
other end is against the body behind the door. Then you swing it though
the door slowly turning it around you as you sit in the seat. While we
were bending this piece, one of us sat in the car while the other held
it and hooked through the door. Once you had it inside the car, the
other guy would go sit in the other seat and both of us would hold it
testing it for fit. So how am I going to hold this while I measure and
fit it?
|
|

|
|
1 2
3 4
5 6
7 8
9 10
11 12
13 14 15
16 17
18 19
20 21 22 23
24 25
26 27
28 |
|
29
30
31 32
33 34
35 36
37 38 39 40
41 42
43 44
45 46
47 48
49 50
51 52 53 |
|
54
55
56 57
58 59
60 61
62 63
64 65
66 67
68 |