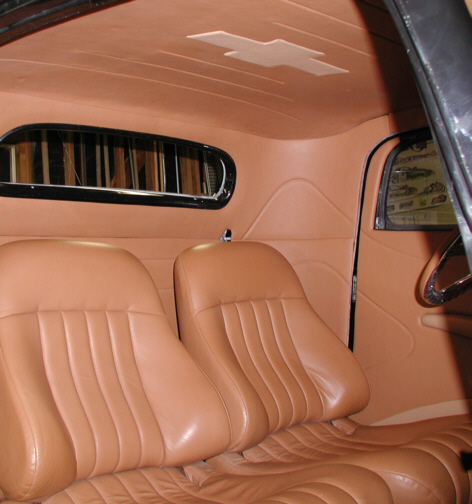
This panel was made the same way as
the previous panel was. I ended up behind the seats to work on the sides
again and hope I don't have to do that anymore. You can see the lines
from the door panel that continue into the rear area.
|
|
|
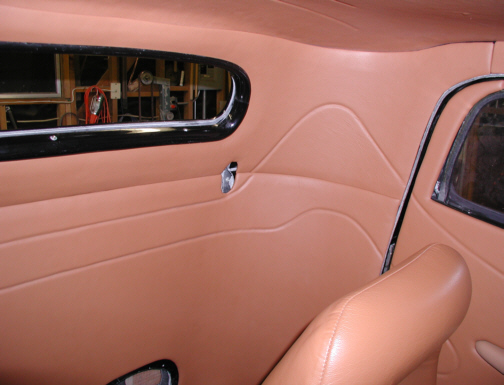
This gives you a better idea of how
the lines look. I wanted to cross the lines that run into the center at
the middle of the panel but there was a wire clip right where I didn't
want it so I ended up just making them straight through to the other
side. I might make something to go into the middle to break it up some
but I'm not sure what yet and if I don't, it's behind the seats where
it's not to noticeable. I'm happy with how it came out and now I'm ready
to install the roll cage again and see how that fits as it pass's
through the rear panels. At this point, all the panels are finished but
I'm still waiting on the wind-lace to arrive from Teas Design. Once I
receive the wind-lace, I can install that and then all the edges around
the doors will look much better. Up next I'm going to work on a center console
so it will hide some of the shifter and I'm going to install the power
window switches in it too. If I cover the center console with material,
I'll have to order more because I ran out. I might end up making it out
of fiberglass and painting it but I haven't decided yet.
|
|
|
| 12/28/04
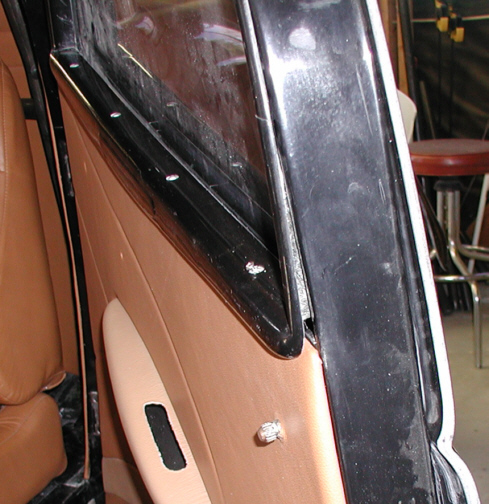
What I'm doing is fitting the window trim that
goes on the inside of the car. Notice the large gap at the front of the
door between the trim and door panel. I didn't take in to account that
the window trim would be against the door panel when I was covering the
panel awhile ago. I should have feathered the edges of the foam near the
top so this would have been a closer fit when the trim was screwed on
but I didn't think that far ahead (rookie mistake here). I have two
options here, either remove the material from the door panel and sand
the foam down some or remove some material from the window trim. I chose
the second way being that the panel was finished and all.
|
|
|
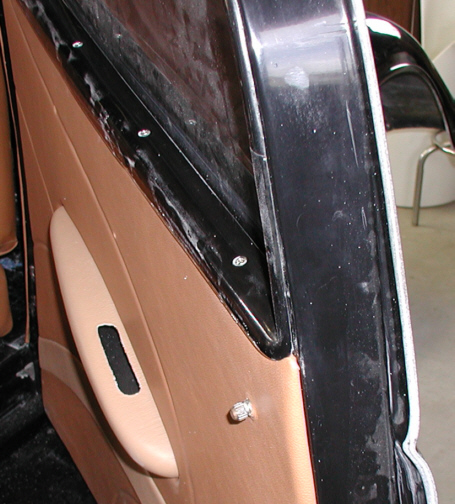
I used my Dremel and removed about
1/4" to 5/16" of material from the trim in the areas that came
in contact with the door panel. The window trim is made out of
fiberglass so it was easy to do but it made the trim very thin in some
places. It was so thin in one place that it cracked while I was
installing the screws that hold it in. When I was pushing on the trim at
the top to line-up the screw holes, I ended up with a 1 1//2" crack
that will have to be fixed when they get painted later on. These trim
pieces will be the same color as the outside of the car when everything
get painted. The good news is they fit with no gaps now.
|
|
|
|
1 2
3 4
5 6
7 8
9 10
11 12
13 14 15
16 17
18 19
20 21 22 23
24 25
26 27
28 |
|
29
30
31 32
33 34
35 36
37 38 39 40
41 42
43 44
45 46
47 48
49 50
51 52 53 |
|
54
55
56 57
58 59
60 61
62 63
64 65
66 67
68 |