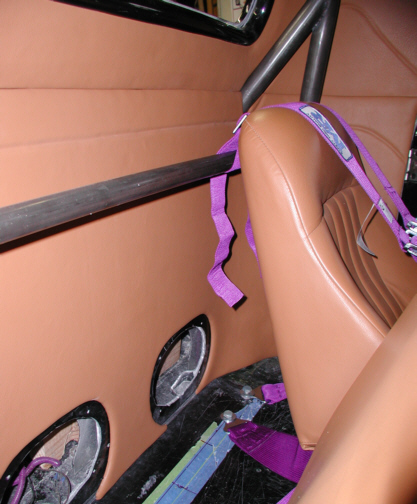
To hold the shoulder harness in place,
they wrap around the shoulder bar that goes between the main hoop. To
wrap them around the bar you have to take the hardware off the strap by
unweaving it, wrap it around the bar and then slide it back through
the hardware again. It doesn't take long once you see how it's suppose
to be done. You have to end up with at least one inch of slack in
the loop that gets wrapped around the bar. I could have gotten the shoulder straps
that go from
two-into-one and then it would fasten to the shoulder bar with a bolt. The
bolt would then go through a piece that gets welded on the bar but I thought
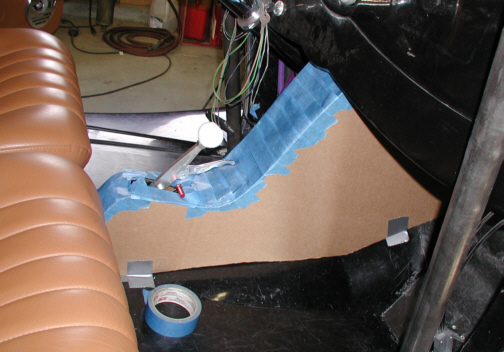
what I bought would be a cleaner setup for what I'm doing. Notice the green tape
on the floor next to the blue tape. Redneck Street Rods put that piece down there with the
words "Seat belts" on it because they put a 1/4" X 2"
X 36" piece of steel inside the body to fasten hardware too. I
drilled all the way through the floor including the steel and then used
bolts, nuts and washers to hold the belts in place. There was no cross
member to drill through like I did the submarine belt so this should do
fine as it would take a LOT of force to pull those bolts through the
floor. I only installed the lap belts on the passenger side because
that's all I'll have while driving on the street. When it's time to play
at the track, I'll wrap the belts around the shoulder bar and bolt the
crotch strap through the floor and I'm ready to go.
|
|
|
| 1/08/05
The interior is almost finished at this point and
one of the last things to do is cover the shifter area. I figured that a
console would look nice so I'm going to attempt building one. What I
wanted to do was cover the shifter and have a place to put some
switches. At first I was going to put the switches in the dash but after
sketching out a drawing, I changed my mind. I cut out some paper and
then transferred that to some cardboard and did some cutting. I used
some tape to cover the center area to give me a better idea of what
things might look like. I plan on using the same thickness of wood for
the sides of the console that I used on the panels in the trunk
(1/8") because they seem to have plenty of strength.
|
|
|
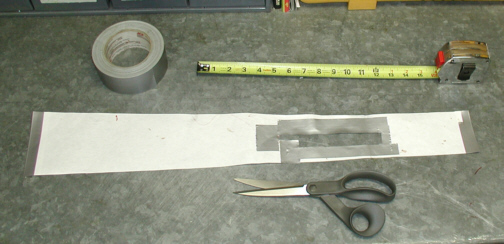
After doing some measuring, I made a
template out of paper of the center area which was 28 1/2" long.
I'm going to need to make this piece out of something other than wood
because of the radical shape that I came up with. I think I'll use sheet
metal but will have to choose between steel and aluminum. The area that
is cutout with duct-tape around it is where the shifter will be.
|
|
|
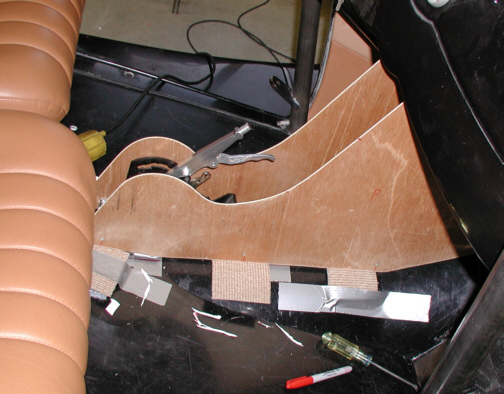
After I was happy with the design, I transferred
the cardboard shape to the wood and did more cutting. Now what you see
under the wood cut-outs is the carpet and insulation that I'm going to
use. The cardboard sat right on the floor but that isn't how the real
pieces will end up. By making a few small pieces of carpet and
insulation to simulate the actual thickness of them both, I can accurately
fit the wood pieces in place. What you can't see is more carpet and
insulation on the firewall so I get the right distance there too.
|
|
|
|
1 2
3 4
5 6
7 8
9 10
11 12
13 14 15
16 17
18 19
20 21 22 23
24 25
26 27
28 |
|
29
30
31 32
33 34
35 36
37 38 39 40
41 42
43 44
45 46
47 48
49 50
51 52 53 |
|
54
55
56 57
58 59
60 61
62 63
64 65
66 67
68 |