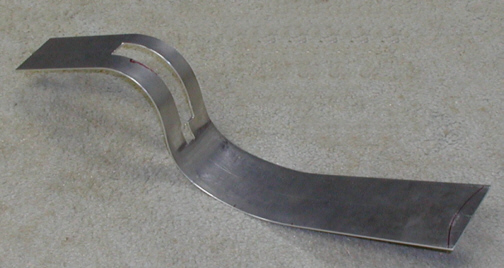
This took longer to form than I
thought it would but here it is with all the bends finished and in the
right places....I hope!. At first glance, it looks like it only has two
radius's but a closer look reveals an ever changing radius on the
section that is on the carpet. This part took the longest because I took
my time with it so it would come out nice. While I had it in place to
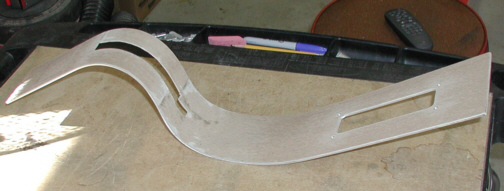
see how things looked, I marked out where my switches would go. I've been needing
a place to put some switches and almost cut some holes in the dash but
something told me to hold on a little longer. The switches that I wanted would
be for power windows, wipers, electric fan (this
would be an over-ride switch so I could turn it on when I wanted instead
of the thermostat kicking in and making it come on), high-low beam for
headlights and interior lights. This adds up to six switches in all but
what kind would I use?
|
|
|
After looking at all the different
choices out there like toggle, rocker, push-button, lighted, colored or
plain, plastic or billet aluminum (yeah, you can buy solid aluminum
switches but they'll take a BIG chunk out of you back pocket), I went
with rocker switches. I cut-out a slot and drilled the holes for the
panel to mount in the middle of the straight section. The red line that
you see is the shape of the dash which means that a small section of the
console will be hidden under it. What I did was center the switches
between the dash and where the first bend starts. I thought it would
look better there and it won't be in the way of my shifter either. After
putting the switch panel in there and seeing how it looked, I think I'm
going to add two more small ones at the bottom near the floor. I just might have a
need for them in the future, like maybe some spray.
|
|

|
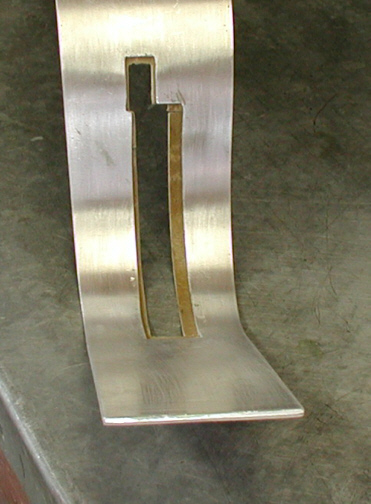
What you see here is the center piece
covered with 1/16" thick cardboard. The reason I did this is
because I could sand out tiny imperfections in the radius if need be.
Also I wanted to cover the opening to the shifter a small amount. The
cut-out was just a little to large for me so this will fix that.
|
|
|
Here you can see what I mean by making
the opening smaller. The cardboard is pretty strong and should hold up
after the material is on. This is going to be a serious challenge to
cover and have it look right. I've never done anything like this before
so don't laugh to hard if it doesn't turn out very well.
|
|
|
|
1 2
3 4
5 6
7 8
9 10
11 12
13 14 15
16 17
18 19
20 21 22 23
24 25
26 27
28 |
|
29
30
31 32
33 34
35 36
37 38 39 40
41 42
43 44
45 46
47 48
49 50
51 52 53 |
|
54
55
56
57
58 59
60 61
62 63
64 65
66 67
68 |