33 Coupe Body 36
2/29/04
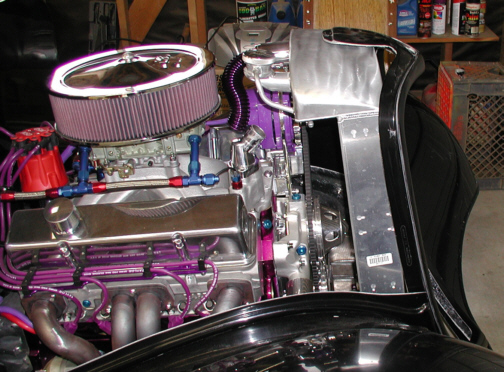
After hours of eating fiberglass, the
grill shell was fitt'n good, but this lead to another problem......of
coarse! Notice the top radiator hose not connected anymore. I had to
disconnect it so I could lean the radiator back far enough to clear the
grill shell but now I can't reconnect it, so I am forced to buy another thermostat
housing. The thermostat housing that you see below can swivel from right
to left, 360 degrees but it is locked in at a 45 degree upright position
and now that the radiator is about where it will stay, the hose won't
bend enough to fit back on. The fix was to buy another thermostat
housing that is "straight" in place of the angled one. After
the new one is in place, the hose will have to be bent slightly and then
get re-attached. If anyone needs a 45 degree Billet Specialties thermostat
housing, let me know because it only has about a half an hour running
time on it.
|
|
|
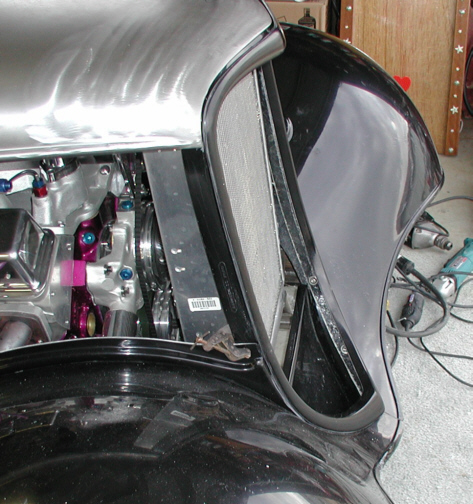
I placed the hood on to give me a better
idea of what the fit was like between the top portion of the grill shell
as well. It looked
good too so things were coming along rather well. At this point, I
drilled out the remaining six holes and bolted grill shell in place.
|
|
|
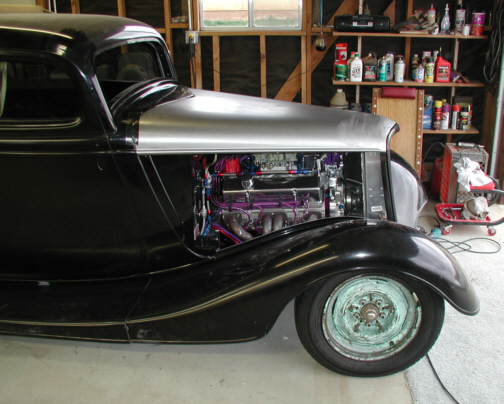
To make sure the hood stayed in place,
I used duct-tape to hold it where it meet the cowl on both sides of the
car. I won't be able to go any farther at this point because I don't
have the hood sides or the hood hinges. I sent my louvered hood sides
back to exchange them for plain sided ones because of the way I wanted to
do the paint. Actually, I ordered the plain sided ones from the start
but received the louvered ones by mistake. I finally got around to
sending them back just about when I was going to need them....duh! So
while I was waiting for them to arrive, I thought I would see how it
looked on the ground on all four wheels. I also used this time to see how the
offset was with the front wheels too because the ones that were on there
seemed to be about right... how bout that!! By jacking up the front and
turning the wheels all the way in one direction, then setting it back
down, I could check to see how much clearance I had between the fender
and tire. I did this in both directions (right and left) just to make
sure because when I order my wheels, I only have one shot at making it
right. If it's wrong, I bought them anyways so this had to be right the
first time.
|
|
|
After seeing how nice the wheels fit,
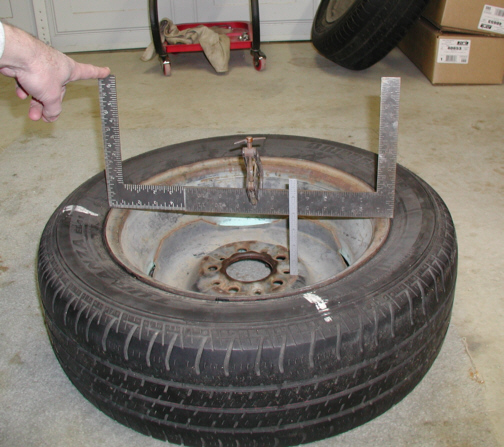
I had to measure the backspace of the wheel. How do you measure the
distance without removing the tire first? Well by clamping two squares
together, I could adjust them to the diameter of the wheel and then
clamp them in place without hitting the tire. Now you
measure from the bottom edge of the square to the mounting surface of
the wheel to attain your backspace dimension. This wheel had 3
3/4" of backspace so this will be written down and used when
I order my wheels. The tire diameter seems to be about right too (195
65R 15) which is about 25" tall. On a different note, I also wanted to know how much
clearance I ended up with under the car so out came the tape measure. I had 4" of
clearance between the oil pan and the same at the transmission pan. I guess
speed-bumps are going to be a challenge so whenever I can avoid them, I
will but the look of how it sets is what I was after so this is about
the size tire I'll want.
|
|
|
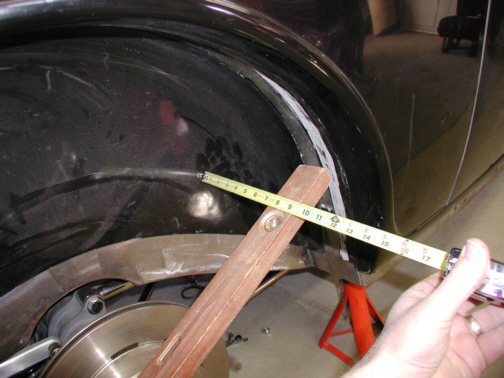
I took this picture before I bolted on
the rear fender when I was measuring the backspacing for the rear
wheels. I have no tire/wheel that I can use like the front ones so I had
to do it the old way. You have to know a few things before you can arrive
at the final dimension of your backspacing which are:
- Size of tire to be used
- Size of wheel to be used
- Section width of tire (total amount of tire
which sticks out beyond the wheel on both sides)
- Wheel-well depth (total amount of space from
body to inside of fender)
By knowing these variables, you can find the right
size tire and wheel combination that's right for you car. In my case, I
wanted the largest tire that I could get in there and here is how it all
broke down. The wheel-well depth was 17" to 17 1/4" depending
on where you measured it. I'll use the 17" dimension because that's
the smallest size. Looking at the different tire sizes that some of the
manufactures had, I found one that was to my liking. Now I could figure
out my backspacing because I knew the size of the tire and the section
width which would determine the wheel size. The first dimension I got
was measuring from the wheels mounting surface to the inner most part of the
body which will give you a "net" dimension. You'll need clearance
between the two so you need to subtract one inch for this clearance. This
clearance is to make sure the tire doesn't come in contact with the body
while turning or cornering. Now you subtract half of the section width of the tire.
Say you had a section width of 10" and you were going to use a
wheel that was 8", the difference is 2". Divide that in two
and this is half of the section width, which ends up at 1". At this
point you would have a number which should be your backspace. Now wasn't
that easy! In my case the backspacing ended up at 4 1/4". I figured
that I should hug the inside toward the body if any because I could use
spacers if need be. It's better to be a little closer than you want than
far away because you can't space the other direction. The wheels will
take about 4-6 weeks to arrive because they have to make them so when they
come in, I'll post some pictures of them along with the tires.
|
|
|
|
1
2
3 4
5 6
7 8
9 10
11 12
13 14
15 16
17 18
19 20
21 22
23 24
25 26
27 28
|
|
29 30
31 32
33 34
35 36 37
38 39
40 41 |
|