|
Making Knives - What was I thinking!
I finished making the knife holders a little early so I
thought I'd use this extra time to make one set of knives. And this set
of knives will be for Matt and Angela because I don't remember seeing
any at their house. Now I don't
know what I'm doing here which means it will be a challenge for me. I
did make one knife for my father-in-law for
Christmas of 2014, which
was my first attempt ever at something like this. But I'll try most any
project once and if it doesn't work out, I'll make some adjustments so
it does. In other words, I like making something I've never tried
before.
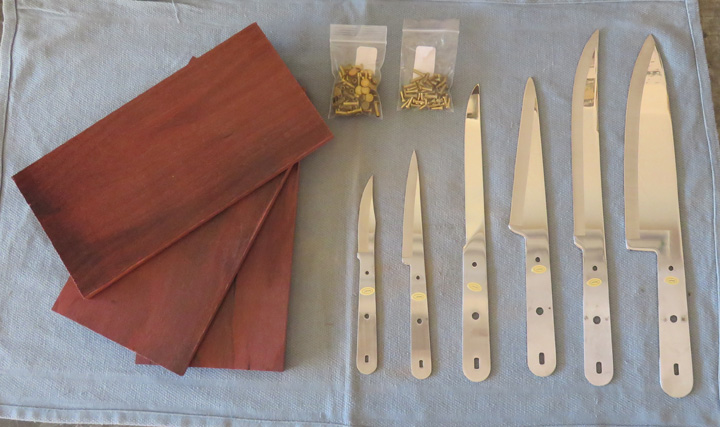
Let's go over what I what I bought from
Jantz Supply
in detail:
-
3" Paring
-
4" Utility
-
6" Fillet
-
6" Cooks
-
8" Carver
-
8" Cooks
-
3/16" Brass Cutlery Rivets
-
5/16" Brass Cutlery Rivets
-
3/8" X 5" X 10" Rosewood Burgundy (3
pieces)
|
|
You might have noticed that all the blades look the same
except for the 'Fillet', which was a second choice because Jantz Supply
didn't have the one I wanted. They backordered my first choice, a 5 1/2"
boning knife, which should be here after the first of the year. I plan
on making that one when it gets here and swap it out for the Fillet
later on. If your wondering about the size of both knives, the catalog
says they're the same. I sure hope so because the slot in the knife
holder is finished and changing it would be a nightmare. On the other
hand, if the new one doesn't fit the slot, I'll just keep it :-]
All the knives are made out of 440c surgical stainless
steel, heat treated, sharpened and have a mirror finish. What I'll need
to do is cut the handle material into smaller pieces, glue and rivet
them to the blade, form the handle, and then lots and lots of hand sanding. I remember from the knife I made last year there
will be a
bunch of handwork which is why I thought I'd try this with the extra
time I had.
I'm going to work on the two smaller knives first as
they use the same size rivets, 3/16" diameter. That's not really the
deciding factor here, I just thought I'd do those first so let's take a
look at how I'm going about making these knives.
|
|
|
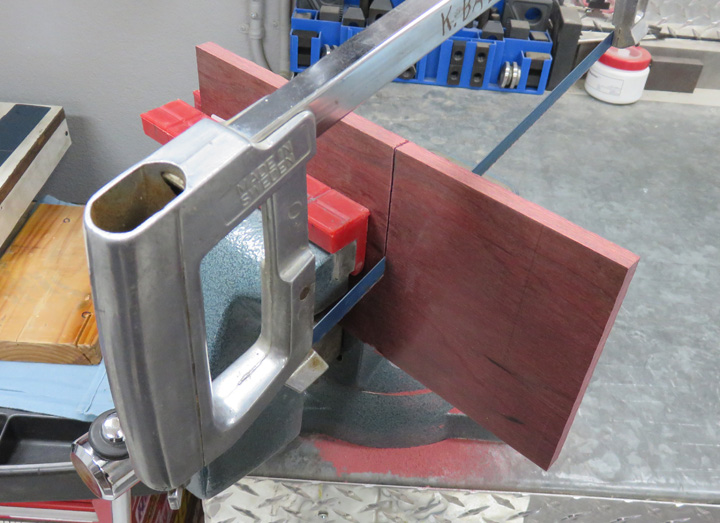
The first thing you should know about this handle
material, it's man made. Even though it looks like real wood it's not,
it's resin impregnated wood. That means it has a grain like wood does
(layers), but in
some ways it reminds me of fiberglass, but without the itchy skin. I tried using a coarse blade to saw
this with but the
material splintered so I switched to a fine blade like my hacksaw has,
which worked great. The only thing about using a hand saw
is...well...it's a hand saw! A power tool would be great here but on the
other hand, I only have six knives to do.
|
|
|
I measured the length of the handle area on my two
smaller knives and added a little more (3/8" to 7/16") and then cut the
material. I'll need four pieces total here, two for each knife.
|
|
|
After cutting out these pieces, that power tool sure
would've come in handy but I don't have a fine blade for my circular
saw. No big deal because a little exercise can be good for you. Notice
the saw cut edges are not straight. This is due to me turning the work
piece around because my hacksaw isn't deep enough to make it in one cut.
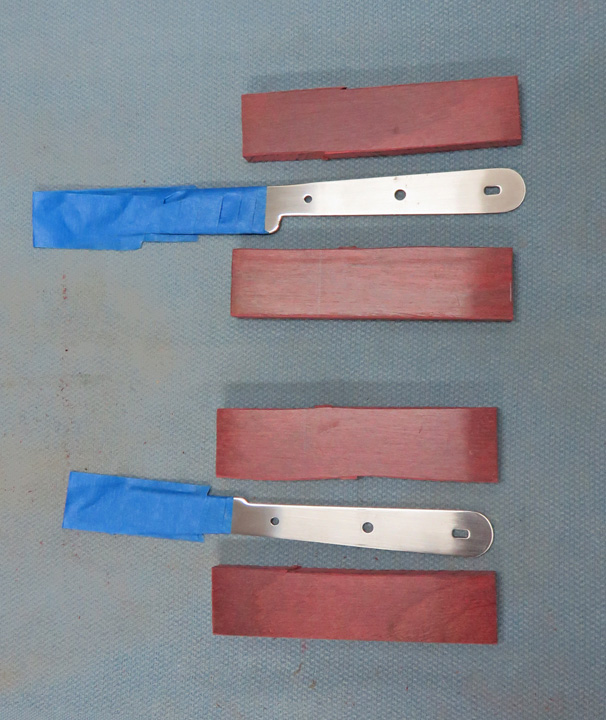
Speaking of cutting, note that I covered the blades with tape. Mainly
this is to prevent me from getting cut but it's also used to protect the
blade from getting scratched.
|
|
|
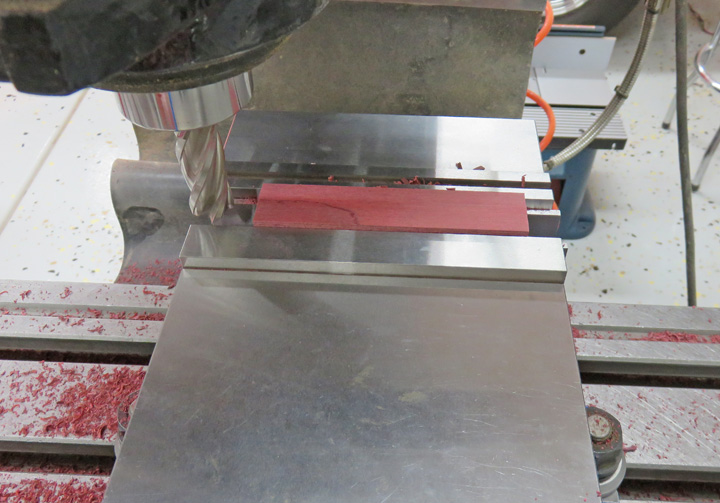
I machined all the rough saw cut sides first so I would
be able to hold them in my vise to machine the larger surface. I then cut the thickness down to .275
for the paring blade and .295 for the utility blade. The reason I made
them slightly different is because I went to my kitchen and looked at
some existing knives for guidance. What I found was the smallest knife
had the thinnest handle. Now I'm not sure here but if you have a larger
handle in your hand you tend to grab it with more authority compared to
one with a smaller handle. Think screwdrivers here: the smaller ones
have small diameter handles and the reason for that is so you can't
apply too much torque. So if you have a thinner handle you would
tend to use it with a lighter touch. At least that's what I came up with
so this is how I'm going to approach making them. Once I cut the
surface I could see the grain a little better. I removed half the
material from one side and half from the other. This way if there are
any imperfections on the surface they'll be removed.
|
|
|
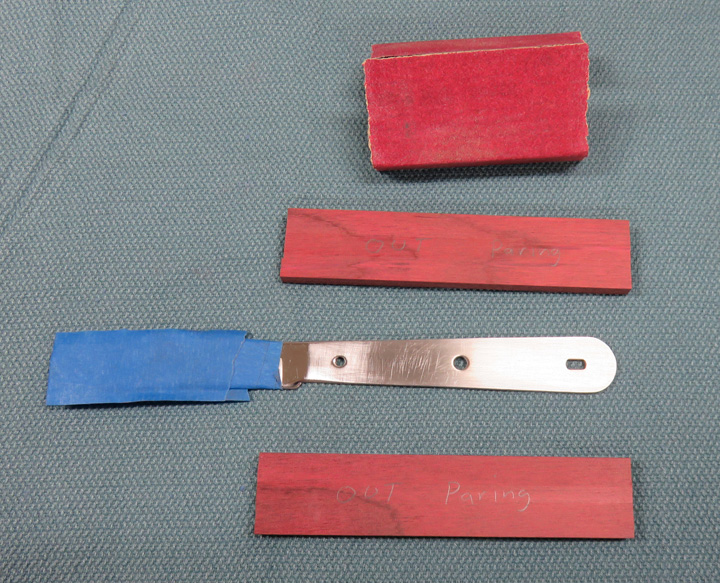
I sanded both the tang of the knife and the handles with 220 grit sandpaper. The reason
for the sanding is because I'll be gluing the handles to the tangs along
with using some rivets. Glue bonds better to a rough surface than to a
smooth one. I wrapped the sandpaper around a wooden sanding block for
this (top) which worked very well.
|
|
|
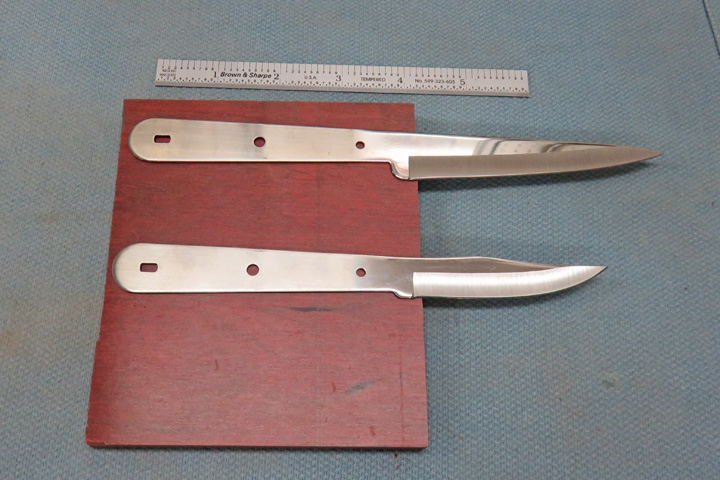
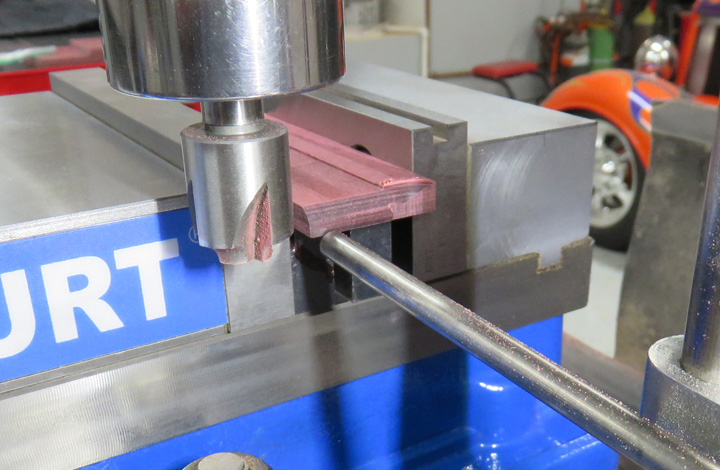
One thing I did before doing any glue and rivet work was
to machine the edge that faces towards the knife point first. Once the
handles
are fastened to the knife I wouldn't be able to do this without
scratching the blade. Just thinking ahead here.
I used a 3/16" corner rounding end mill to put a
radius on the front edge of all four pieces, two for each of
the smaller knives. Once they were all cut, I sanded that area with 220 and
and 320 grit paper.
|
|
|
I centered the tang on my material and placed the front
edge of the handle right where the tang and blade come together. Once I
had this where I wanted it, I used my pencil and traced around each of
the three holes. Look close and you can see the pencil mark in the small
hole.
|
|
|
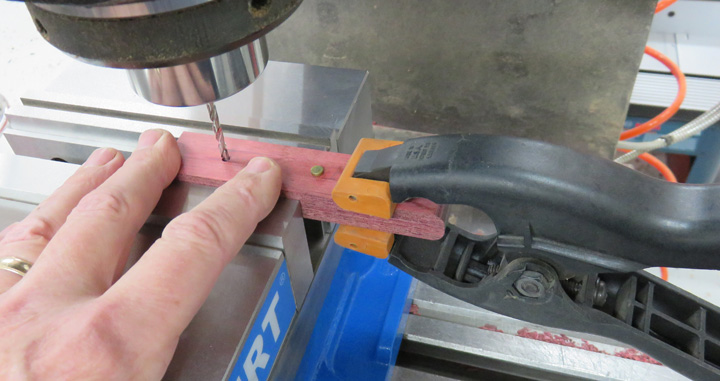
Once I drilled the three holes in one half, I clamped
both handles together and used one handle as my guide to drill the
other. This worked out good and now the front edge of both handles will be
aligned. Once I had the first hole drilled I placed a rivet in that
hole, then moved to the middle and repeat.
|
|
|
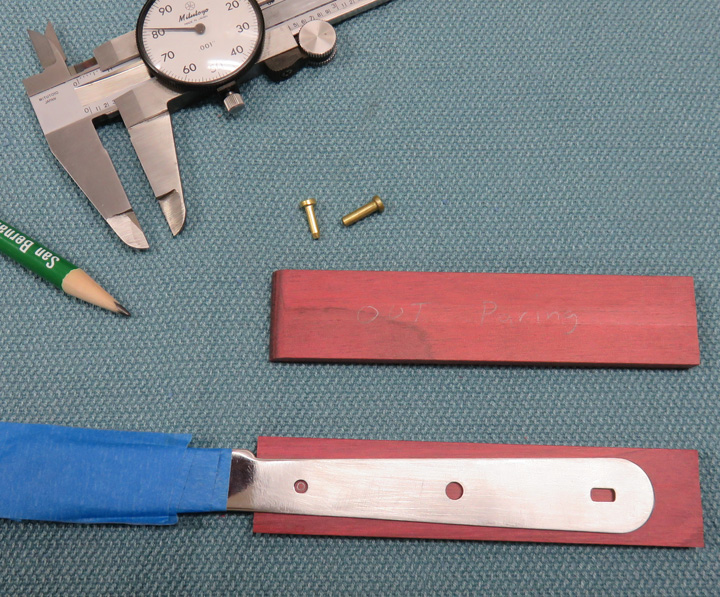
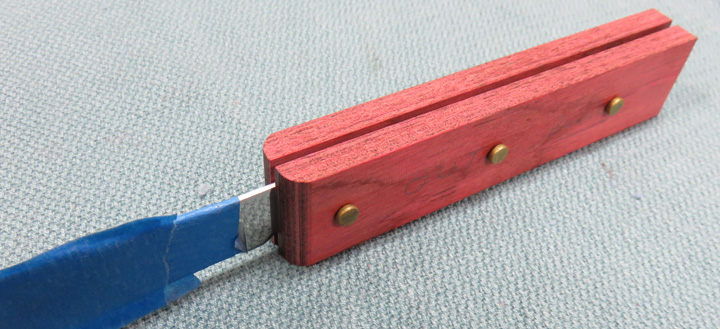
I'm test fitting the handles prior to them being glued
and riveted.
|
 |
|
1
2
3
4
5
6
7
8
9
10
11
12
13
14 |