|
The next gift would be a knife for my father-in-law. Making a knife is something I've always wanted to
do but for some
reason or another I never attempted. After doing some research on different
knives, I found a place that sells about anything you'd want if it's
knife related. The place is called
Jantz Supply and I bought
enough materials to make two different styles.
Jantz Supply has plenty of kits for sale but I decided to go
à la carte and buy what I
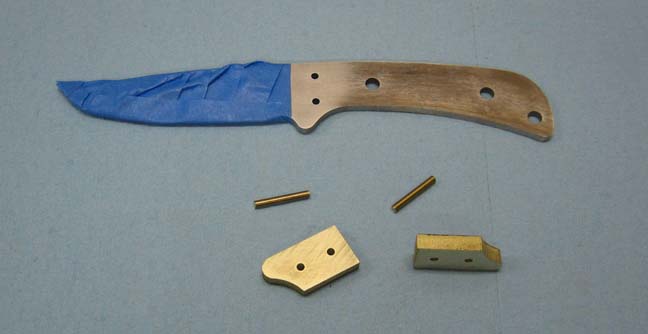
wanted. What you see below is a leather sheath, blade, scales (wood
handle),
bolsters (finger guard) and two types of rivets. I'll explain more about
the components later.
|
|

|
|
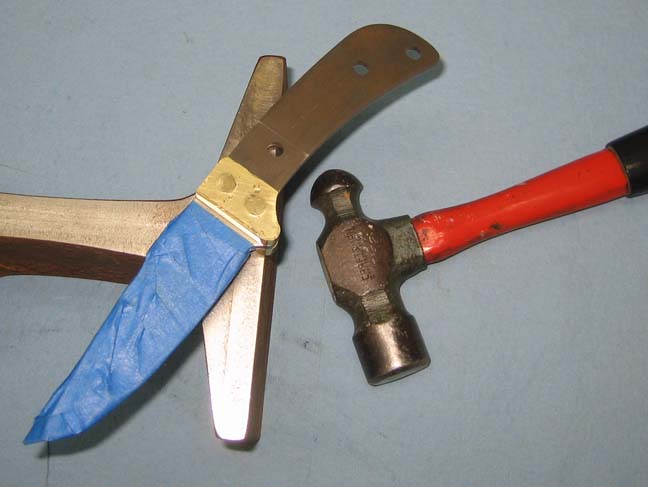
The first thing I did was cover the blade with masking tape because the
one I chose came sharpened. The overall length is 8 3/8" long with a 3
1/2 blade X 5/32 thick. The material is 440 C stainless steel heat
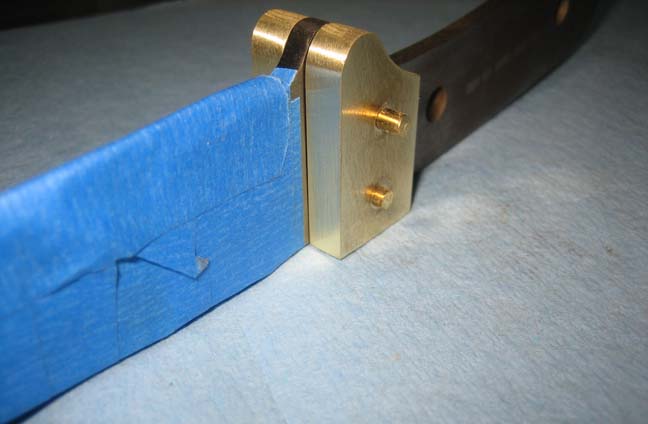
treated to 57-58 Rc. The next step for me was to test fit the bolster
to the blade. You have lots of choices for bolsters and pins but
I went with brass for both of them. A nice feature here is that
everything has been predrilled which made it nice but you can buy just
about anything you want.
|
|
|
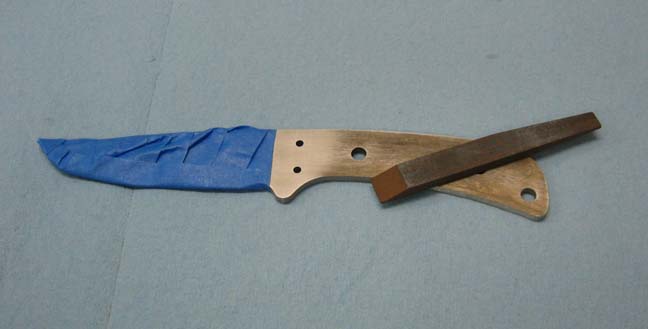
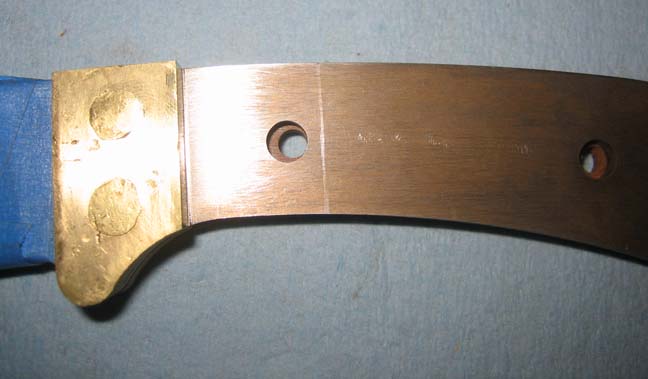
Here is the bolster and pins resting on the blade just mocked up. Again
I wanted to get an idea of how things fit and what I needed to do because I've never done
this before. One thing that came to mind here was, if I wanted a nice
finish on the bolster, it would be very hard to sand or polish the area
right
next to the blade once the pins were in place. Mocking this up worked
out because now was the time to do some sanding, not later.
|
|

|
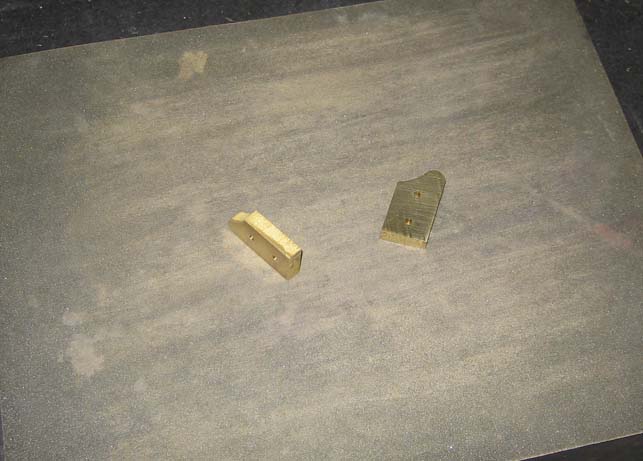
I sanded the surface that would be against the front of the blade with
some 220 grit and ended with 600 before buffing it. This process went
pretty fast because there was only one surface per bolster that had
to be polished.
|
|
|
|
Here is what the one side looks like after a short
time. This should make life much easier once they are in place.
|
|

|
|
I ran a stone over the tag making sure there were no burrs or high spots of any kind
before I installed the bolsters and scales.
|
|
|
The idea here is to hammer the pins flush with the bolster surface. When
done properly, the pins expand inside the bolsters and mushroom on the
outside keeping them from coming loose. I
used a 3/8" diameter punch and gave each pin a few hits each while
resting on an anvil, then turned it over and repeated the process until
the pins were mashed flat. This took some time as I was inspecting
carefully as I went. I'm sure the next one will go faster now that I've
done one and know what to look for.
|
|
|
Once the pins started to mushroom, I kept turning the knife over
every few hits so each pin was hit evenly. After a few minutes, this is
what I ended up with. The T shaped piece below is a small section of
railroad track that I used for my anvil. But any large piece of steel
will work for this. About a week after I peened these pins, I
read that it's a good idea to apply epoxy under the bolsters to make
sure nothing moves or comes loose. Heck of a time to find this out. That
means when I do the next one, I'll be sure to use some glue in this
area.
|
|
|
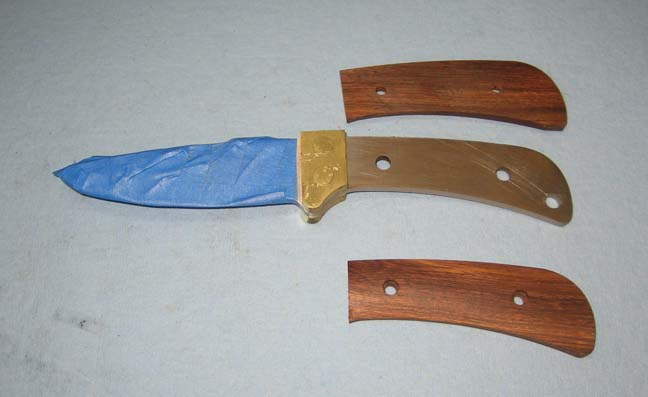
Now that the bolsters are in place, the scales (handles) are next. The
choices for scales are unbelievable as there are hundreds to choose from
but I went with some made from ironwood. I thought they would make a
nice contrast with the polished brass. Now you can spend a lot for
scales, like an exotic material which might cost in the mid three
hundred range. Yeah....they can cost that much if you're willing to
spend it. I sanded the surface that will contact the tang with 220 grit
paper making sure they were burr free.
|
|
|
Here you can see the holes don't line up, which is normal. The reason
for this is
to fit each side perfectly so there isn't any gap between the
bolsters and scales. Come to find out this isn't as easy as I thought. I
first tried using a sanding block with some 180 grit paper. This worked good
but it was a slow process so I tried my belt sander with some fine
grit paper but I didn't have enough control so I went back to the
sanding block.
|
|
|
One thing I thought would look nice is some contrasting material between
the bolster and scales. I bought these from the hardware store but they
sell them at Jantz Supply too. I used two pieces of .018 stainless and
one piece of .032 brass. Once I cut the pieces close to size, I used epoxy on them and
on the scales as well.
|
|

|
|
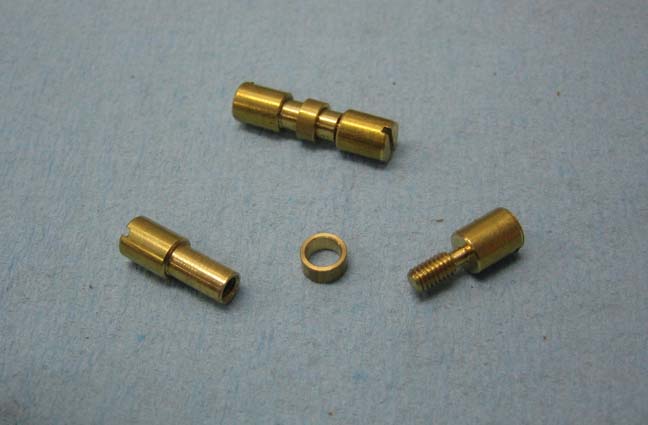
These are called Corby rivets which are used to hold the
scales on. This is a nice system because all you do is screw them
together and then sand away the extra material (screwdriver slot). If
you used a traditional style of rivet like I had on the bolsters, one
miss with the hammer and you could say 'good by' to your wooden scales.
These come in different materials and I bought brass (below) and
stainless steel.
|
|
|
|
1
2
3
4
5
6 |