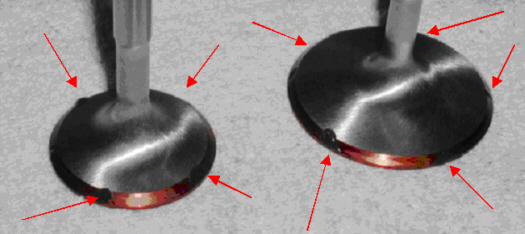
What you do now is put lapping
compound on the valves but only a small amount. I put four small spots
on the exhaust valve and five on the other (see arrows). A little goes a
long ways here so it's best not to get carried away. You insert one
valve at a time into the correct hole. Remember I talked about numbering
awhile back? This is why you want to keep them separated because once
they have been hand lapped, there mated together so you don't want to
mix them up.
|
|
|
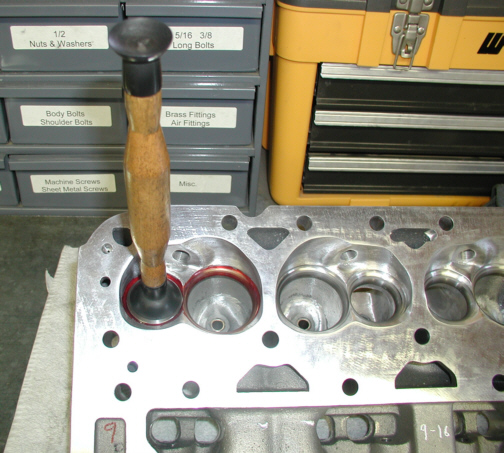
By taking your plunger which has two
different size cups, and sticking it on the end of the valve, you give
it a back and forth motion with the palm of your hands. It's best to
move the valve around in a complete circle while doing the back and
forth motion because if the valve or seat had a high spot, you wouldn't
know it so this is why you do the circular thing. Now you take the valve
out and check your work.
|
|
|
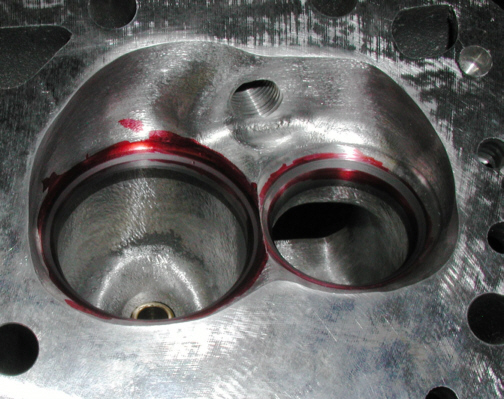
Take a rag and wipe off both the seat
and valve and see what kind of pattern you have. If you have an even
amount of red removed all around, things are looking good like we have
below. It's hard to see here but these heads have a 3-angle valve job.
What does that do? It's good for air flow which is good for horsepower
but the valve seats get smaller by doing this. Small seats won't last as
long as larger ones but you can't have it all and if I have a choice,
I'll take the one that makes MORE POWER!! The angle of the seat (the
area that the red has been removed from) is 45 degrees. The one on top
of that is around 25 degrees and on bottom is about 60. The exhaust port
has a radius on the bottom of the 45 degree angle which is even better
for air flow.
|
|
|
|
1
2
3 4
5 6
7 8
9 10
11 12
13 14
15 16
17 18
19 20
21 22
23 24
25
26 27
28 29 |
|
30
31 32
33 34
35 36
37 38 39
40 41
42 43
44 45
46 47
48 49
50 51
52 53
54
55 |
|
56 57
58 59
60 61
62 63 |