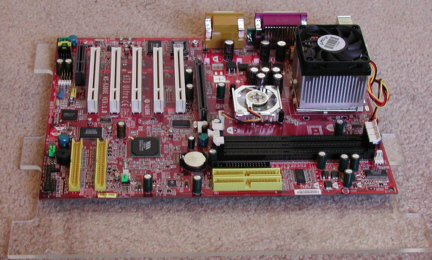
| To layout and mount the motherboard, I put it on
the shelf and used a Sharpie marker to transfer the mounting holes. One
little dot was all I needed but I only marked two holes (the end holes) to make sure it was
going to line up. After the first two holes were done, the the rest
could be laid out and drilled. Those are brass stand-offs which were drilled and
tapped for 6-32 threads like the case has.
|
|

|
To mount the drives to the other
shelf, I made some brackets that had slots in them so they could be adjustable
and put 6-32 threads in them to hold them to the shelf. After attaching
the brackets to the drives, I set them on the shelf to find out where I
needed to drill the holes for the screws. The brackets were two
different lengths but the same height (1.125). The larger ones are for the hard
drive and the smaller ones are for the CD-ROM. I made the brackets about
an inch longer than the mounting locations were on the drives.
|
|
|
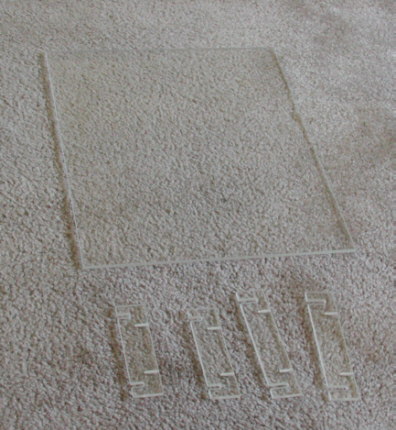
After attaching the brackets to see
how it fit, I had to add some slots for wiring. This pattern was achieved
by the motherboard shelf because the two cutouts had to be cut around
the stand-offs. This left the three locaters you see here that are to go
in the slots in the side panels.
|
|
|
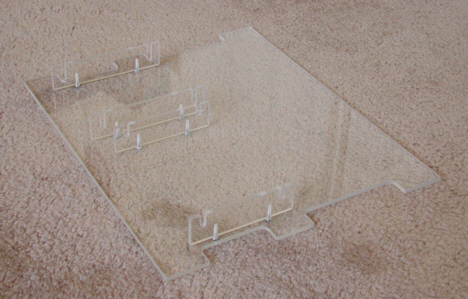
Here is what it looks like with the
motherboard on it. The cutouts are very close to the mounting
screws on the motherboard. This is about as far as I wanted to go inward
and leave enough strength in the shelf.
|
|
|
|
Now it's time to mod the
CD-ROM drive.
|
|
1
2
3
4
5
6
7
8
9
10
11
12 |