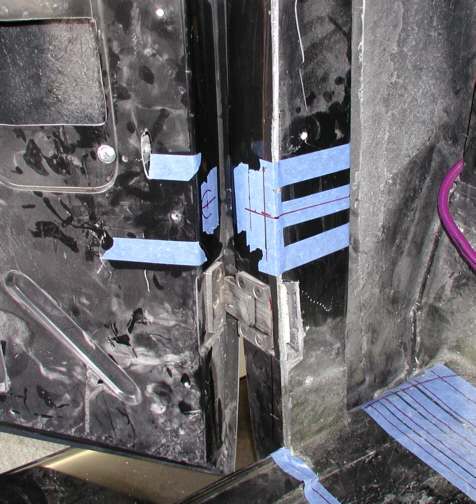
The first thing I did was find a place
that wouldn't be in the way when the wires pass through because I have
electric windows. The electric windows have channels so I had to make
sure to work around them. After finding a good spot, I laid-out some
lines and was ready to drill some holes.
|
|
|
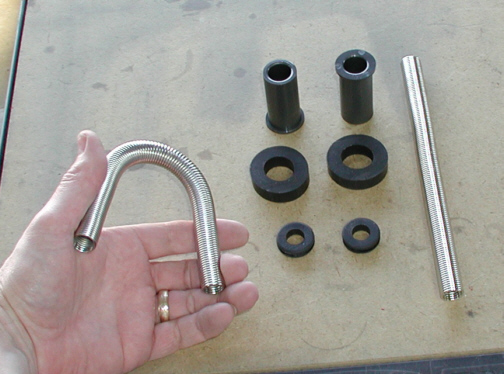
Here is what comes in the kit. The
spring-looking things are made out of stainless steel and really are
springs which act as flexible conduits. This is where the wires will
pass through later on. The larger pieces at the top are nylon bushings
and act as a guide for the springs to slide through. The larger rubber
pieces are retainers that go on the top pieces very tightly to keep them
from moving once there in place. And the smaller grommets on the bottom
are to hold the springs in place which fit around them tightly too. The instructions
say that you can install this either way so I'm going to put the nylon
bushings into the door-jams.
|
|
|
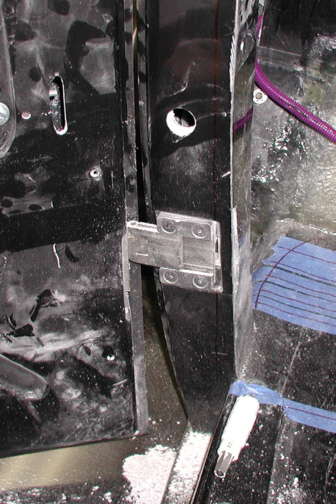
Here you can see the 15/16"
diameter hole that was made with a hole-saw. It's hard to see here but
the thickness of the door-jam at this spot is over 3/4" thick which
is why I chose this side for the nylon bushings because the smaller
rubber grommets only have a 1/8" groove and wouldn't have worked
here.
|
|
|
Once I had the larger hole finished,
it was time to drill the smaller 3/4" hole which had to be right
in-line with the other one. The way I made sure they were both in-line
was to use my first hole saw (15/16" red arrow) to drill the pilot
hole in the door from the previous hole but from the other side. I had
to make a hole for the wires to pass through the B pillar anyways (from
red arrow yellow arrow) so I made it big enough to accept the larger
nylon bushing retainer grommet. After the pilot hole was drilled, I
changed over to the smaller hole saw and finished the hole.
|
|

|
|
1 2
3 4
5 6
7 8
9 10
11 12
13 14
15 16
17 18
19 20
21
22
23 24
25 26
27 28 |
|
29 30 31
32 33
34 35 |