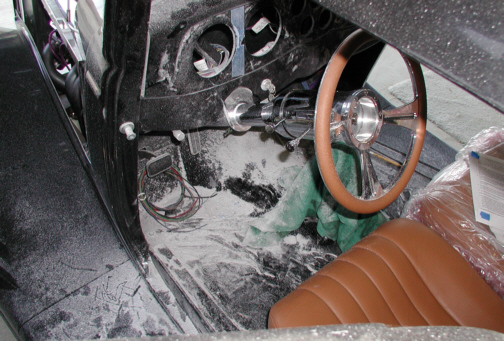
The first thing I did was use a
hole-saw to get started and then used my Dremel to enlarge the hole to
it's final size. After hours of carving, I had some very large holes in
my dash, along with a very large mess.
|
|
|
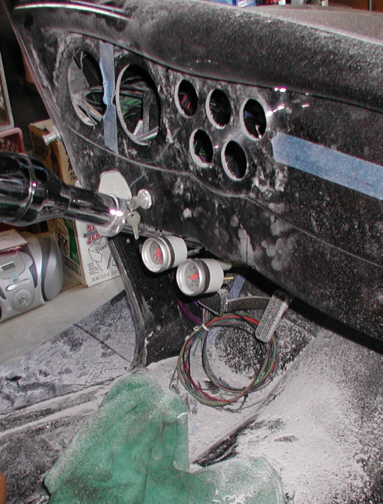
This is a better shot of the mess that
I made. You can also see two of the seven gages below that will soon
make there way upward. I used a shop-vac to cleanup all this powder which
works great for dust-like fiberglass particles. Now that the holes are
finished, it's time to install some hardware.
|
|
|
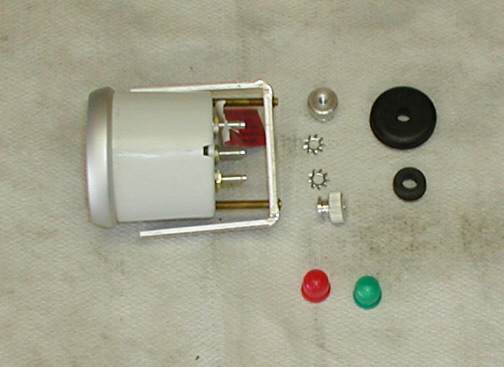
This is the fuel gage which is one of
the five smaller gages that will be used. To hold them in place,
Autometer uses a "U" shaped piece that goes over two threaded
studs and that gets held on with thumbscrews and lock-washers. This type
of fastening system is typical of most gage manufactures and works very
well. The rubber grommets are used for wires that might pass through
sheet metal, but not fiberglass because the size of the slot in the side of
them are only 1/16 wide. No big deal because I am running my wires
through some split-tubing anyways. The red and green things are for
different color lighting if you don't like the standard white light that
comes from a normal light bulbs. All you do is place one of them over
the light bulb and in no time, you have a different color display. I
think I'll go with no color and see how that looks first.
|
|
|
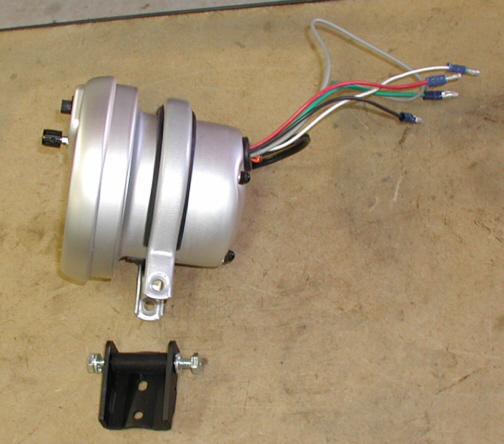
This is my tachometer which doesn't
have the same kind of mounting system that all the other gages have.
This is made to install on the steering column or on a some kind of tubing,
like a roll cage.
I'm going to have to come up with some way of mounting this. The wires
have all been shortened to about six inches from two feet long. I also
put some connectors on the ends to make it easy to attach.
|
|
|
|
1 2
3 4
5 6
7 8
9 10
11 12
13 14
15 16
17 18
19 20
21
22
23 24
25 26
27 28 |
|
29 30 31
32 33
34 35 |