33 Coupe Last Details 6
4/10/04
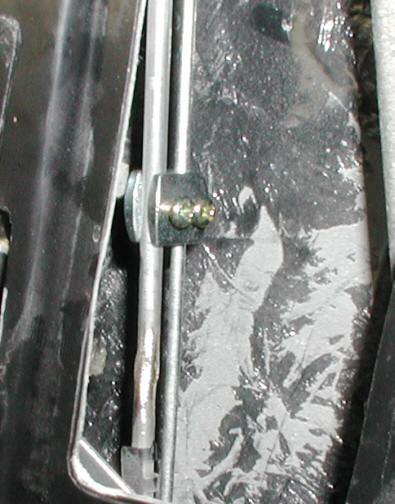
This is a close-up of the adapter that
is used to clamp to the linkage. The larger diameter rod is the one
that came with the car and the smaller one is what came with the
kit. It's hard to see here but the larger rod had to be ground down to
fit the adapter over it because the adapter is made to have the rod
slide through it from the top down, not straight-in like I did. The existing
linkage had an "S" shape bend on both ends so I wasn't able to slide
it through the adapter which is why I made the flats on the larger rod.
The adapter has a solid hole for the smaller rod but is open on the larger one.
The larger hole is 3/4 round so the rod won't come out which is why I
had to grind the flats on the linkage.
|
|
|
After all the adjusting and playing
around with the position of the linkage as much as I could, the doors
wouldn't open. Turns out the actuators weren't strong enough to do the
work needed. I called Rocky Hinge Inc. and asked them for an answer to
my problem. He said that they had some new ones that were stronger (by
only two pounds) and he would send them out to for nothing, free, no
cost, nadda!! After receiving them, I checked to see if they had the
same bolt pattern, which they did so I screwed them in and gave'm a try.
No luck, which is kinda what I expected. I didn't want to send these
back so I decided to fix it myself. Now because the actuators needed to
be stronger, how about if they did the same work but was easier for them
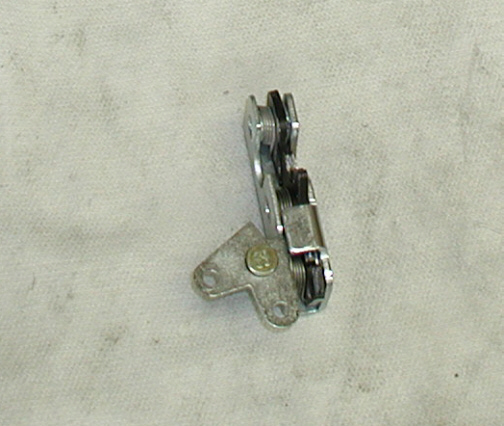
to do the work! What you see below is my door latch that gets held in
with three 5/16 bolts. Notice the bracket that's on left side that has
two holes in it. The hole on the bottom doesn't get used but the left
hole is where the door linkage is attached too. What I needed was a way
to increase the leverage to this latch to open it with my
actuators.
|
|
|
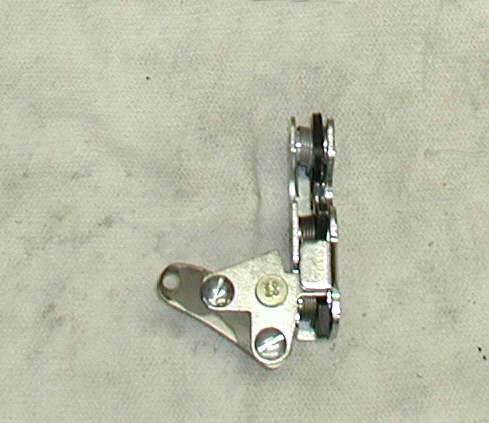
Here is what I came up with which is a
small piece of steel that works as a longer lever. The difference from
the existing hole to the new one is 3/4" of an inch but that's all
it took to make the doors open. I used 1/4" bolts and lock-nuts to
hold the new piece in place so it shouldn't rattle loose. After
determining that this was going to work, I made another one for the
other door and bolted them back up. The doors work fine now so let's get
started on the trunk.
|
|
|
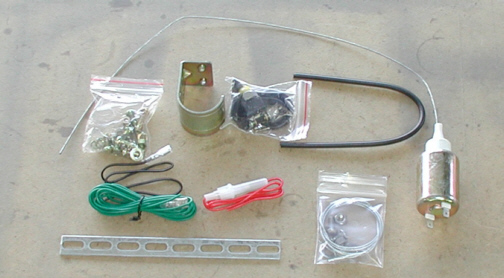
Here is what I'm going to use to
remotely open the trunk, again made by Rocky Hinge Inc. This time there
is a solenoid in place of an actuator. This is a two wire hook-up just
like the doors are but this solenoid only had one mode,
"pull". It comes with a fuse but I won't be using it because I
already have the hot side fused when I ran the wires to the rear of the
car.
|
|
|
|
1 2
3 4
5 6
7 8
9 10
11 12
13 14
15 16
17 18
19 20
21
22
23 24
25 26
27 28 |
|
29 30 31
32 33
34 35 |
|