33 Coupe Last Details 10        4/10/04

Here is the finished flexible stainless wire conduit installed and ready for some wires. As the door closes, the spring feeds its self into the nylon bushing in the door-jam. When I opened the door for the first time, it made a clicking sound because of the extreme angle between the closed and open position so I removed the nylon bushing and put a larger radius on the corner and now you don't here it at all. I cut and spliced the wires that go to the door actuators and there's plenty of room for more. If I decide to put speakers in the doors, there won't be a problem later on. 


4/27/04

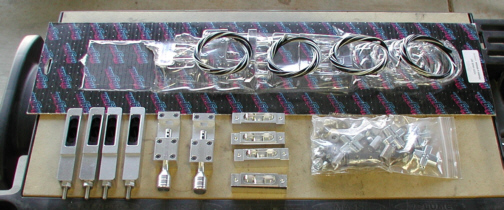
I'm getting ready to install my hood hinges which are made by Hagen. This is a tri-opening style hood hinge which means you can have the driver side open, passenger side open or you can take the hood completely off. As you can see, there are a lot of parts to be installed and because of the complexity that this project entails, it even comes with a video tape to help you through it. The video covers the whole process of installation but most importantly, it covers the first eight steps out of 17 total. If you wanted to just jump right in and open the paper instructions to get started, it tells you that your starting at step nine so you better know what your doing if you continue. 


One of the first steps in the video shows you to make some shims wrapped in tape which then get tapped to the cowl in seven places to make sure the hood is sitting in the proper position before you do any measuring or cutting. They also want you to use five shim packs on the grill shell. By adding or removing shims, you can adjust the height of the hood so it sets just right. You also have to bend the hood if it doesn't fit which I had to do as well. 


1  2  3  4  5  6  7  8  9  10  11  12  13  14  15  16  17  18  19  20  21  22  23  24  25  26  27  28
  29  30  31  32  33  34  35