The thermostat housing I'll be using
is made by
Billet
Specialties. One of the reasons I picked this one is because it
swivels to any angle you want. It also uses an O-ring instead of a
gasket which means I don't have to worry about replacing gaskets if I
ever have to remove it.
|
|

|
Here you can see the O-ring and how it
goes together. It's a two piece design is a very good idea and it looks
great. It also comes with fasteners which are made out of
stainless.
|
|

|
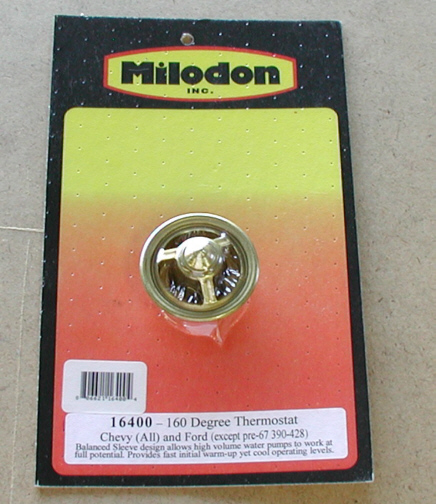
The thermostat you see here is made by
Milodon. It has a
high-flow unit and it opens at 160 degrees. I choose this temp because
the cooler the engine, the more horsepower you make. I had a 160 degree
thermostat in my other car and that worked out good so this will be my
starting point.
|
|
|
Here you can see it installed. All I
did was put a small amount of white grease on the O-ring and tightened
down the bolts. When I put in the radiator and top hose, I'll be able to
point the new housing in just the right direction for things to
line-up....sweeeet!
|
|

|
|
1 2
3 4
5 6
7 8
9 10
11 12
13 14
15 16
17 18
19 20
21 22
23 24
25 26 |
|
27
28 29
30 31
32 33
34 35
36 37
38 39
40
|