This is a story about what I came across and went through
while doing routine maintenance to my 33 Ford. Read on to see what
happened and what it took to get the car running again. And if you'd
like to be kept in suspense and then a little surprised along the way,
scroll through slowly as you read, and then look at the pictures as you
go. I think you'll have fun if you do it this way so buckle up because
it's a long and rough journey!
Once a year I change the oil in my hot rod, which may sound like a long
time but you're able to get away with this by using a good synthetic
blend vs conventional motor oil. I've been using Royal Purple for about
five years now and have been very satisfied with it so far. If you're
wondering if the oil is really purple or not, it is when you put it in
the engine but not after it's been run for awhile.
When changing my oil I like to put the car on jack-stands to make it
easy to get underneath it. And while I'm under the car I take the time
to make sure all the bolts and nuts are tight and wipe off the chassis
at the same time. While cleaning the underside of the car, I also like
to take a visual inspection of everything just to make sure things
aren't cracked, broken or falling off.
After warming up the car for a few minutes, I shut it off, pulled the
drain plug, changed the filter and then tossed in seven quarts of oil.
BTW, I always fill the oil filter before I put it on the engine. Why?
Because oil goes through the filter 'before' it goes through the engine.
That means the engine runs for a few seconds before any oil is being
pumped through the oil galleys and then on to your bearings. By doing
this it's time well spent and your engine will thank you for it in the
long run! The next step I like to do is start the car right away and check for
leaks of any kind. This little procedure is how I do every oil change if
it has an oil filter.
After running the motor for a few minutes I remembered the valves
needed adjusting. If you have a solid lifter cam (flat tappet or solid
roller) you'll need to adjust them from time to time. This
is normal for this type of camshaft and is pretty easy to do. A
hydraulic camshaft is much different as they don't need nearly the
maintenance because they stay adjusted for many trouble free miles at a
time.
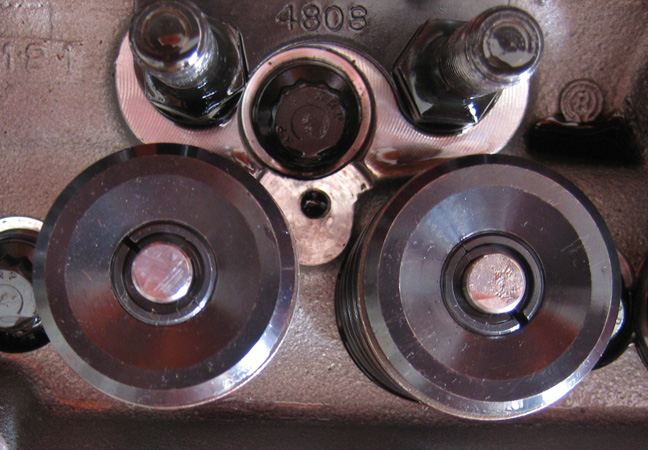
Once you have the valve covers off (and in my case the stud girdles
need to be removed as well) you're ready to get busy. The tools needed
for this are very basic for my solid roller, and in my case include: feeler gages, 1/4" hex
wrench (Allen wrench), 5/8" box end wrench and a remote starter switch.
Note: If you've ever tried to bump the motor over by using the key in
place of a remote starter switch, you won't be a happy camper after a
few minutes. Buy the switch and be done with it...trust me!
For those of you that have never adjusted a solid lifter camshaft
before, it's very important to have the cam lobes in the correct
position so you end up with the correct valve lash. What you want is the base
circle of the cam (the opposite side of the lobes) to be under your
lifter while you're adjusting it to end up with the correct valve lash.
If not then you'll end up with the wrong settings. Here is how I was
taught to do it which is very easy and involves only two steps.
1. When the exhaust valve just starts to open, adjust the intake.
2. When the intake has opened all the way and is about half way
closed, adjust the exhaust.
I like to work from left to right while adjusting and go right down
the row, not skipping or bouncing around at all. By doing it this way
it's hard to mess up or miss a valve and has worked well for me for many years.
This is very easy to do and doesn't take long so give it a try if you've
never done it before but have always wanted to.
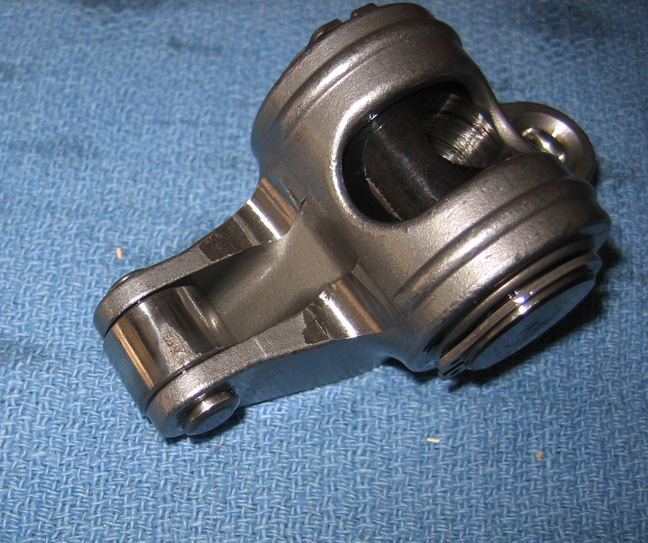
Okay back to the story now, I was adjusting my third rocker arm when
something caught my eye. Now with my engine running just a few minutes
before, everything is covered with oil. As I slid the feeler gage under the
roller tip of the rocker arm, the roller tip will move or roll as the
feeler gage goes under it when you are at your final adjustment. I first
thought that I saw a large drop of oil on the roller tip so I
wiped it off and slid the gage through one more time. Once I looked a
little closer, I didn't like what I saw.
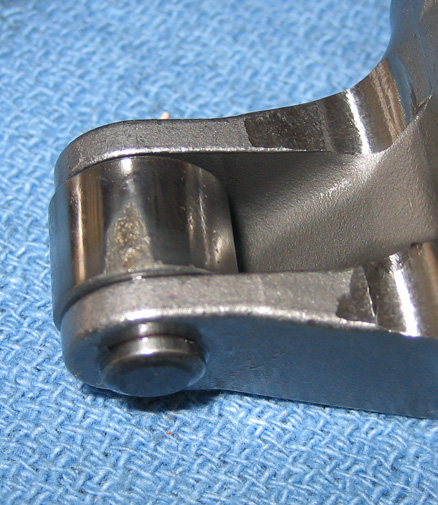
What I thought first to be oil turned out to be a damaged rocker arm,
the roller tip to be exact. First thought was..."Oh no". I
confirmed the damage with some magnification and sure enough, I had a
problem.
After the initial shock wore off, I adjusted the rest of the valves
looking for any others that may have had the same problem. And as luck would
have it, I found one more but not as bad as the one that you see below.
|