Valve Train Problems  9            4-28-14

One Step Forward, Two Steps Back


Now that all the testing was finished and I found out which pushrods and shims work the best, I was on my way to the finish line. I had my intake manifold, carburetor, radiator, pulleys and alternator all installed and was ready to stab the distributor in when I decided to prim the engine. I probably wouldn't have thought about doing this if I hadn't borrowed the tool from my buddy Larry, but it was on my work bench and I thought...why not!

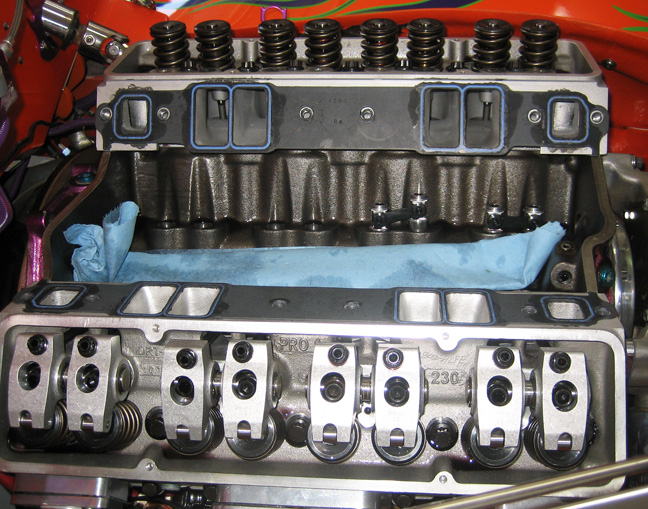
After dropping it into place and spinning it with my drill, I had oil pressure on the top end. At least most of it anyways. Notice the intake gasket on the heads. This is what used gaskets look like once they've been assembled once. Huuhhhh? Strap in because it's going to be a bumpy ride.

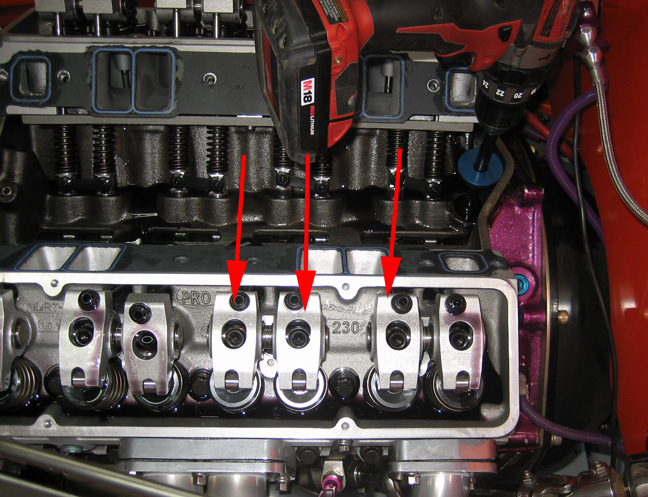
What I found when I was priming the engine, or the lack there of, was four rockers that were not getting oil. Now how can that be? All of the others were fine and looking good, except for those few. I stepped back and looked at all the rocker arms that had oil running down them, and then looked at the ones that didn't. Again I found myself shaking my head from side to side saying "no damn way"!!

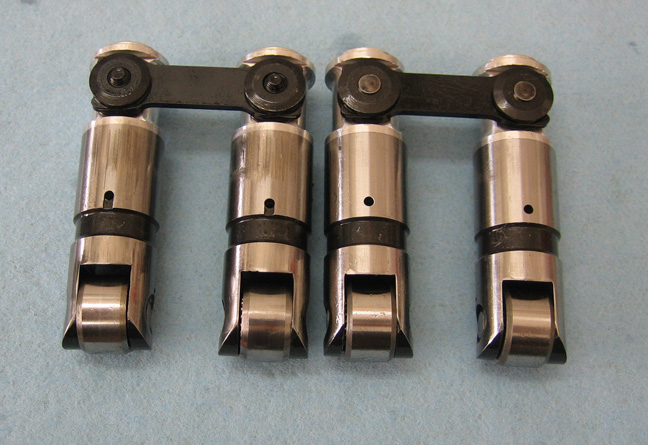
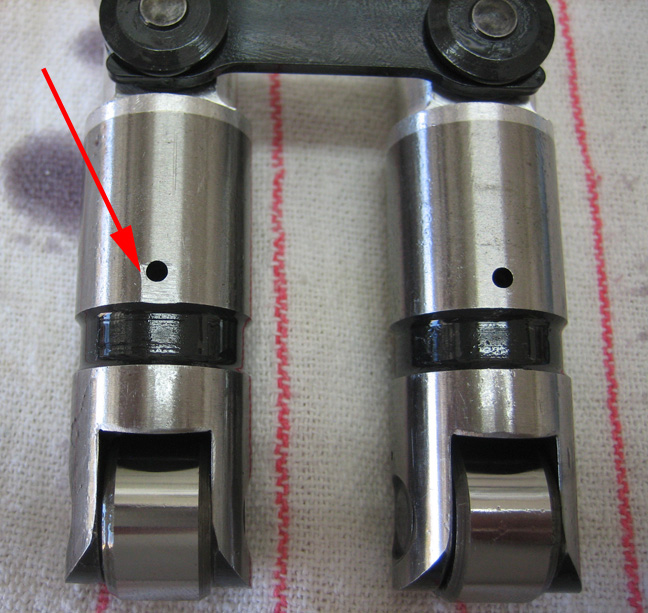
I couldn't believe what I was seeing and could only wonder why this was happening. Then it hit me what it might be....my new rebuilt lifters?? I hated to even think it, but that seemed to be the only explanation. I tried priming the engine two or three more times, trying to get some...or any oil... to those rockers so I didn't have to take stuff apart that I just put together just minutes before.

As I sat there sitting next to the car looking for an answer, I couldn't believe that I was getting ready to take apart most of my engine....again.

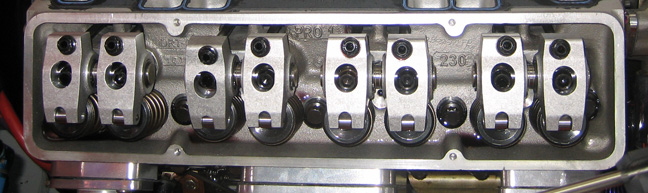
Notice the rev-kit has been removed here. Also notice the four lifters are not in the engine on the left side anymore. Son-of-a-bitch!! This was enough to piss off the good humor man.


Note the slots in my old lifters on the left and none on the new ones. I called Isky about the lack of oil on the top end before pulling all this apart because I wanted an answer. They told me that they could send me some others that were of a newer design or I could send the ones I have back and they would modify them. After talking with them I found out that Isky puts a very small slot in the new ones but only .003 to .004 deep. He told me that I could do this with a file if I wanted.

I had a couple of options here but I was so mad at having to take apart the motor again that I didn't want to go through the whole process of shipping my old ones back, having them do the work and then shipping them back so I decided to work on them myself and see what happens.


The guy at Isky told me that I didn't need much of a slot and going to far would oil too much. To me that means 'be careful' so it was time to make a small slot. I put my plastic soft jaws in my vise, placed a shop towel between them and lightly clamped my lifter with the oil hole facing upward.


I took a reading with my micrometer before starting and made note of what the lifter body measured. With the number in mind I slowly filed the area between the oil hole and oil groove till it was.003 deep. After blowing it out with some compressed air, I put all of the valve train back in to see if I had any oil on that one lifter. Well hot damn, we've got oil.

The amount of oil wasn't quite as much as the others so I decided to go a little deeper with the slot. Once again I took the valve train apart, removed the one lifter and made the slot .004 deep this time. Once it was back together the oiling was just what I wanted and matched all the others.


This is what it took to get oil to the top end. That small flat was the difference between having no oil at all to having enough to match the others. The guy at Iskenderian was right about keeping the slot small because this worked and was really easy.


The three rockers that didn't have any oil are shown with the arrows. The rocker on the right is the one I put the flat on which worked out great, well except for taking everything all apart of coarse. Now it's time to work on the other three lifters and start putting the whole thing back together again. Oh I just remembered one thing....before I can put the intake manifold back on, I'll need to get back online and order another set of intake gaskets (unbelievable... as I shake my head one more time while I'm typing this).

One other thing I thought I'd mention was about installing the remainder of the rocker arms. As you already know I started with the number one cylinder and then worked my way across the head, one cylinder at a time. To make it easier for me to install them, I rolled the motor over till I had the cam lobes out of the way and then screwed in the two rocker arm bolts. If I didn't do it this way I would end up tightening the bolts down and compressing the valve springs at the same time which isn't good for the threads in the heads.

Once I had two cylinders done I tried to roll the motor over to get the cam in place for the third cylinder but I found it very hard to do. I was fighting two valve springs at the same time which made it very hard to roll the motor so I decided to hook up my remote starter switch and let the starter do the work.  I used this method for the remainder of the rocker arm installation because once I had mutable valve springs to deal with, they added up to some huge pressure. You know the old saying, work smarter...not harder.


I sure hope these new rockers work good because I like many things about them including, how there built, the pushrod geometry, how much material each one has (for strength) and it's easy to adjust them. If they work half as good as they look, then I should be good to go!

Speaking of adjustments, valve lash is something that's easy to do but how do you set it correctly when the engine is cold and your spec sheet calls out a certain dimension while hot? For accuracy with a cold engine and a solid lifter camshaft, you need to compensat for heat expansion with cold lash settings. With an iron block engine with aluminum heads like I have, the chart below recommends subtracting .006 of lash from the recommended hot settings.


Valve Lash Compensation Table


Block Heads Lash Compensation (inches)
Iron Iron +.002
Iron Aluminum -.006
Aluminum Aluminum -.012


1  2  3  4  5  6  7  8  9  10