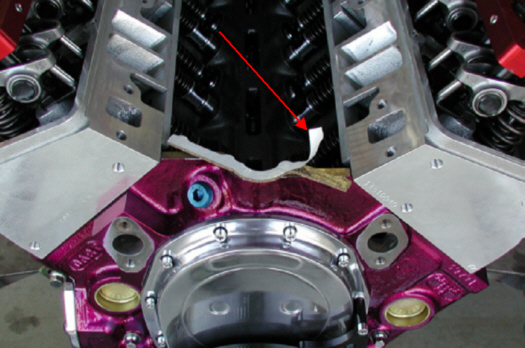
Now that the intake manifold is ready,
it's time to lay down some gaskets. These Fel-pro gaskets have adhesive
backing which makes installing them easy. The sticky side will go
against the block but the other side gets a small amount of RTV sealant
in the corners. The sealant is also used around the intake ports and
water jackets on the head side only. The gaskets have a "raised
bead" that goes against the manifold so no sealant is needed
there.
|
|
|
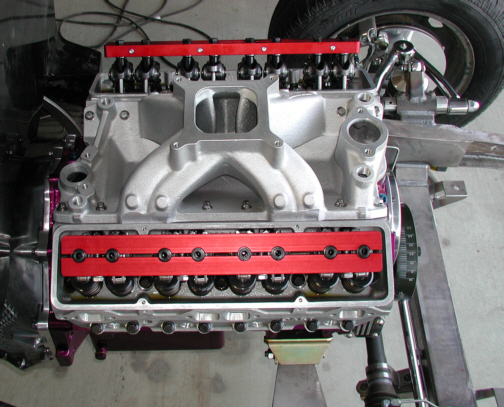
Here we are with the manifold
installed and tightened down. It's starting to look more like an engine
all the time. I'm going to be installing some Aluminum pipe plugs in the
front (1/2" pipe) and rear (3/8" pipe) of the manifold which
carry water. I will be using one of the two rear holes (3/8 pipe) for my
water temp gage later on so only one of these gets plugged. The location
of this hole is in a good place to run the line for the gage because it
doesn't have to run the length of the engine and will look a little
cleaner this way. I'll cover this at another time.
|
|
|
| 9/12/03
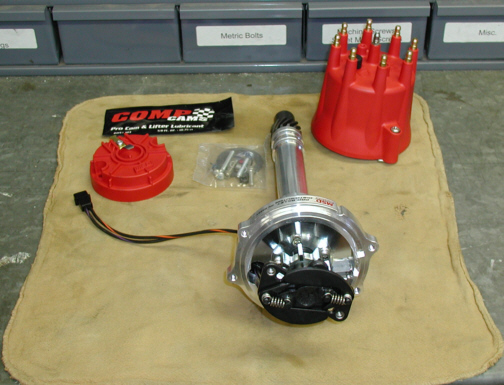
Now that the intake manifold is on, I can install
the distributor. The first thing I have to do is swap out the cam gear.
The reason is because the cam is made out of billet and the gear that
comes with the distributor works with everything except that
one.
|
|
|
The one I'll be using is made out of
bronze which is softer than the stock one and will wear better. If I
used the stock one, I'd have problems very early on so we don't want
that. This is an easy change so let's get started.
|
|

|
|
1 2
3 4
5 6
7 8
9 10
11 12
13 14
15 16
17 18
19 20
21 22
23 24
25 26 |
|
27
28 29
30 31
32 33
34 35
36 37
38 39
40
|