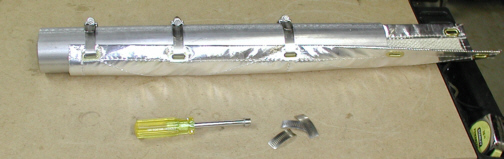
This is what it looks like clamped in
place on a scrap piece of tubing. Now
I don't need a full two foot piece just to protect those wires so I'm
going to cut it but I have plans to use the rest somewhere else. Notice
that I cut the clamps so they fit a little better. This is because the
kit fits up to a 3 1/2" tube and mine are only 2 1/2" diameter
which had the clamps way to long for my liking.
|
|
|
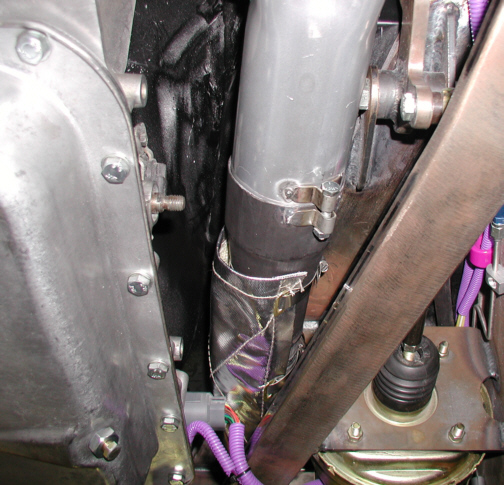
After cutting the material a little
shorter, this is what it looks like installed. Notice how it doesn't fit
tight against the tubing. Thermal-Tec recommends that you leave a
1/2" air gap between the tube and material to work best. I'll have
to see if those wires stay cool enough when I start the engine up again.
If not, I can always put the remaining piece over the wires themselves
for some added protection. Not much room between the wires and tube
....now is there!! I may add some insulation to protect the power brake
booster if it gets to hot so we'll see about that later too.
|
|
|
| 3/21/04
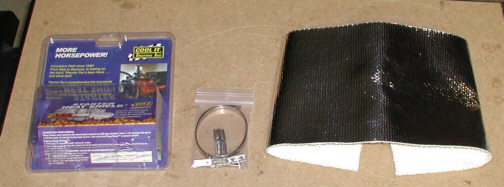
I had my exhaust apart the other day to add this insulation to both
sides (top and bottom) of the mufflers. The reason is because the
mufflers rest on the top and bottom of the chassis's X-member. What's
the big deal you ask? Well after talking to my buddy Gary, he suggested
that there should be a gap between the muffler and chassis so it
wouldn't resonate through the car. I had bought this kit from
Thermal-Tec
which is made for insulating a starter but I was going to cut it into
small pieces for what I needed. The kit comes with a piece of material
that is 12" X 18" and is made out of the same stuff as the
exhaust insulation is in the above picture. It also comes with a band of
stainless steel that is 3 feet in length and five clips. What you do is
cut the stainless band to whatever length you need, then slide a clip on
one end which only goes on a given amount. Now you take the other end of
the band, slide it through the other end of the clip and pull it tight.
The band has small cut-outs in it and the clip has small barb-like teeth
that fit into the cut-outs for a nice tight-locking assembly.
|
|
|
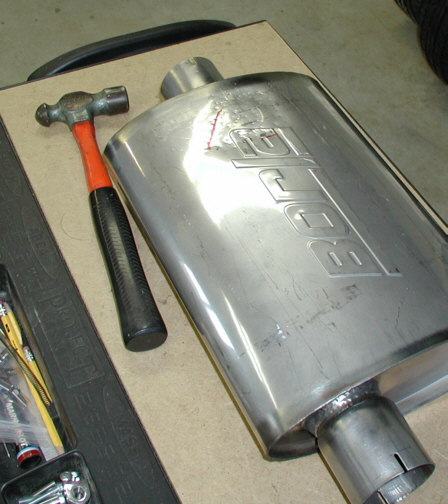
What you see here is some clearance being added to the
mufflers. I had to dent the can in a small area to make room for the
insulating material to fit. The dented area that you see rests on the
driveshaft hoop bracket which is 1/4" thick but because my chassis
has only 4 1/2" of clearance and my muffler is 4 1/4" at the
largest point, I had no room for my insulation. This gave me just enough
room to add a piece on top and bottom.
|
|
|
|
1 2
3 4
5 6
7 8
9 10
11 12
13 14
15 16
17 18 19
20 21
22 23
24
25 26
27 28 |
|
29 30
31 32
33 34
35 36
37 38
39 40 |