|
Working With Wood Continued
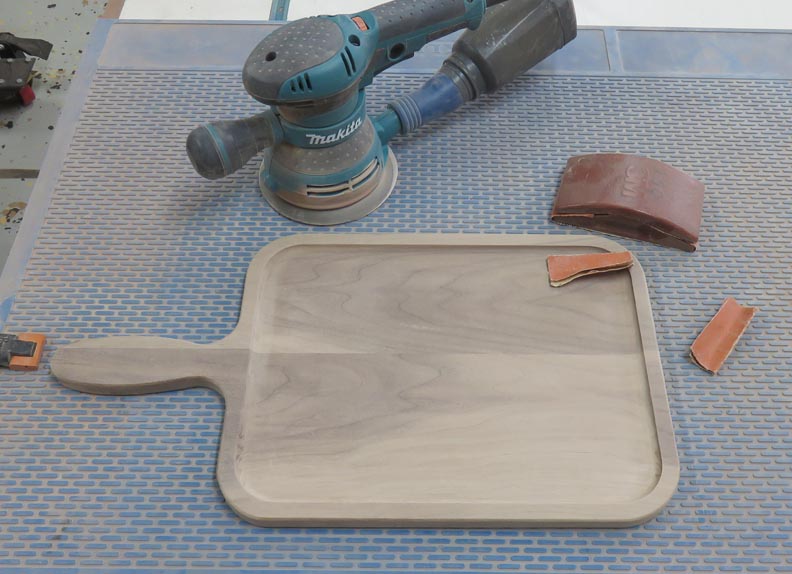
After sanding everything, I put a small 1/8" radius around the
periphery using my router table.
|
|
 |
|
I did a test piece out of pine to see how the router
fixture worked. Everything checked out great, except when I was plunging
my cutter into the wood. This type of cutter isn't the best at
center-cutting. So I thought if it doesn't cut soft pine very well, then
it will have a "really hard" time with the walnut.
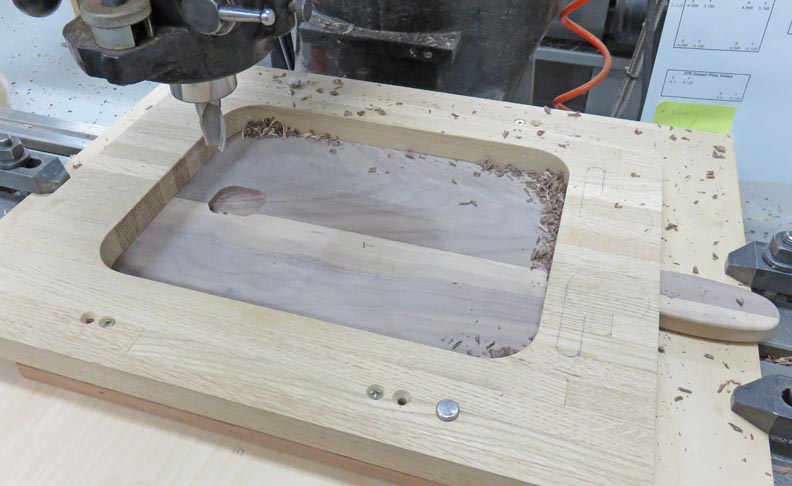
With this thought in mind, I decided to make a pocket
for my router cutter to start at. Here I'm using a 3/4" end mill and
going .240" deep (just shy of 1/4") as a starting point.
|
|
 |
Here is a close-up of the pocket that I did free-hand.
|
|
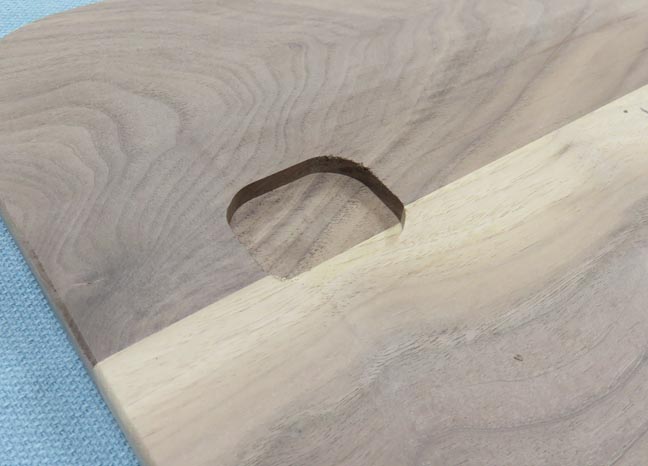 |
This worked out really well and didn't strain the cutter or myself in
the process.
|
|
 |
|
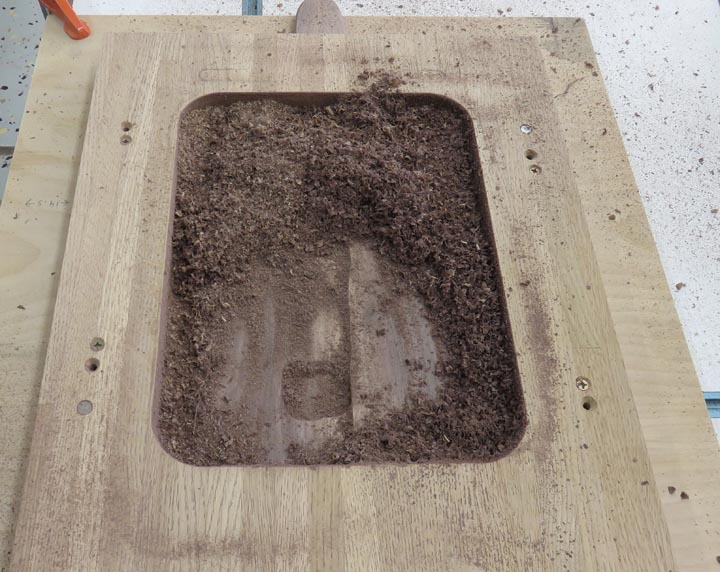
The amount of wood chips added up very fast here. And if
you look close, you can see I've only gone halfway because I had to
vacuum all that sawdust (line down the center).
Once the sawdust was gone, I was able to finish at this depth of 1/8". Then I used the vacuum again, dropped down to my final depth of
1/4" and repeated the process again.
|
|
 |
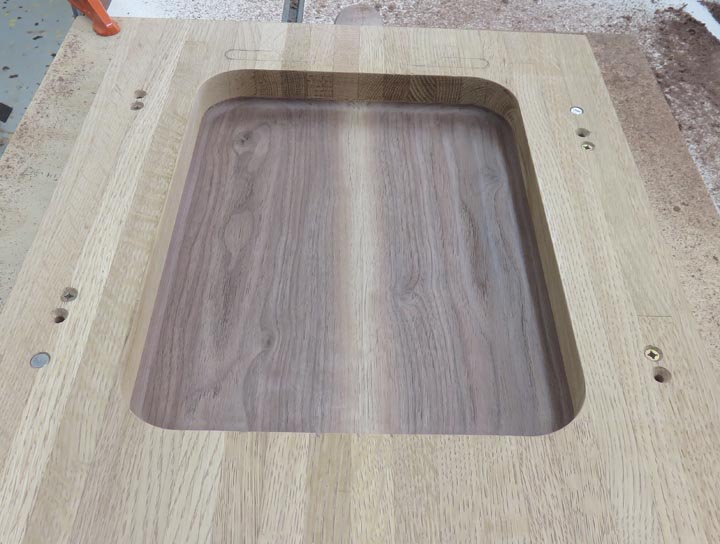
Here is what it looks like when I was done with the router. This process
took awhile because there was a lot of material to remove and clean-up
along the way.
|
|
 |
Next I sanding in the middle using my DA sander, along with some hand
sanding.
|
|
 |
|
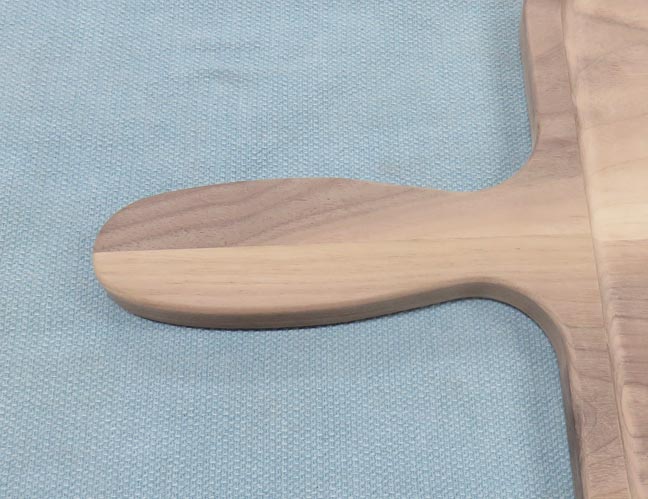
Now that all the sanding is out of the way, I'm going to
put a hole in the handle so it can be hung if anyone wants to. The hole
size will be 1/4" diameter, but I'm gong to add a little extra in the
way of a brass insert here. This brass piece will be about 1/2" diameter
with the 1/4" hole in the center of it.
|
|
 |
|
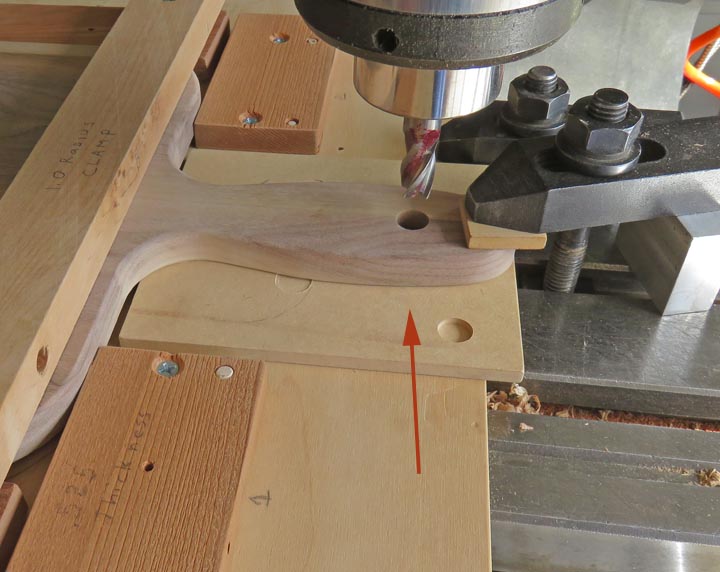
After looking at some of my end mills, I found one that
was .475" diameter (just under 1/2") which will work great for this. To
make sure I don't have any tear-out when the cutter goes through my work
piece, I'm using some sacrificial MDF under it again (arrow).
|
|
 |
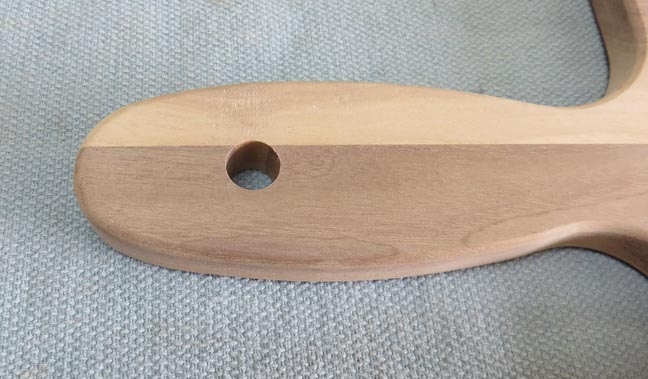
And there we go, I'm ready for my brass inserts. Now it's time to dig up
some material and make my inserts.
|
|
 |
|
1
2
3
4
5
6
7
8
9
10
11 |