|
I'm going to make a few charcuterie boards (serving
trays) as Christmas presents but I had a hard time deciding what shape
they should be. Now I've seen many different variations of these boards
over the years, some I've liked and some that I didn't. But after doing some sketching, I came up with
the design that you see below.
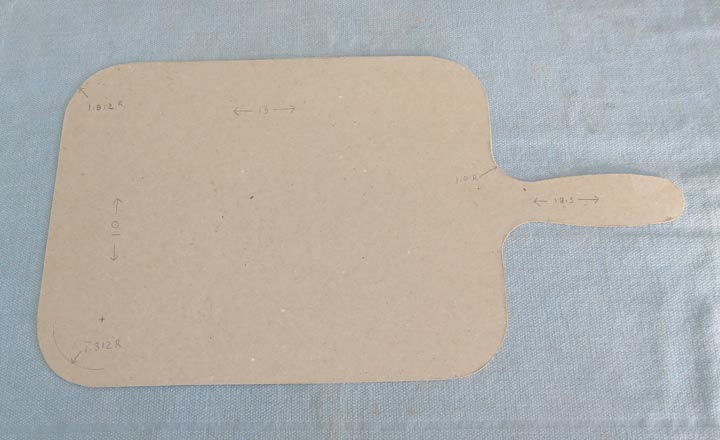
This piece of cardboard is full size, which helps a great deal to
visualize what your project will look like compared to just numbers on a
piece of paper. And I've done this sort of thing many times over the
years so this isn't something new to me.
The size of the trays will be 18.5" long overall
(including the handle) and the thickness will be about 5/8", but the serving
area will be 13" X 10". The four corners will have a 1.812" radius
(1 13/16") and the radius next to the handle will be 1.0".
Also, the serving area will be recessed 1/4" with a .250" radius at the
bottom, but there will be a 1/2" flat area between the serving area and the
outer dimensions all the way around.
|
|
 |
| Making A Multipurpose
Fixture
This fixture will be used to perform four different
operations. The first and second operations will be used on my milling
machine, the third will be used with my router and the fourth will be back
on my mill. On the milling
machine, this fixture will be used to machine in the 1.0" radius next to
the handle. The other operation will be to cut the short straight
section next to the handle that will tangent into the 1.0" radius.
Then it will used as a router fixture to put in the 1/4" deep recess.
Last it will be used to add a hole to the handle.
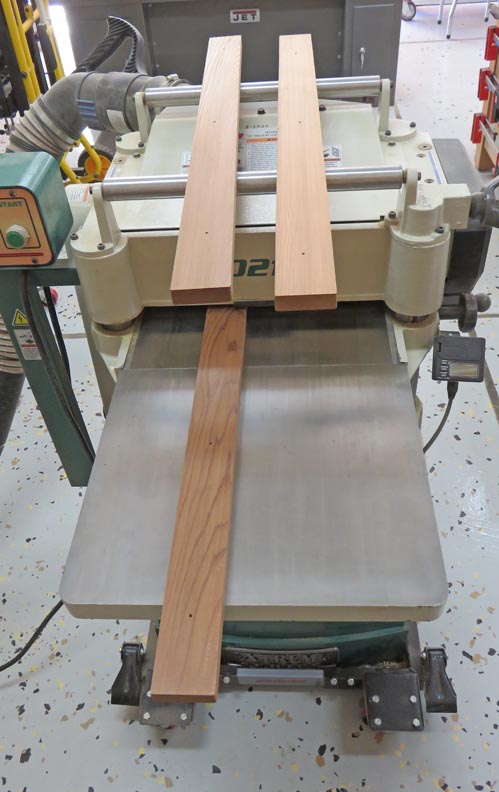
The pieces that you see below are going to locate the
trays on all four sides. Here I'm running some redwood through my
thickness planer down to about 1/2", which is just undersize of what my
trays will be. Why redwood? I had it laying around so I thought I'd use
it.
|
|
 |
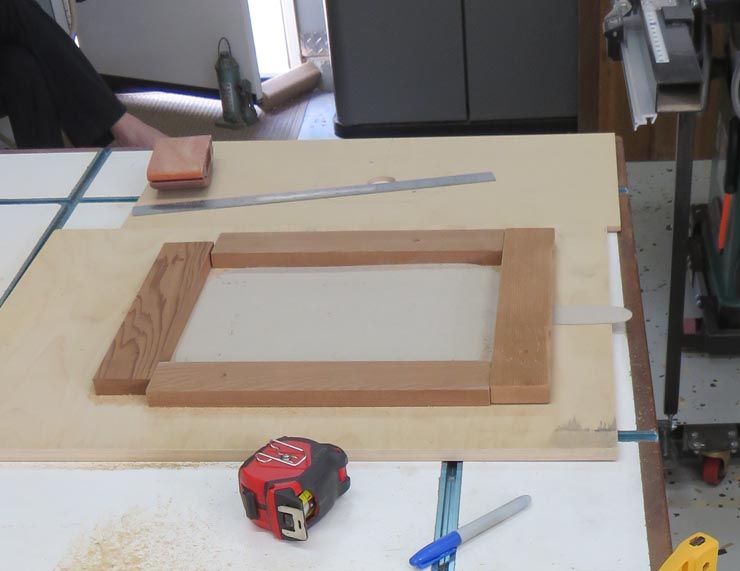
I'm using some 1/2" plywood to mount everything on. And if you look close,
you can see my cardboard template below.
|
|
 |
|
I cut a piece of pine to use as a setup piece to help
locate my redwood pieces on all four sides while I screwed them in
place. The size of the pine is 13" X 10". I used some steel parallels
that are 1/4" thick to help locate some of my side pieces so they
are equally spaced.
|
|
 |
|
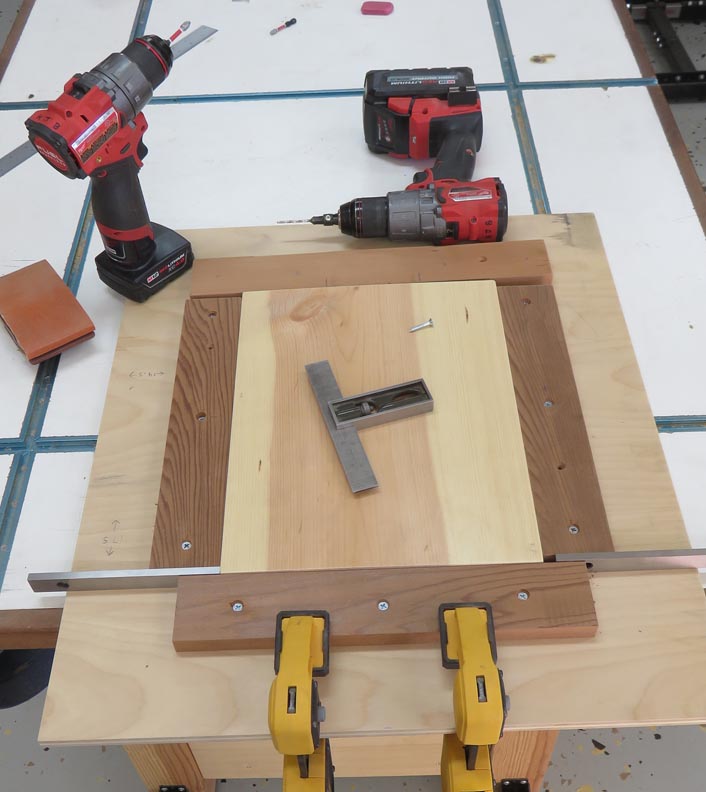
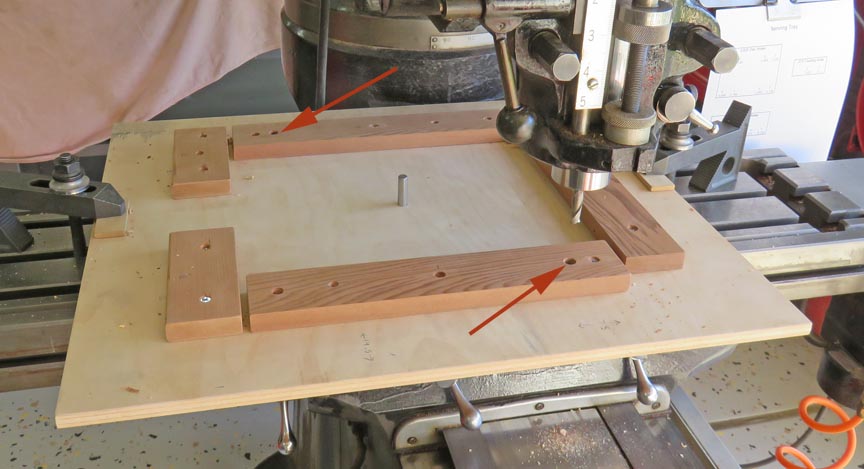
A couple of things are going on here. First notice the
cutout on the left side. This is clearance for the handle when the times
comes. Also, I'm putting in two 3/8" diameter holes for some dowel pins
(arrows). These pins will locate the clamp plate or template, that goes on top. I'll
talk more about this top piece later.
|
|
 |
|
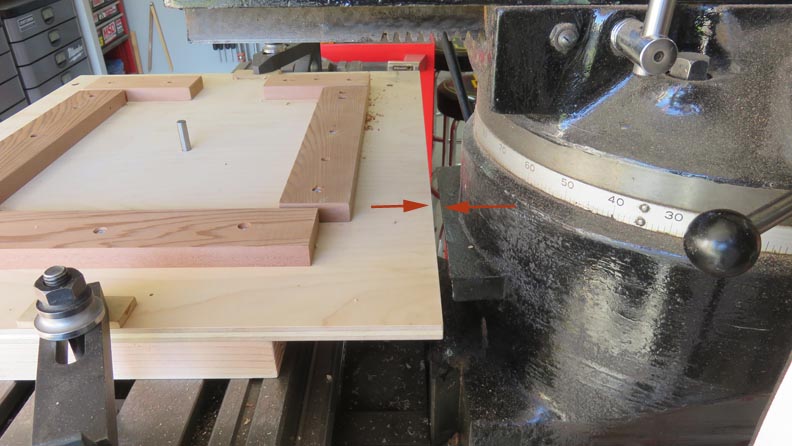
I wasn't able to drill both dowel pin holes in one
setup because my milling machine doesn't have enough travel in the Y
axis. That meant I had to indicate my fixture square first, then
indicate the pin in the center, which establishes my X and Y zero, then move to
the
location of the dowel pin hole. Also notice how close my fixture is to
my milling machine (arrows). This took some planing because of the
amount of travel in my Y axis and how big my fixture is.
|
|
 |
|
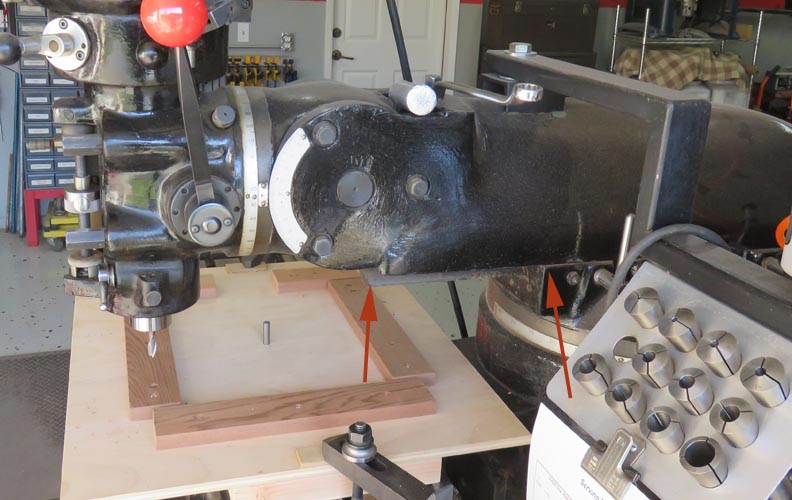
Then for the second of my two 3/8" dowel pin holes, I
had to move the ram almost all the way out (arrows), indicate the
fixture square, then indicate the center pin once again (which
establishes my X and Y zero), and then move to my second dowel pin
location. This works just fine but does take extra time.
|
|
 |
|
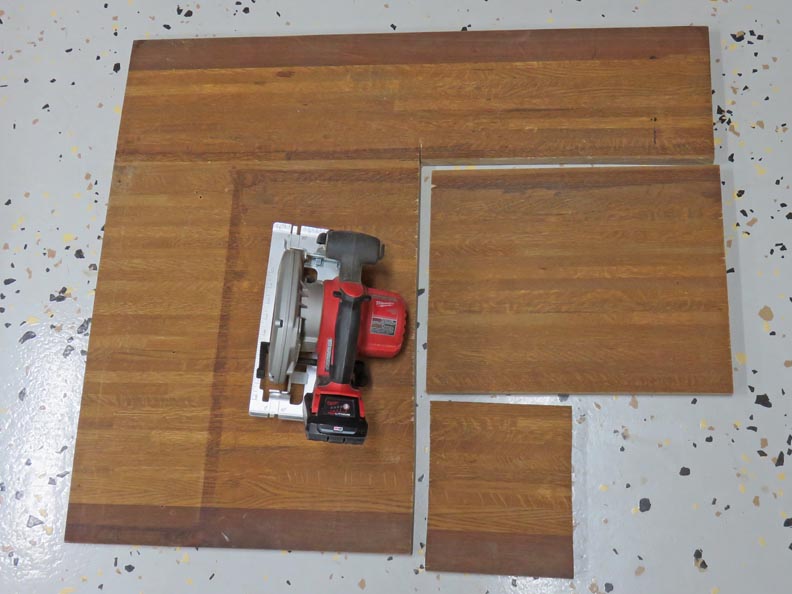
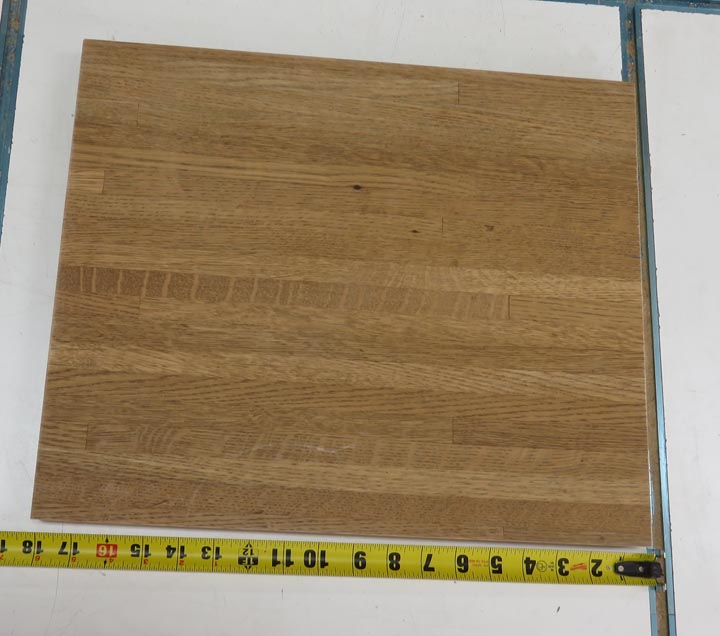
This is what's left of a solid oak desk top that I've been
using for a few years now. The thickness of this desk top is over one
inch and it's very heavy. I cut out a piece that will be used as the template
for my router
fixture.
|
|
 |
The size of the fixture top will be 18 X 15" when finished.
|
|
 |
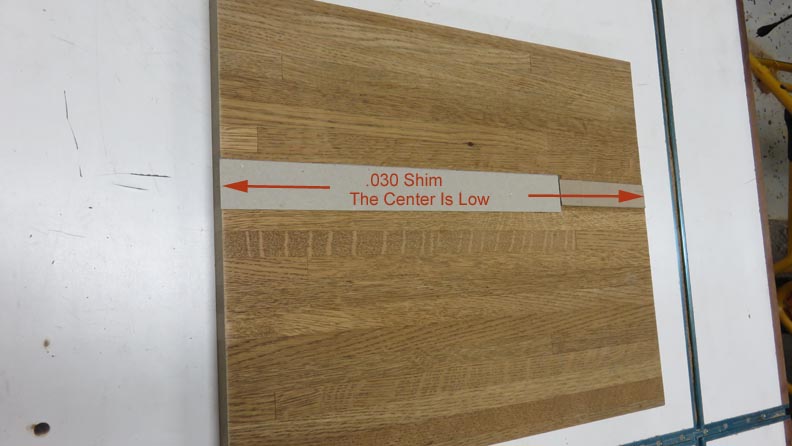
I wanted the top to flat but it had a bow in it. I glued some cardboard
shims to the low section which will help keep the middle from being
pressed on when it goes through my thickness planer.
|
|
 |
|
1
2
3
4
5
6
7
8
9
10
11 |