|
Car Parts Lamp 1
02-2018
|
I was in the garage a few weeks ago, just looking around for
something to work on and I came across my old camshaft from my
33 Ford
Coupe. Once I saw that box I brought it over to my work bench and
started reminiscing about some of the good times I had while driving the
car and all things engines too.
Now this is the cam that I had to replace, along with a
few other pieces because I had some
valve train problems
in 2014. Once my mind settled down and came back to the present,
I started thinking how cool it would be if I could make a table lamp out
of this cam. But.....to do that I would need to drill a hole through the
center for the electrical cord to pass through. I mean technically, I
could route the cord behind the cam, say through some kind of small
metal tubing that was attached in some way. I suppose there are a few
ways to run an electrical cord if you think about it, but through the center
would be ideal.
A little history about camshaft materials:
Most cams are made out of cast iron that have been heat treated at the
surface, and are much softer everywhere else. This would include
hydraulic flat tapped, sold flat tapped and hydraulic roller cams (with
the latter inside
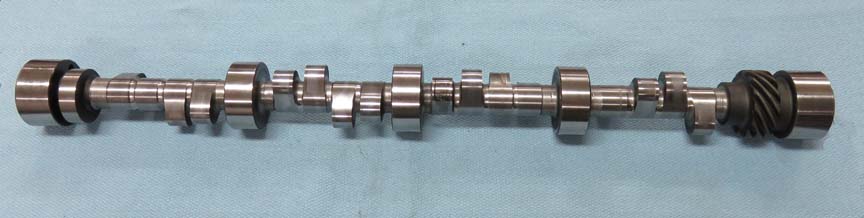
most modern cars today). However, my camshaft happens to be a 'solid
roller' and most of those are made from a solid piece of tool
steel (billet). What kind of steel you ask? There are a few different kinds but
most are made from 8620 or 8650 steel that is heat treated. My
cam is made from 8650 and is
very good material, which is a good thing if you want it to last. Yes I
know... mine didn't last (on the street that is) but that's another story for
another time.
Anyways, I was thinking of a way to put a hole through
the center of this cam and decided to test the outside of it with a
file. Now a file is very hard and if you can remove material by
running it across a given surface, or if you can put a nice scratch in
something, chances are you'll be able to machine it. However, when it
came time to test the surface of my cam, it was really hard, which meant
I wasn't going to be able to drill it. Or can I???
Knowing that 8650 (or 8620) is usually case hardened, I
had high hopes of being able to drill the center of it. Case hardening
is a process of having the outside of the material very hard, but the
center is not, meaning that I might be able to work with it. Now this
doesn't mean the center is soft, not by a far cry. The center will still
be very tough, but workable, if I take some precautions and work smart.
|
|
 |
|
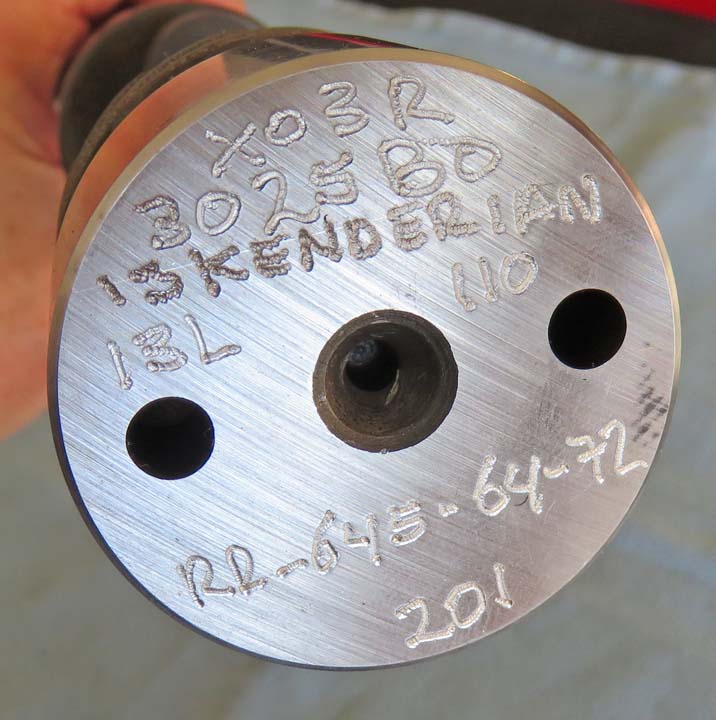
My camshaft is made by a company called 'Iskenderian'
and this is how they identified the back end so you know what you've got. This is also where
I'll be trying to drill (at the center) but first I'll need to remove
the 'center drilled area' so I can get below the case hardened material.
|
|
 |
|
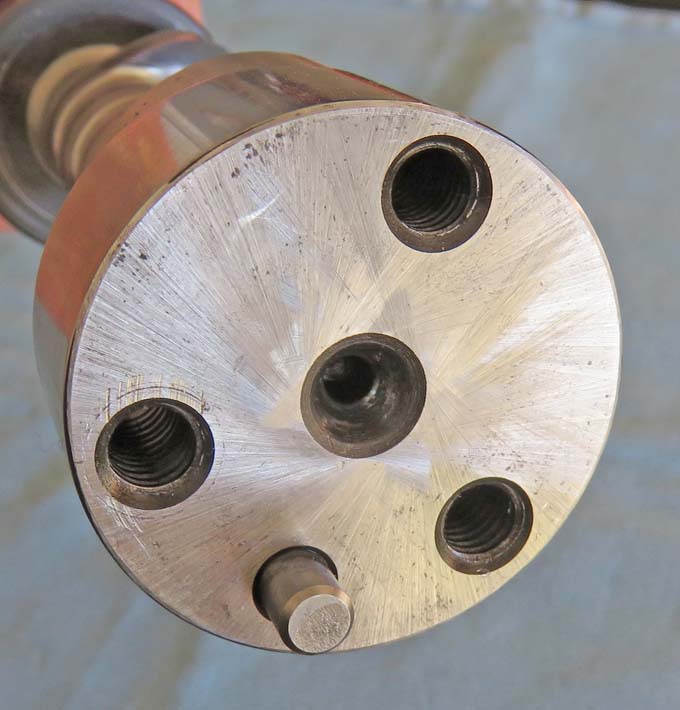
This is the front and those three threaded holes are
where I'd like to mount some lamp hardware. However, first things first,
I'll have to find out if I can work with this hardened material or not,
so it's time to do some machining. Oh, and I pulled out that dowel pin
before I started.
|
|
 |
|
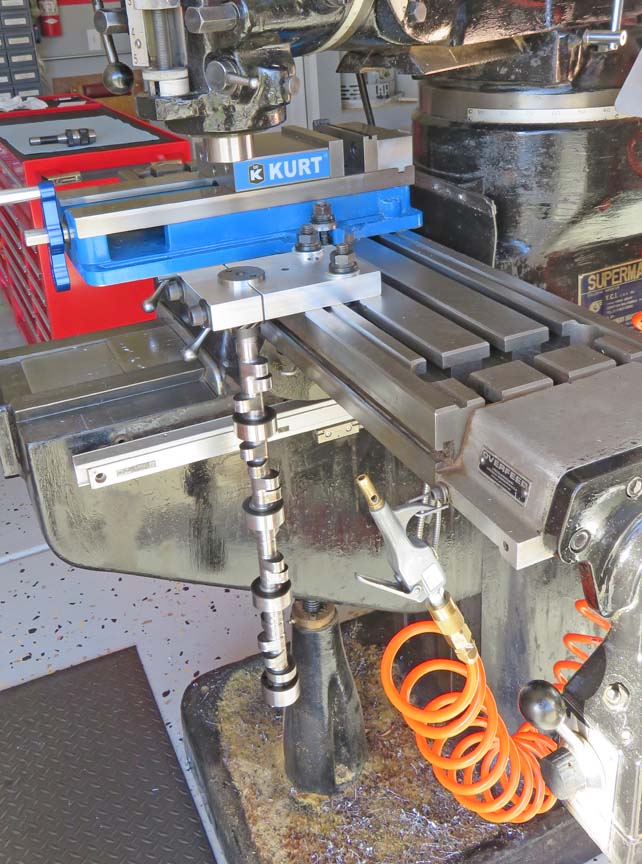
Making Tooling I plan to drill my cam on my milling machine, which
means I'll need a way to hold it before I do anything else. In order to
do that I made a fixture to hold it with. Now you may be asking, why
don't you do this in a lathe? There are a couple of reasons. First if I
used a lathe, the camshaft would need to be clamped horizontally with
the chuck jaws only holding a small portion of this long cam. This is
far from ideal because it would cause undo stress while holding it this
way. If I held the cam towards the center then the unsupported part
sticking out of the chuck jaws could chatter, which is another bad
thing. Anyways, let's see if this is going to work?
|
|
|
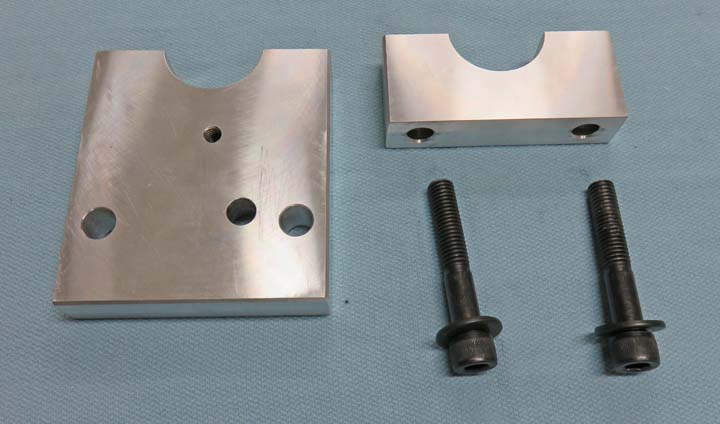
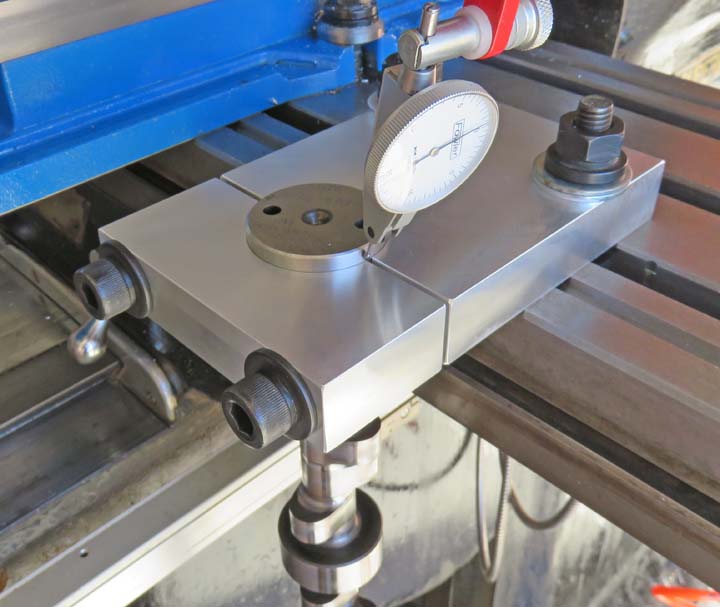
I bored a hole that was the same size as the cam bearing
journals, which is 1.868" diameter. Then I saw-cut through the center
and machined both surfaces flat. I also drilled and tapped two 1/2-13
threads on either side of the bored hole to clamp it with and used some hex bolts along with hardened
washers. The fixture will bolt to my milling machine table through two
1/2" holes (arrows) and the cam will hang over the edge of the
table. The other holes that you see are not going to be used for
anything, they just happen to be in this piece of material.
|

|
|
Drilling A Long Hole This should give you a better Idea of what I'm doing. I
had to turn the head of my milling machine to about 25 degrees and I had to
move the ram almost all the way out so it would reach my tooling. And
yes, I know the bottom of my milling machine is dirty with sawdust but
that helps soak up the way lube oil that runs down there.
|
|
Once I had the milling machine tightened back down, I used an indicator to find
the center of my cam.
|
|
|
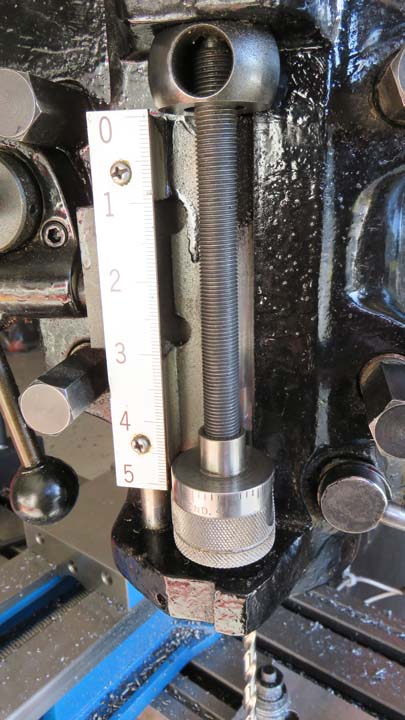
As you can see, my milling machine has less than five inches of travel on
the quill. This won't be nearly enough to drill through the cam....not
even halfway, so how am I going to put a hole though it? Well I
thought of this before hand and I plan on drilling a small amount at a
time and then remove the cam from the tooling and repeat. Keep reading
and it should make sense soon.
|
|
|
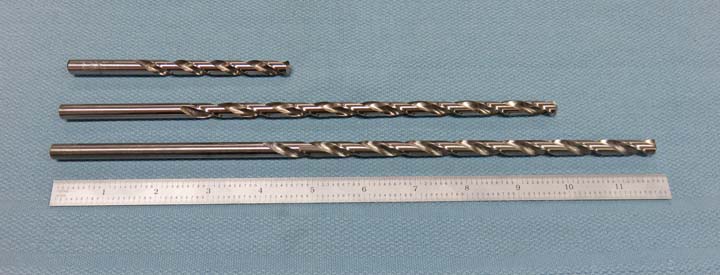
I'll be using a 5/16" diameter drill for my electrical wire to pass
through which should provide plenty of clearance. I also plan on
drilling halfway through and then turn the camshaft over and repeat the
process. In order to do this I'll be starting with a jobber length drill
(normal length), which is the shorter one.
The length of the cam is 21 1/2" long, which is why I'll need the longer
drill. The reason I'm using the short one first is because it's more
ridged than the longer ones and helps keep the hole straighter when I
start. After that I'll be switching over to the 10" drill and then
finally the 12" if everything goes well.
|
|
|
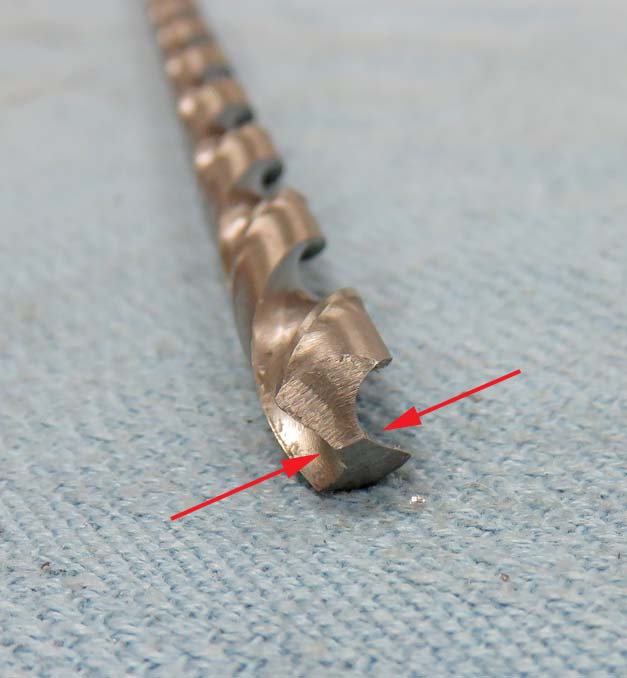
Here is the 10" drill and notice how thick the web is (between the
arrows). This is how most drills are made and would be fine if I were drilling something soft, like mild
steel or some stainless steels. However, this isn't the best way to go
if you have some tough steel like I have. Why is this a bad thing?
A little history about material again: If you remember earlier I
mentioned the type of steel my cam is made of along with it being
case hardened. This leaves the center softer...yes...but it also leaves
the center very tough. Why does this matter? Because if you don't drill
this tougher material with authority (lots of pressure), it will 'work
harden' on you. And if it work hardens while you're drilling, it's very
difficult to get through that section of material again.
What is work hardening? It's when you have good steel that can be heat
treated, and you let your tool (in this case my drill) dwell for just a
moment, that area the tool is touching will turn into glass (a machinist
term for very hard). In other
words, it will harden that area "right-then-right-now", leaving you with a
problem. Now normally you would drill nice and easy taking your time
letting the drill do the work, which is what you should do most of the
time, and is standard practice. However, this isn't your everyday steel
we're dealing with here so you need to change your drilling habits
accordingly.
|
|
|
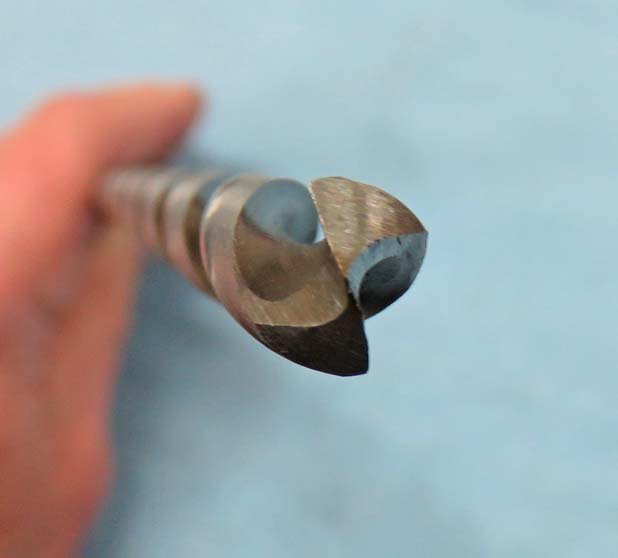
One way of helping the cause here is thinning the web of your drill. This
helps reduce tool pressure resulting in drilling more freely. This
method isn't used on everything, just in special cases. Now this is a
very easy procedure to do, and anyone can do it if they have a bench or
pedestal grinder. By holding your drill at an angle and just touching
the web with the corner of the grinding wheel, you'll have something
that resembles what you see below. Just be careful not to remove the
drill point in the process.
|
 |
|
1
2
3
4
5
6 |
|