|
My daughter Stefanie works at a beauty salon and has her
own room for massages, beauty treatments, etc. But the headrest that
came with her table wasn't designed very well and was really
uncomfortable. So she asked me if I could help her make something
else. I was happy to work on this project and gladly accepted.
|
|
 |
|
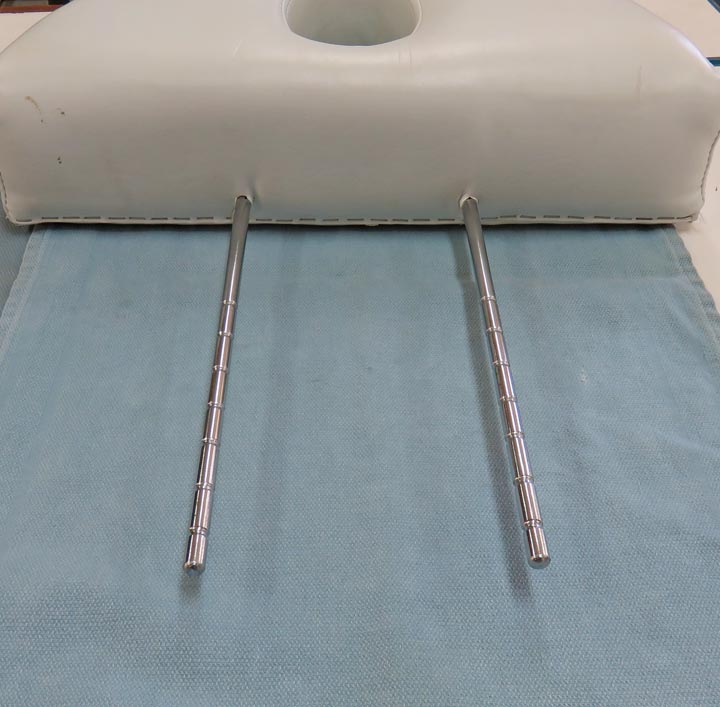
One thing I wanted to keep was the pins that were on
the old headrest because they worked with her table. So I plan on cutting these off and reusing
them but tossing the rest out.
|
|
 |
|
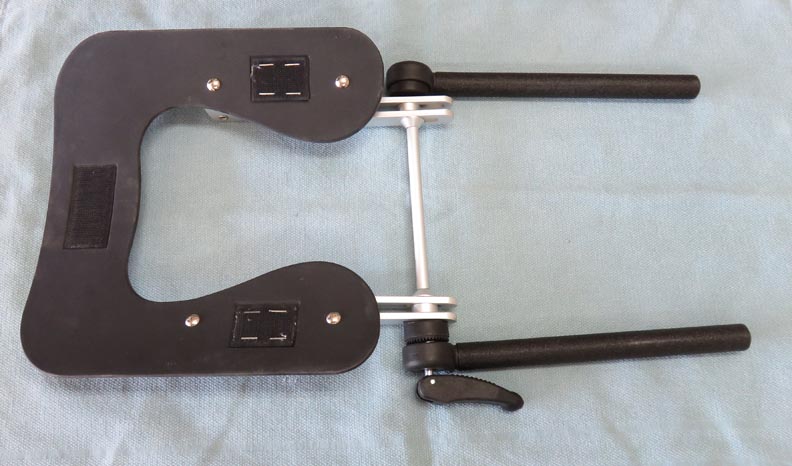
Stef also gave me this headrest, which was made for a
completely different table. But she wondered if I could somehow use it
because she had the cushion that goes on this one. And this cushion was
in good condition. One thing unique with this headrest is the ability to
fold down out of the way with the use of that small lever. This was a
must for her because the room she's in is very small. So maybe if I could
somehow adapt the old pins to this unit that would be ideal.
After looking at this one for awhile, it had some nice
features but it also had a lot of plastic pieces which is very hard to
work with if you want it to end up being strong and work correctly.
After thinking about it a little longer, I decided to keep only one
piece of this headrest.
|
|
 |
|
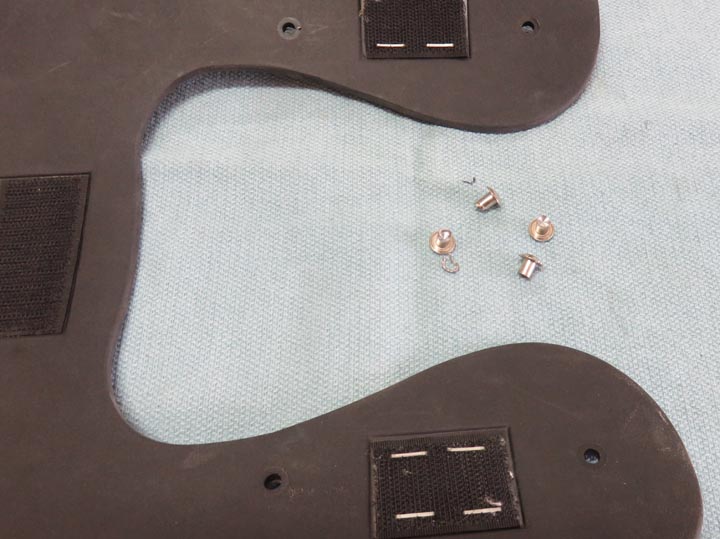
I'm only going to keep the plastic frame that the cushion
attaches to so I drilled out the rivets and removed everything from it.
|
|
 |
Here you can see the four rivets that I drilled out. You can also see
the Velcro that holds the cushion on as well.
|
|
 |
This aluminum angle that I removed is not 90 degrees, so I'll need to
duplicate this angle when I make a new one out of steel.
|
|
 |
|
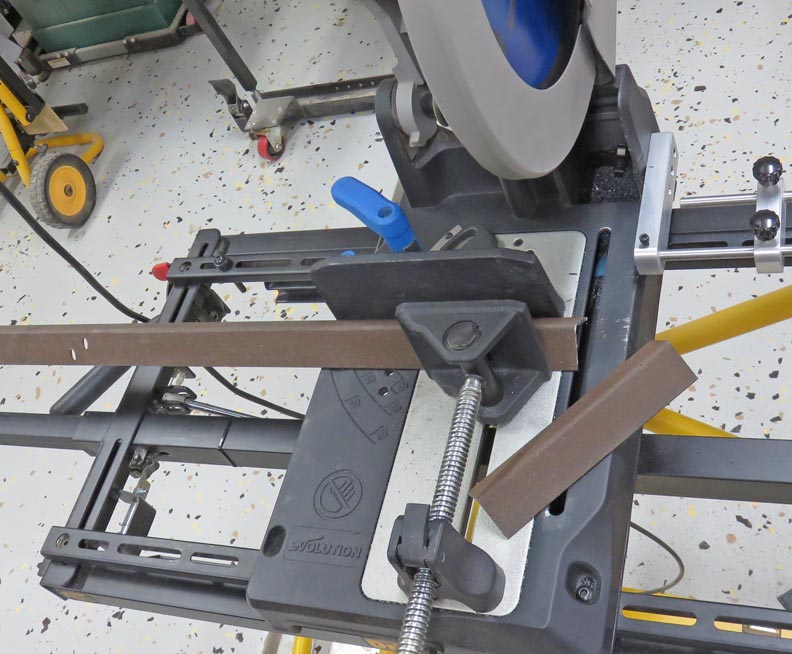
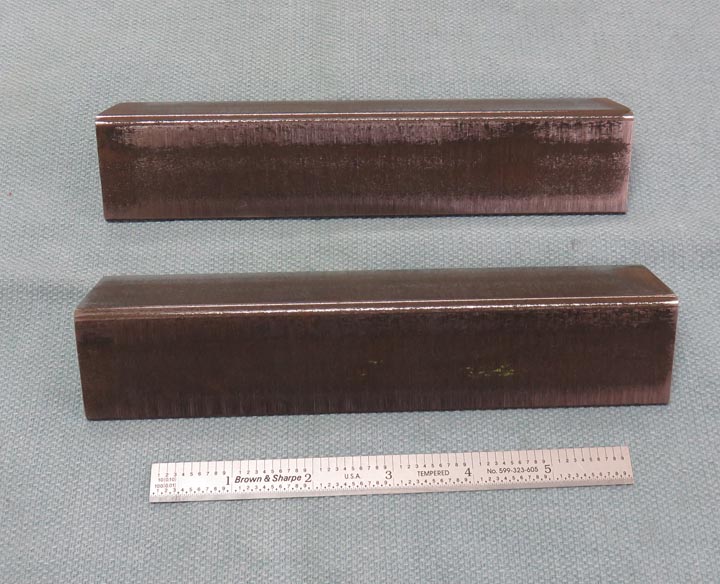
Working With Steel
I had some angle iron that came from an old bed frame laying around
and it has a wall
thickness slightly less that 1/8" that should work great for this
project. I cut off two pieces with my metal cutting saw.
|
|
 |
I used my belt sander and cleaned up the surface so it's easier to work
with.
|
|
 |
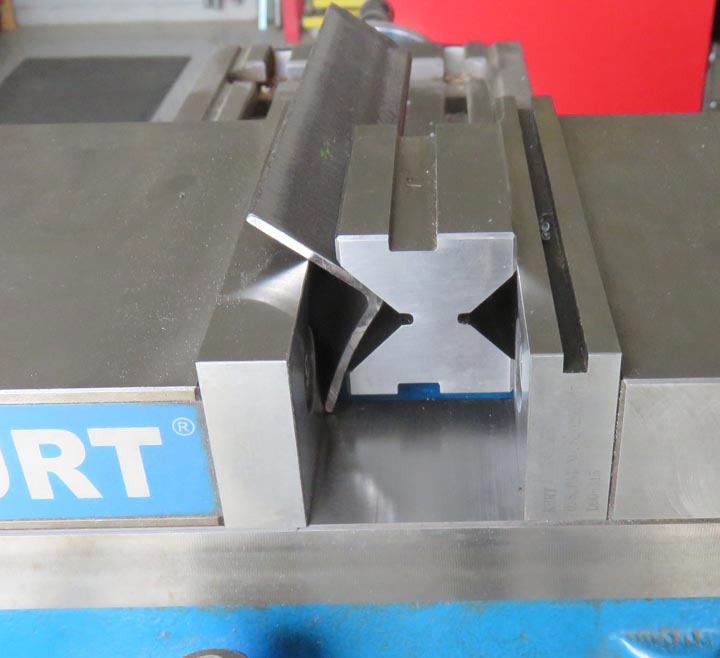
Next I needed to match the angle of the aluminum pieces so I put them in
my vise that I use on my milling machine. However, this didn't work like
I thought it would so it was time for plan B.
|
|
 |
|
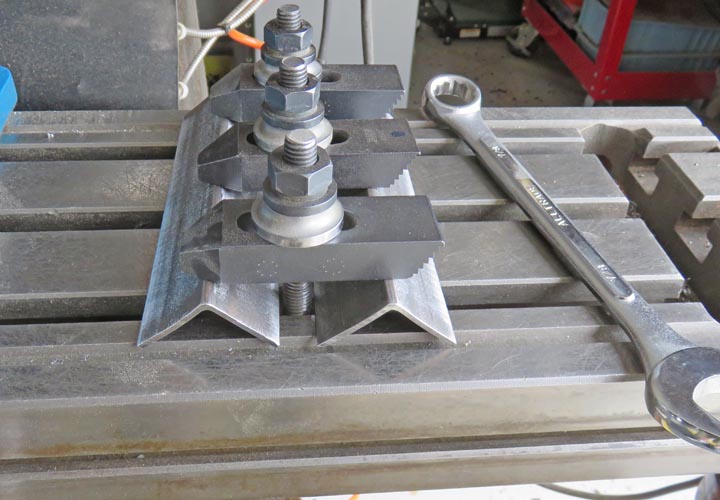
I used three toe clamps and started tightening them down
until I had my angle iron squashed pretty good. But this material wasn't bending
like I wanted and I found out later that it had some kind of heat treat
to it. Now I had
to scratch my head at this because heat treated bed frames was new to me. But after a few times
back and forth with the clamps and doing some measuring, I had both bent like I wanted
them.
|
|
 |
|
1
2
3
4
5
6 |