|
I made a
lamp out of car parts a
few months ago for my daughter Tracey, and once it was finished I had it
displayed in our spare bedroom for awhile. The lamp came out nice enough
that my wife wanted another one when Tracey took hers home, so this is
where my new project comes from.
If you read the other lamp project then you'll know that
the
camshaft came out of my 33 Ford, which was cool because part of the car
stayed in the family. However, this lamp is getting a brand new
one....mainly because I couldn't find a used one. This new cam I bought from
Summit Racing and it was
the cheapest one I could find. That's the good news but the other news
is it doesn't go to a Chevy or a Ford, not even a Mopar, it goes to a
Holden. What's a Holden? It's an engine made in Australia and it has engine
sizes similar to a small block Chevy. At least it's a V8!!
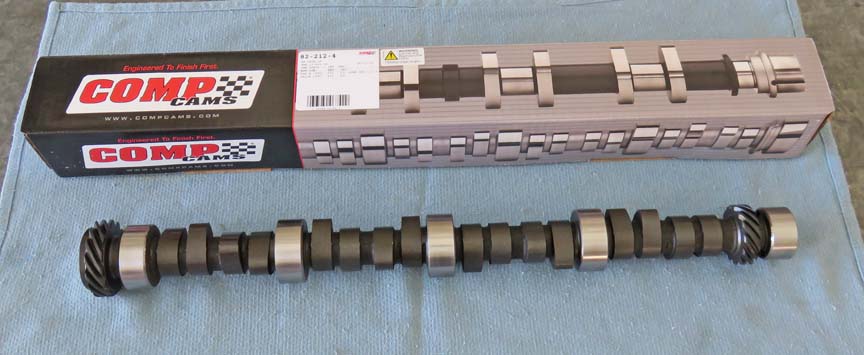
As you can see the cam is made by Comp Cams and it was
only 30 bucks. Really!! How they can make something like this so cheap
is beyond me. On the other hand, I'm fine with it. And the cam specs
have it listed as a fairly large camshaft so it's all good.
One of the first
things I noticed once it was out of the box was... it has two gears. I'm sure one of them is for the
distributor, however, the other one I'd have to guess.... maybe for the oil
pump? I'm mot sure but to me it just adds to the looks so that's good
news. The other thing I noticed right away was the different size cam journals (cam
bearing surfaces). I'll revisit this in a moment because it's an issue.
Anyways, let's get started with the project.
|
|
 |
|
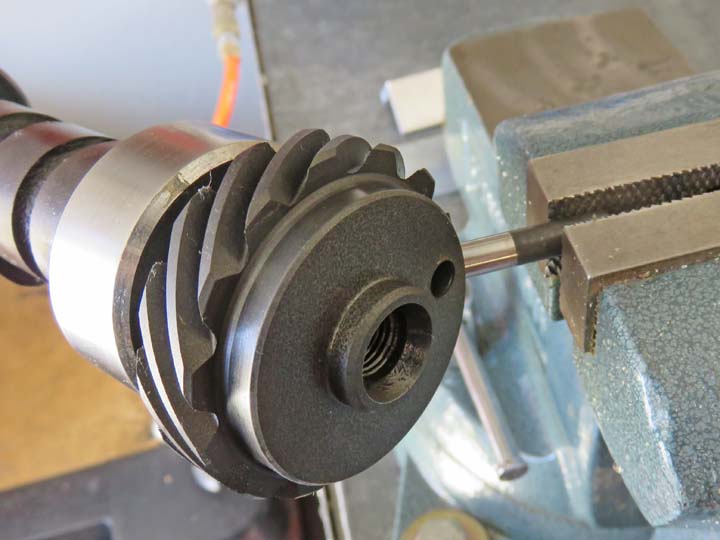
The first thing I did was remove the dowel pin that
would go to the timing set (arrow). In my case I don't have any use for it
so out it goes. This was simple to remove" I grabbed the pin in my
bench vise and hit the camshaft with a soft faced dead-blow hammer. After
a few smacks, it came right out.
|
|
 |
One thing that I found strange once the pin was out was, the dowel pin
had been plated while it was in the cam. I didn't expect this but maybe it gets
used for manufacturing purposes, like grinding the cam lobes or
something.
|
|
 |
|
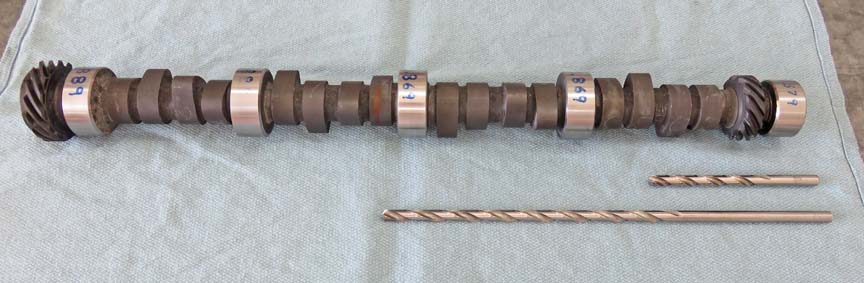
As you can see this cam has three different size cam
journals. This is a first for me and I'll just have to work with it.
Notice the two on the right side are the same size at 1.889". Note: If
you're wondering about this dimension being correct compared to the
picture, it is, the camera didn't show one of the two 'eights'
very well as it looks like a 'three' in the picture. Working our way to
the left we have two more that measure in at 1.869" and last but not
least we have one at 1.579".
This will be a slight problem for me trying to hold it
while drilling
because the ends are different sizes. However, I'll just make some tooling to
help aid in holding it.
|
|
 |
|
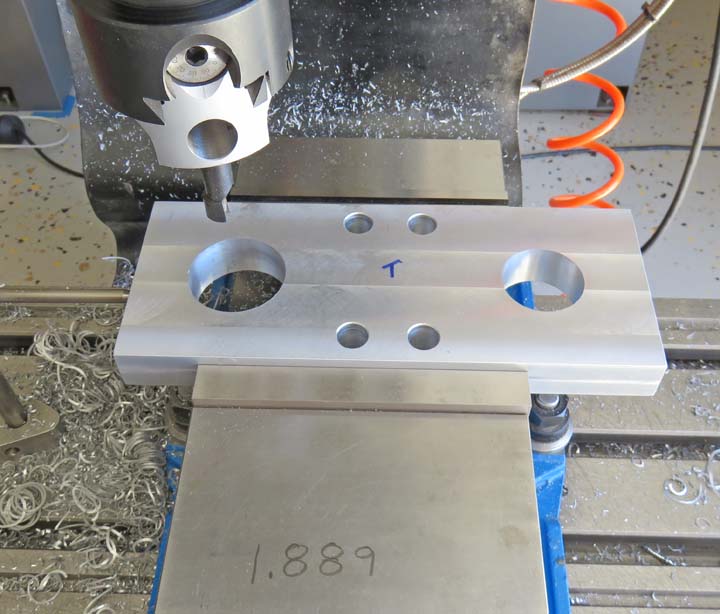
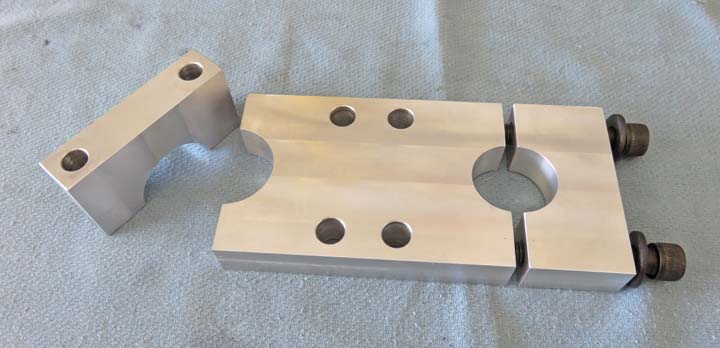
Making Tooling Here is the tooling I was talking about and notice the
two different sizes. The smaller diameter is finished and I'm working on
the larger one here. The four holes in the middle are for holding it to
the mill table. I'll only use two holes at a time depending on which end
of the cam I'm drilling.
|
|
 |
I took the fixture to my work and used the bandsaw to cut through it.
All I did was layout some center-lines and then cut on the lines.
|
|
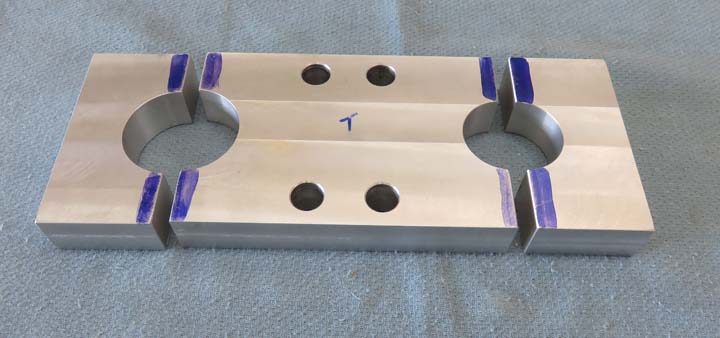 |
I drilled and tapped for 1/2-13 screws and used the bolts that I had for
my other lamp project. Now I'm ready to start drilling the cam for my
electrical wire.
|
|
 |
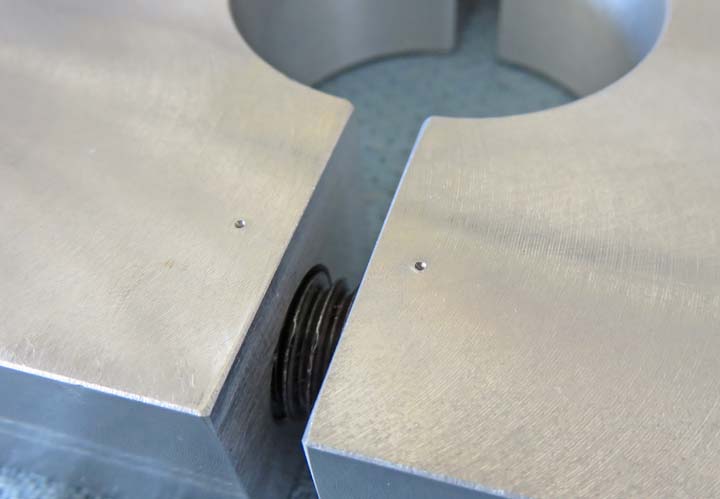
To make sure the two halves were orientated properly, I used a
center-punch and put a dot on the top surface of each one. The other end I put the
center-punch closer to one edge. Whatever works!
|
|
 |
|
Let's Drill A Long Hole
Here are the two drills that I'll be using, which are 5/16"
in diameter. The short one is jobber length (normal length) and the
other is 12" long. This is similar to how I did the other lamp and
should work great for this because this camshaft is made out of cast
iron. I used a medium length drill on the other project but I don't
think I'll need it for this one.
I'll use the shorter drill first, which will help keep
the hole straighter and then switch over to the longer one afterwards.
|
|
 |
|
Once I had the fixture bolted down, I used an indicator
to find center. Then I used a center drill to give me a starting point.
Yes there was already a center in the cam but I wanted to make sure I
started as close to center as I could. This was easy to drill and it
went pretty fast compared to my other cam. Why? Well, my other one was
made out of tool steel and gave me all kinds of problems. But this one
only took about 30 to 40 minutes to drill from start to finish, which
included both ends.
|
|
 |
|
1
2
3
4
5
6 |