|
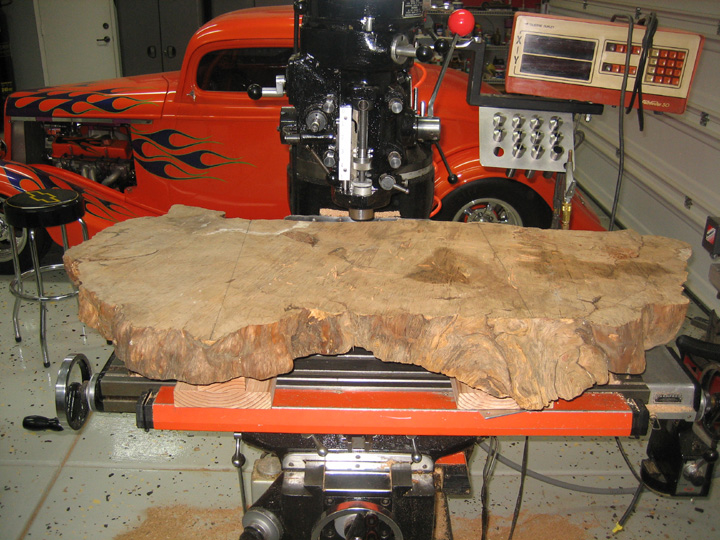
I needed a way to hold this large piece of wood to my
milling machine and because it's longer than the entire clamping area on
my machines table, I had to come up with something to hold it so I could
cut the top surface.
|
|
|
Now normally I would just clamp whatever I was working
on right to the milling machine itself but this piece of wood covered
all my clamp slots as you can see above and below. My milling machine
can move about 22" in the X axis (left to right) and about 9" in the Y
axis (in and out) which wasn't going to be close to covering the entire
surface. The good news is that most milling machines upper half can
rotate 360 degrees and the ram (which the head is connected to) can move
in and out another 12" or so. This was going to get me much closer but
still not quite enough which means I'll have to turn this large piece of
wood around to machine what I couldn't reach initially. To be able to do this
would require some tooling that would have to be machined and fastened
to the bottom of my new wooden table. If the tooling is made right then
I should be able to pick right up where I left off after it's turned
around.
|

|
|
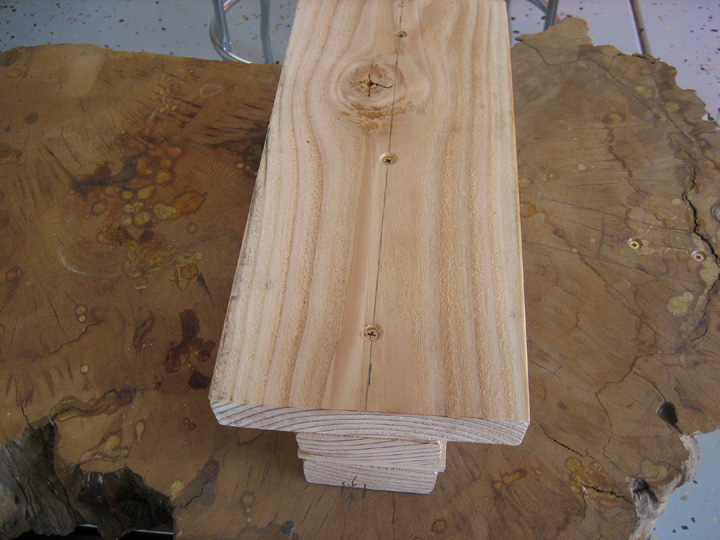
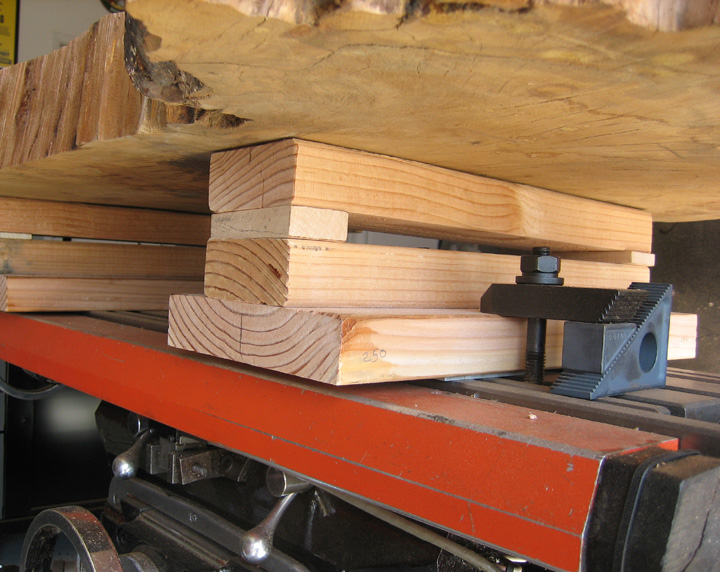
I used wood for my tooling which should do the job just
fine. It's much cheaper than any kind of metal and it's much easier to
machine. I used a 2 X 4 that was 14"
long that I fastened to the bottom of the wooden table with three
screws. Then a second 2 X 4 of the same length was fastened to the first
one with four screws (two on each end). Between these 2 X 4's are shims
that I'll show in more detail later. The last piece of wooden tooling is
a 2 X 8 X 14" long and is fastened to the second 2 X 4 with three
screws. This will all make since in the next few pictures.
|
|
|
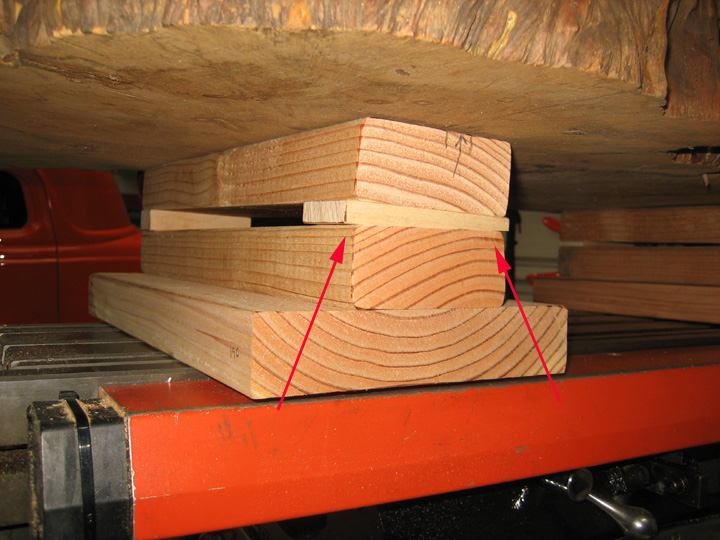
This should give you a better idea of what I'm talking
about. I machined both sides of all the tooling before I fastened it to
my wooden table. This was necessary because I needed things to repeat
once I unclamped it, turned the table around and then reclamped it.
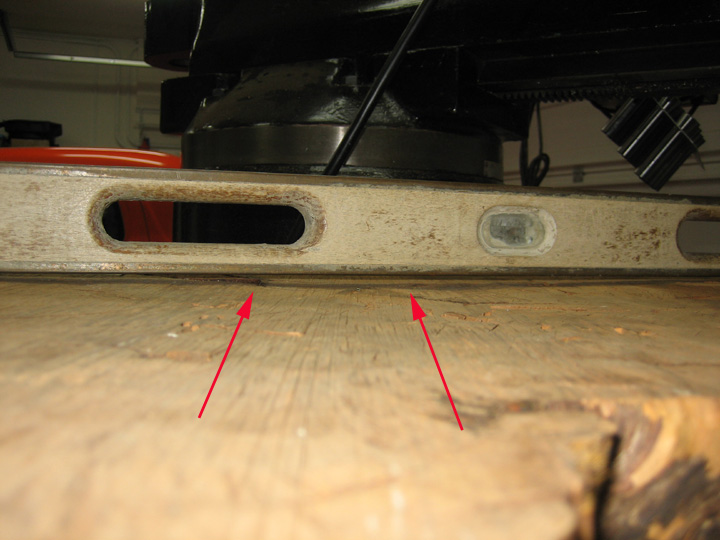
All of the shims are tapered (arrows) which again was
necessary so the wooden table would sit correctly. It was a little
trial-and-error here because once I fastened the tooling to the wood
table, the 2 X 8 didn't sit flat on my milling machine. The reason for
this was because the bottom surface of the wooden table wasn't flat
making the tooling sit at an angle. After doing a little math and then
machining the shims with the right amount of taper, everything sat nice
and flat.
|
|
 |
|
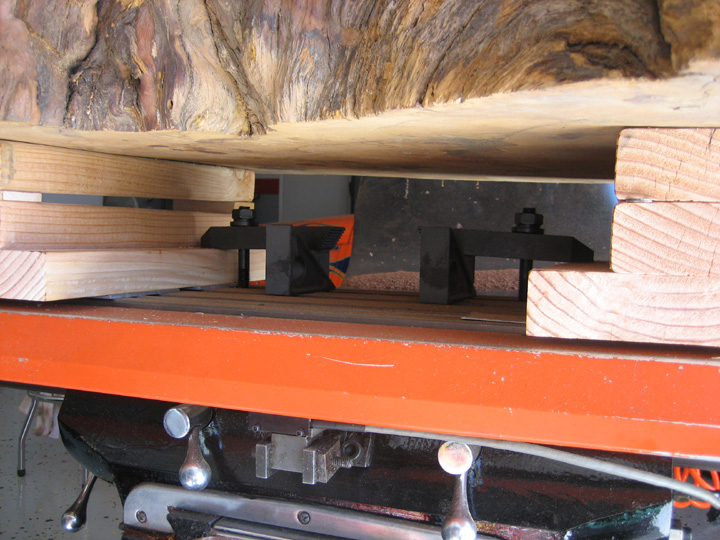
Here you can see how the wooden table will be held down.
By using the larger piece of wood on the bottom it gives me someplace to
use clamps. And by using two 2 X 4's, that gave me enough clearance for
the height of the clamps and to use a wrench to tighten them with.
|
|
 |
|
I used four clamps total to hold the wooden table down
(two inside and two outside) which worked out very well. The thickness
of the wooden table also helped make the setup more ridged which is
always a good thing. A keen eye might notice the use of different height
shims at each corner. That needed to be because of the variable
thickness of the wooden table. Remember the wooden table was cut with a
chainsaw and wasn't the same thickness at any given place.
|
|
 |
|
The gap under the straightedge is over 5/16" so I
planned on cutting 3/8" off the this surface. The reason I took more off
is to make sure the surface cleaned up because I didn't want to
go back and remachine it again.
|
|
|
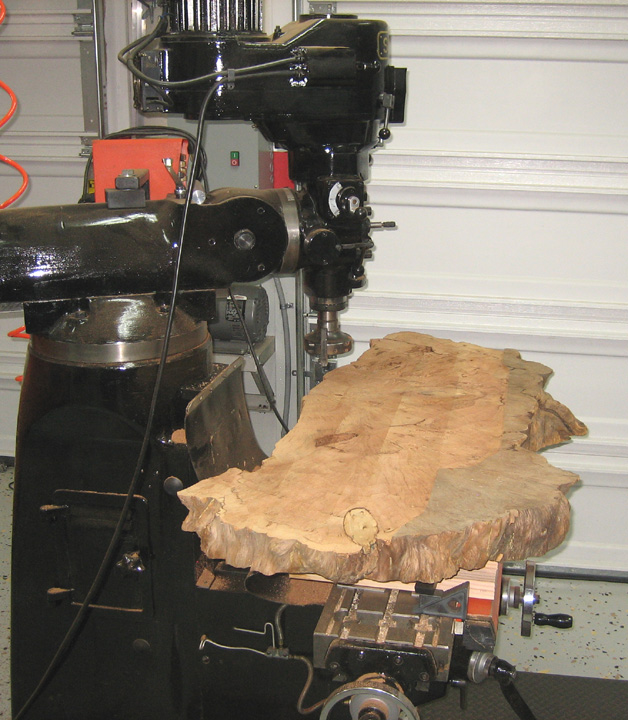
What you see here is the first side machined and now I'm
ready to turn it around and cut the opposite side. Also notice the
column is close to a 45 degree angle to reach the far side.
|
|
|
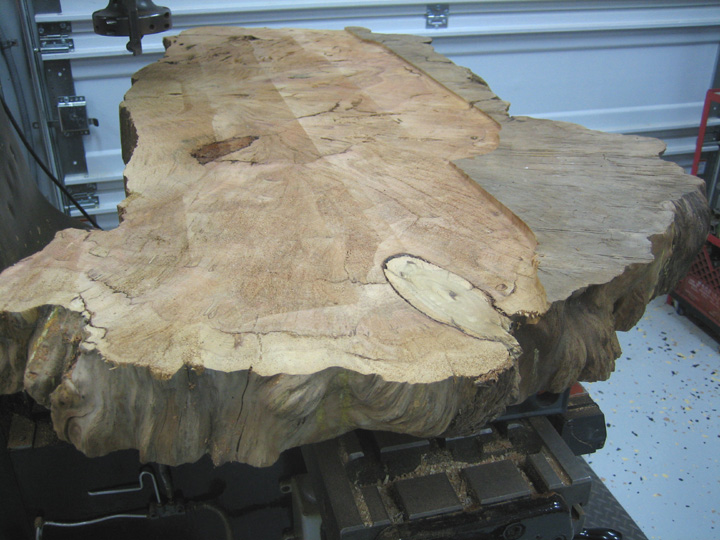
To cut the area that you see here took me six different
setups. I cut as far as I could, stop, move the column and ram on the
mill, cut as far as I could again and then repeat. I'm glad I took off
more in the center than just the minimum because there was a bad low
spot and everything cleaned up great. The second side went much faster
and the blend between the two sides were as close as the first side
which means the tooling worked out great.
|
|
|
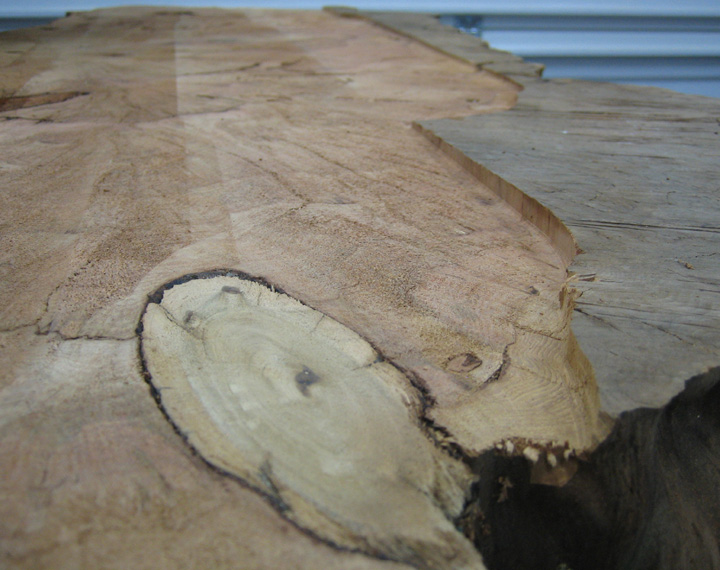
The randomly spaced lines from the cutter were very easy
to hand sand out because they didn't vary in depth by more than a couple
of thousands (the thickness of your hair). I thought about using a belt
sander but after trying it by hand, it cleaned up fairly easy with
180 grit and a sanding block. That knot didn't move at all so the screws
did their job here. That step that you see is about 3/8" deep which is
what I expected.
|
 |
|
1
2
3
4 |