33 Coupe Adjusting and Tweaking 10
4/16/08
|
I worked on the car the following week
(now that I had more time) and was able to install my fuel shut off
valve, and relocate my battery too. The reason I moved my battery was
because I made a new tray for it out of aluminum and some of the pieces
I had anodized. While I had the
battery out, this would give me a chance to install my new starter as
well. I had thought about removing my old starter,
taking it all apart and then sending some of the pieces to the chrome
shop. The reason for all this was because it's easy to see. After
checking out how expensive chrome is these days and how much work it
would be to disassemble and reassemble it, I ended up just buying a new
one. The new one is the same model as my old one, but it's chromed. And
being that they're made by the same company, I would be able to use my old mounting
block that had already been modified (clearanced for my headers).
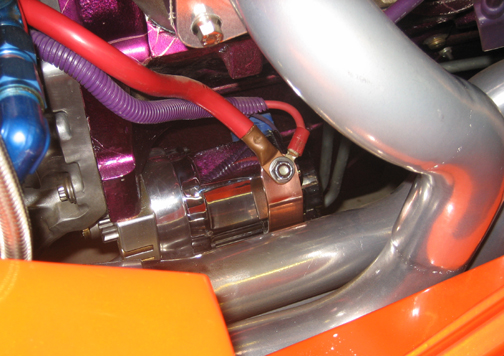
This is my new one and it looks a lot better. I also took the time to
shine up my copper battery cable extension too. In case you're wondering
about the copper extension, I made it awhile back to move the battery
cable away from the hot headers. It's about 3 1/2" long and has two
bends in it so it wraps around the starter. If the cable was connected to the
starter, it would have melted years ago because it's right next to those
header tubes. I'm not sure how anybody else does this, but it worked for
me.
|
|
|
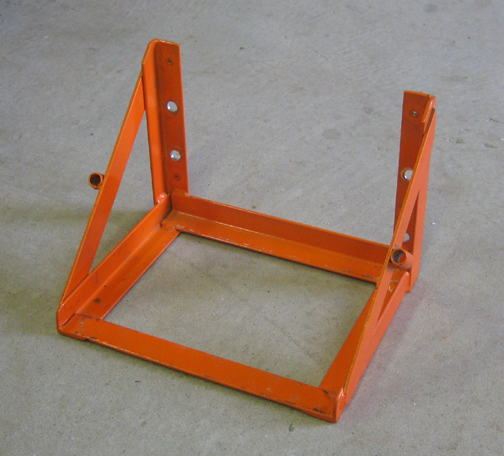
My battery tray that I made from angle iron awhile back
served it's purpose well, but I was never really happy with it. I guess
I knew deep down that I could do better, which is probably why I started
making a new one a few months ago. I was in no rush to finish it because
I had one that worked, but as the week went by, it was on my short
list of things to do now.
|
|
 |
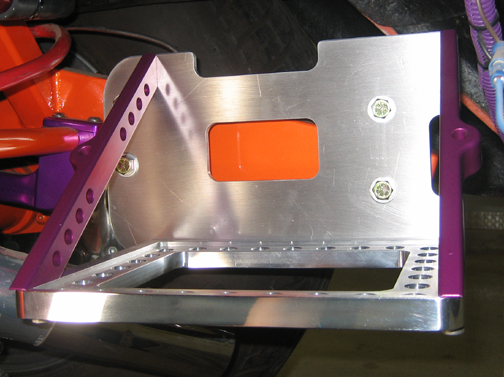
| The new one is made from aluminum (billet). In case
you've ever wondered what "billet" is, it's really very simple because
it's any metal that starts off in a solid form (round or flat stock for
instance).
Once you machine it to what you want, people say that it's made out of
"billet", which is true, but "any" metal in it's solid form can be
called that. So the next time you here the word "billet", it's really no
big deal and doesn't mean that it's the best material on the planet,
it's just a piece of metal that came from a solid piece. And in my case,
it's
6061-T6 aluminum.
The battery sits in a 1/8" deep recess that has been milled into 5/8"
thick base. Notice the two holes in the middle of the supports, these
are for the bolts that will hold down the battery that have been
incorporated into them. I also moved the location of the battery towards
the rear of the car about 1 1/2" and down 3/4". The reason for the move
was to give me more clearance between the top of the battery and the
underside of the car, and it worked out pretty well.
|
|
|
I used my existing four bolt location to fasten the unit to my chassis,
and all the holes in the base are for lightening. The base is fastened
to the back piece (which is 1/4" thick) with four 5/16 bolts (which you
can just see if you look close) and the same size screws are used to
hold the supports on too. In this shot, the exhaust looks closer to the
tray than it really is.
|
|
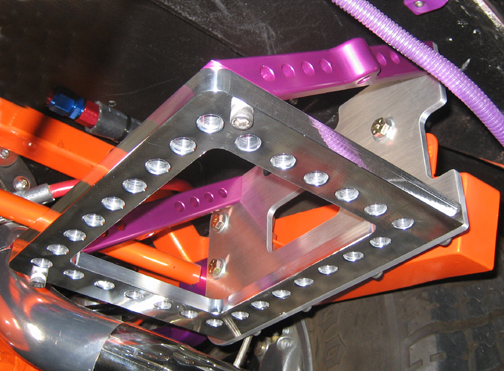 |
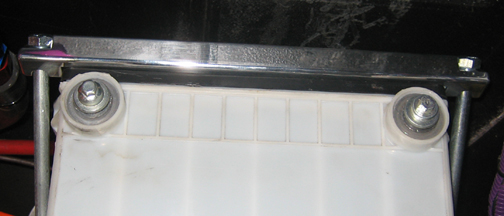
Here is the hold-down clamp that I made to keep things in place. The piece
is 3/4" X 3/4" X 11" aluminum that has been notched out (L shaped)
underneath to fit my battery (which you can see on the left side if you
look close). The bolt hole area has been milled away so the
bolts sit flush with the top.
And the bolt holes have been placed right next to the cut out area so
the head doesn't turn when I tighten the lock-nuts. Every edge has a
1/8" radius on it so it looks a little better too. On the other hand, I
don't think to many people are going to see it, but I had fun making it.
|
|
 |
|
1
2
3
4
5
6
7
8
9
10
11
12
13
14 |
|