33 Coupe Paint 19
9/30/05
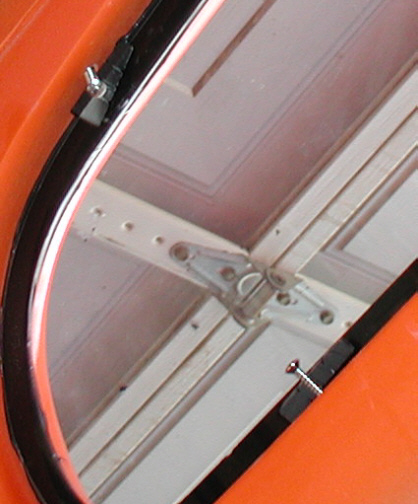
This is a shot of the rear window.
What Paul did to install it was to use some small rubber pieces between
some mounting screws and the glass to keep it in while it dried. The
rear window was treated to some silicon in place of the
"nasty" stuff to keep it in place. Some garnish molding will
go around this window which is held in by six screws. The cleanup for
the rear window was no problem compared to the front. After the silicone
was dry the next day, I removed the screws and rubber pieces All
that was needed at this point was to trim a few places around the
outside of the window where some of the silicone had squeezed out which
was handled by a razor blade. Thanks again Paul for all your help, you
did an awesome job!!
|
|
|
| 10/02/2005
It's Graphics time!
We're over at Bart's place again but this time
it's all about graphics. Bart introduced me to a guy named Rob Turner
from Yucaipa, CA. Rob has been painting graphics most of his life and
after looking at some of his work, I made the decision to use him. We
talked about what would look good and what wouldn't and why. Rob had
some good ideas about what he wanted to do on the car but I had my own
ideas as well. What he told me he would do is layout a pattern to see
if I liked it or not and then go from there. Rob laid out one side only too
see what I thought and after a few minutes, I told him that I liked it.
One of the areas that I thought would look good
with a small amount of graphics on it was the firewall. The firewall is
nice and flat with not much on it so it would be a blank canvas
for Rob to work with. He agreed and laid a few test lines on it to show me what it
might look like. I told him that I wanted to think about it and would
let him know the next day.
|
|
|
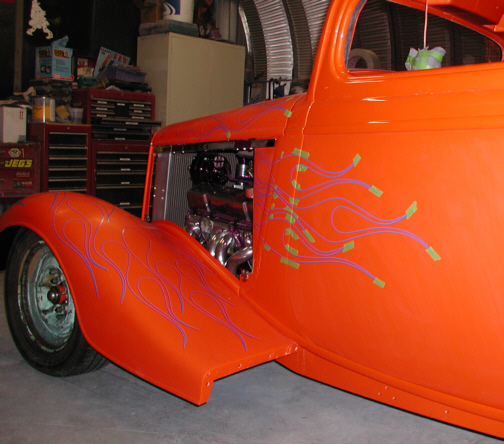
I went back over to Bart's the next
day to give Rob my answer and this is what he had done to the car. Rob
had all the layout done and was ready to start cutting out the patterns
for the flames. Notice the firewall area that doesn't have anything laid
out. This is where the graphics would go that I've been thinking about
over night, if I say "yes". Well, the answer I gave Rob was
"yeah let's do it" so he started to do the layout on it a few
minutes later. Also notice the hood rails
have been removed so he could wrap the graphics around the cowl area.
I'll talk more about that in a minute.
|
|

|
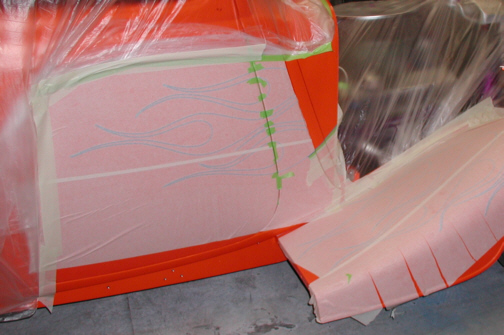
In this shot you can see the flames
that still have to be cut out but the layout has been finished. Rob uses
a razor blade and Exacto knife to do his cutting. The paper that ends
just beyond the green tape is where the hood side meets the body. The
area that is not covered by paper is the cowl, which is going to receive
graphics that blend in with the flames on the doors. The whole idea of
putting graphics on the cowl and firewall is so when I have the hood
sides off, the flames wrap into the cowl and firewall and look like they
were suppose to be that way. When the hood sides are on the car, the
flames would run into the doors (like most people have) and would look
normal too. This way when I have
the hood sides off, the graphics won't look like they've been chopped
off and unfinished.
|
|
|
|
1
2 3
4 5
6 7
8 9
10 11
12 13
14 15
16 17
18 19
20 21
22 23
24 25
26 27
28 29
|
|
30
31 32
33 34
35
|
|