Hammers  2                                                3-2025


Working With Metal Continued


The next piece I made was the handle. This aluminum is 6061-T6 and machines really well. In case you don't know, the T6 at the end of numbers is the amount of heat treatment the material has. If it had a T0, then that would mean the material was very soft. When it's in the T6 condition the material is easier to machine because it's crisp. And if you have your speeds and feeds correct, the chips will break in stead of being stringy.

I made a clean-up cut first and then used my knurling tool (arrow) to give the handle a nice grippy surface.


Here is a better look at the knurled surface. The trick here is to use a slow rpm along with a fast feed rate. In case you're not aware, knurling is a process of displacing the metal to create the surface that you see below. This process uses a huge amount of pressure, which is exerted through the knurling tool, then onto the work piece by turning the cross slide dial until you think something is going to break. No kidding!!

I took about three to four passes to get the results I was after. If you look close you can see the bottom (right side) has a small turned section about 3/16" long. This is where the end cap will go.


Here is a better view of where the end cap will end up. The large bore is .501" diameter and the end cap is .500" so there is .001" clearance when it gets assembled. And you can see the 1/4-20 threads in the bottom. Also the chamfer near the top. This is to make sure there is clearance between the end cap and handle. I'll talk more about the type of fastener I'll be using to hold the end cap on later.


I used a full radius groove tool that is 1/8" wide to give the handle a little something extra.


I used some thin cardboard to protect the knurled area while I turned the 3/8" O.D. and then put a 45 degree chamfer on the other end that transitions into the knurled area. I also used a thread die to produce the 3/8-16 threads on the end. This about completes the handle so now it's time to work on the head.


This material is 440C stainless and isn't the easiest to machine. It's a surgical grade of stainless steel and is used in the medical field extensively. It takes a very good heat treat if you needed to which can go all the way up to 58Rc. I had this piece leftover from a previous project so I thought I'd use here.

I'm machining the head to a diameter of .875" (7/8"). This means the soft face pieces will be slightly larger than the head. This is by design and is the look that I'm after. I'm going to reduce the diameter between the blue reference lines and there will be a 1/8" radius at each end.


Once I had the head profile complete, I drilled and tapped for 1/2-20 threads on one end, which is for the Teflon. This was not easy to thread and I had visions of a broken tap from time-to-time. In the end, taking your time is key and I didn't have any problems.


After parting it about half way through, I used a hacksaw to finish it with. This is because I don't have a very good parting tool (cut off tool) so I was playing it safe here. Then I faced the end, drilled and tapped for 1/4-20 threads for the brass piece. And again, I went nice and slow here.


Most everything is complete here except for the two larger diameters. I didn't know if they would get damaged while doing more work on it or not so I left a small amount of material on them (arrows).

Also notice the large chamfer at the beginning of the threads. I used a large center drill for this knowing I'd be coming back to turn those larger diameters. I also used a smaller center drill on the opposite end. This way I can turn this piece between centers later on.


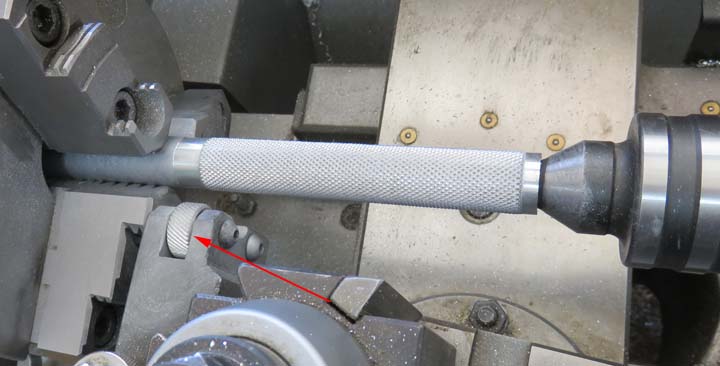
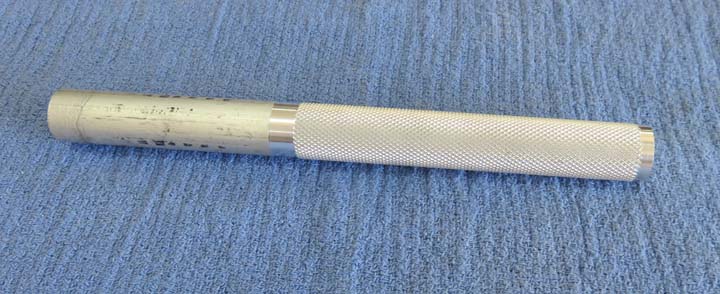
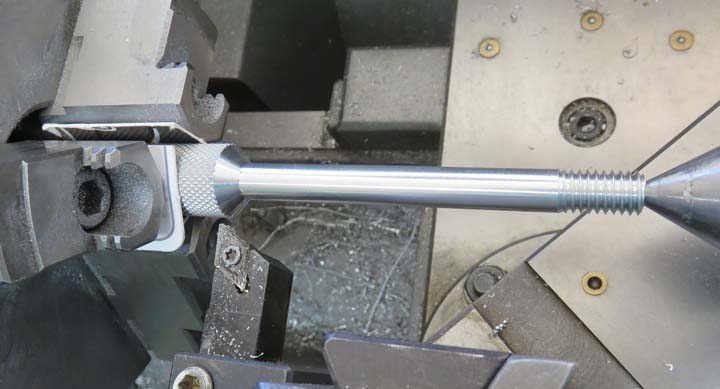
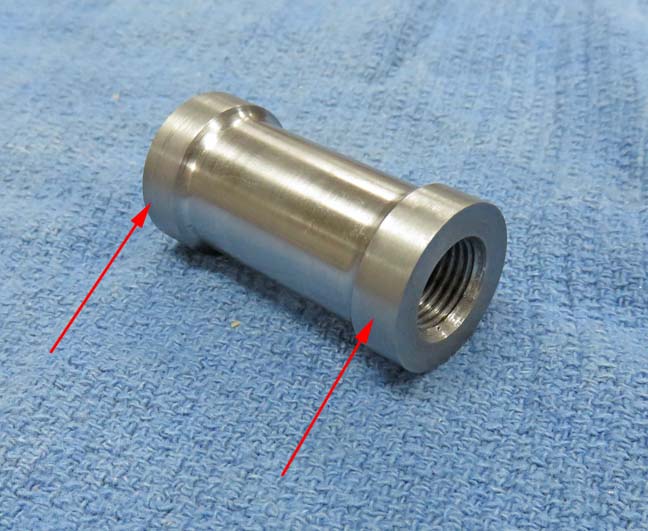
The next step is to put some threads in the head for the handle. And this is what it takes to do this operation correctly.

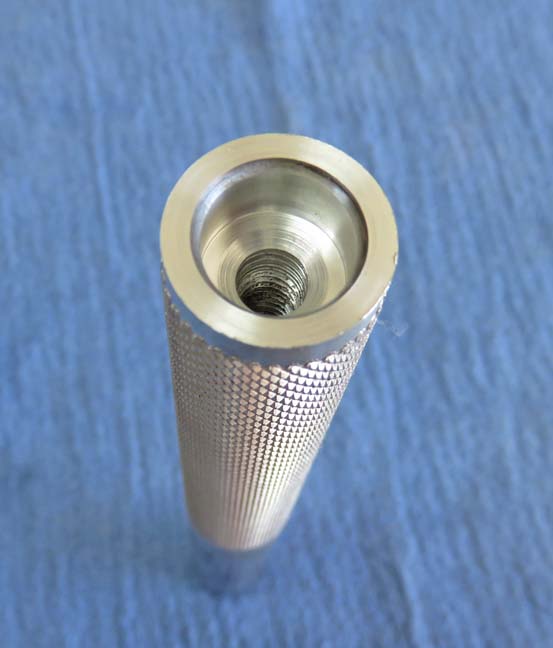
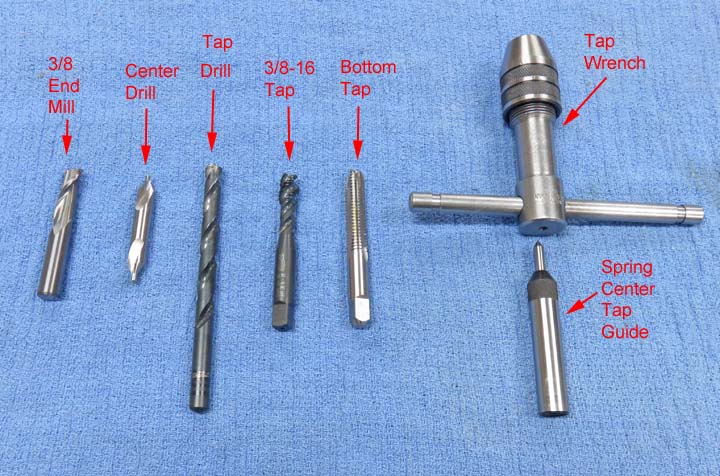
1.End Mill. This step is two-fold: First the 3/8" diameter end mill is used to produce a flat bottom for the center drill. Now you really don't need a flat bottom while using a center drill because these short drills don't flex very much. But the real reason I'm using this cutter is so the 3/8" diameter handle will enter into the head a small amount so it hides the threads on the handle. The depth I went with this tool was about .100".

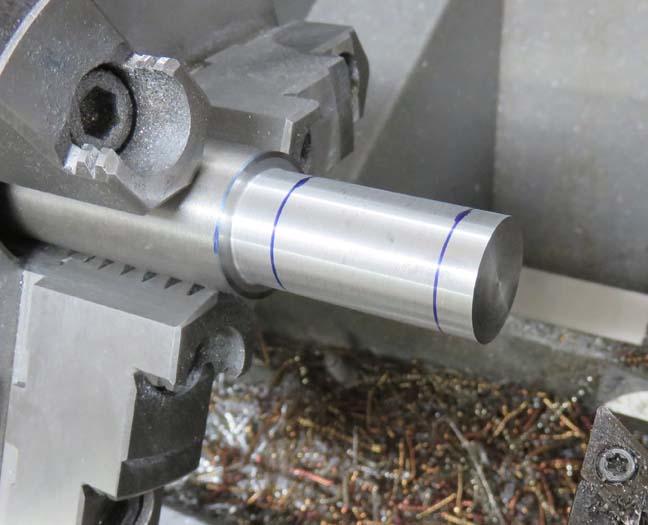
2. Center Drill. You always use a center before doing any drilling so you end up with a hole that is on location.

3. Drill. This is the tap drill for a 3/8-16 tap. This is a Letter O size drill and I went .750" to .780" deep.

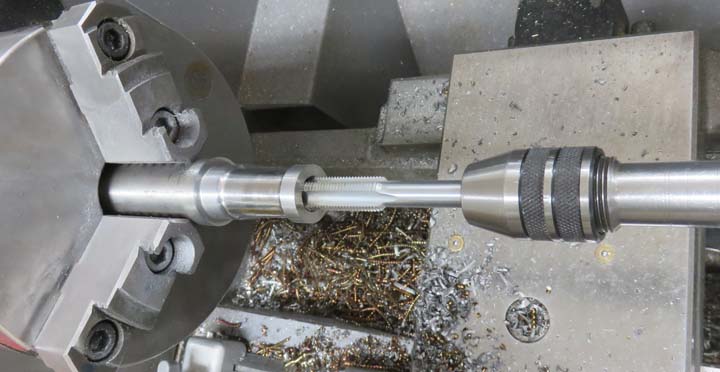
4. Tap. This 3/8-16" tap has a special geometry which is designed for harder metals. A person could have used an common tap design for this if they didn't have the other one.

5. Bottom Tap. This style of tap is designed to remove the last thread at the very bottom of a threaded hole. All taps have a taper at the lead end, but this one has much less of one, helping to remove a small amount more. However, you don't want to start threading with this style of tap otherwise you risk the tap breaking under such stress.

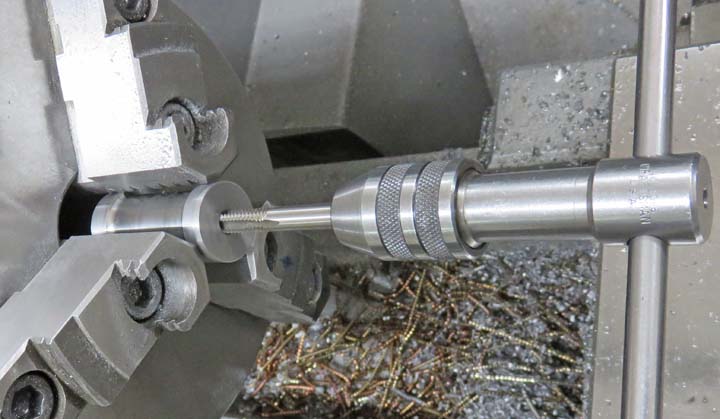
6. Tap Wrench and Spring Center Tap Guide. I used this tap wrench and spring center tap guide while using both taps here. This is to make sure the tap stays in alignment and goes in straight. The spring center tap guide mounts in the drill chuck and the pointed end of the spring loaded tap guide goes into the tapered hole in the back of the tap wrench. As you're turning the tap handle, the tap starts cutting threads and is traveling downwards. This is where the spring loaded center comes in, it follows the tap wrench keeping it in alignment the whole time. And when you run of of spring center travel, you just lower the quill a small amount and keep turning your tap wrench.

This is just one of many things a machinist needs to do to make things come out right. 


1          2          3          4          5          6          7          8          9