|
My daughter Tracey and her husband Jon, wanted me to
make them some door handles for their new home. Tracey told me that
she wanted these handles to have a Steam Punk theme and after we talked
and traded some ideas, here is what we came up with.
Working With Pipe
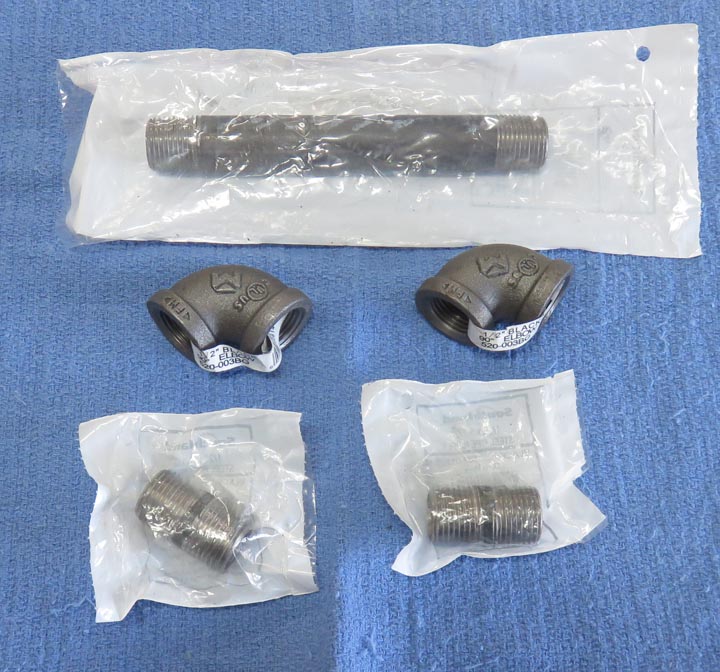
I'll be using some 1/2" black pipe for the main pieces,
which will be easy to assemble. But if you look close you won't see a
way to attach this handle to the door, but that will come later. Speaking
of attaching, I'll be making a handle for each side of the door
using 1/4" bolts to hold them together. With that being said, let's get
started.
|
|
 |
|
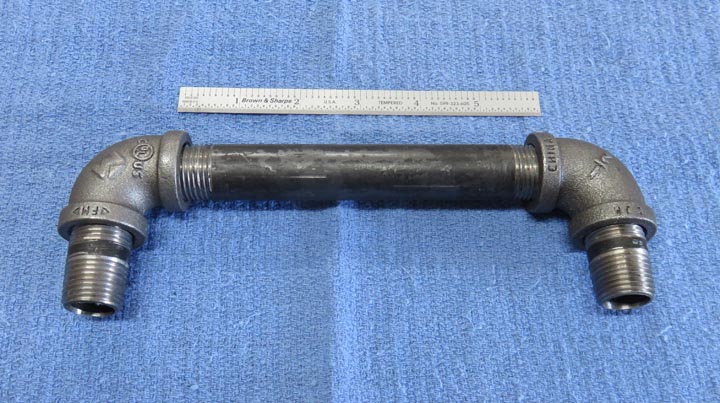
This is the basic shape and should
accommodate almost anyone's hand as the straight section is about 6"
long. Now it's time to work on some tooling that will locate inside the
pipe nipples that you see below.
|
|
 |
|
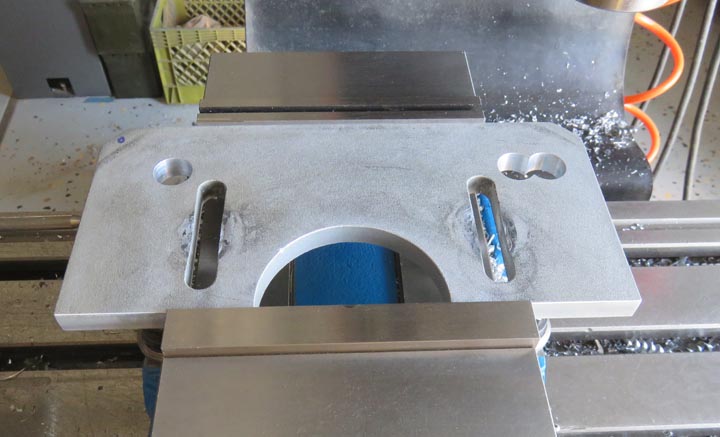
Tooling
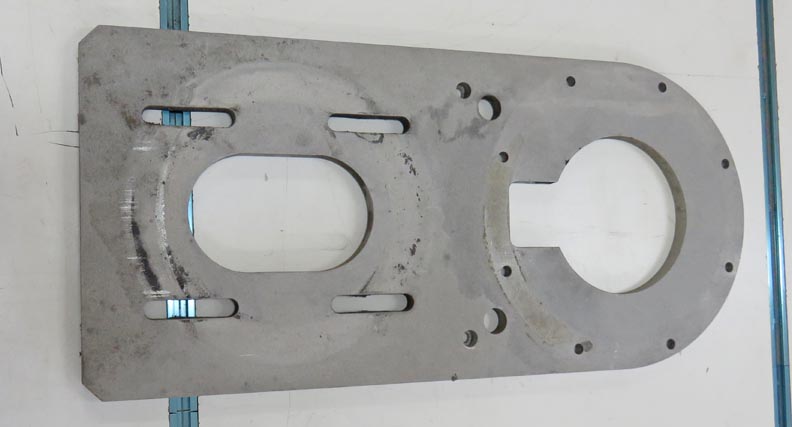
This is 1/2" thick aluminum plate that was going to be
thrown out at my old work so I took it home just in case I needed it for
something. Well, that day is here and I plan on cutting a piece off the
end to use as my tooling to aid me in making the door handles. This
piece is 6" wide and 24" long.
|
|
 |
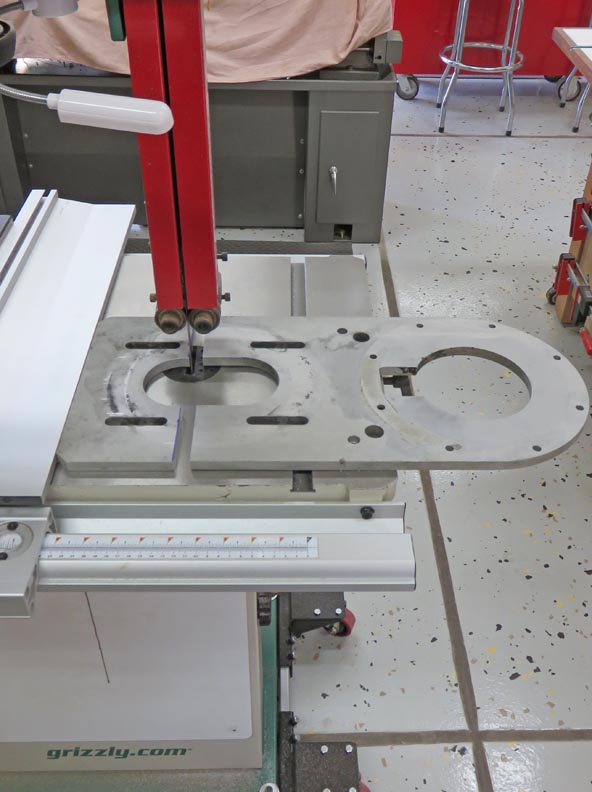
I used my bandsaw to cut my work piece which worked great for this.
|
|
 |
I machined the two longer sides first so I could hold it in my vise.
Then I drilled and bored two holes that are 3/4" diameter. These holes
are the same distance apart as the pipe nipples.
|
|
 |
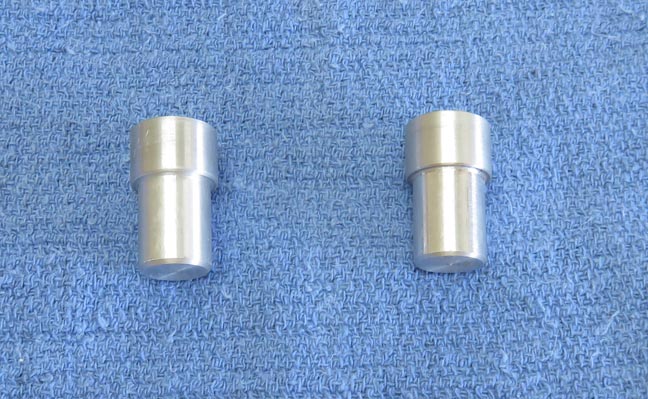
I made these locating pins to help hold the pipe handle. The larger end
(3/4") will locate in the tooling. And the smaller end will go inside
the pipe nipple to locate it.
|
|
 |
Here is what I have so far.
|
|
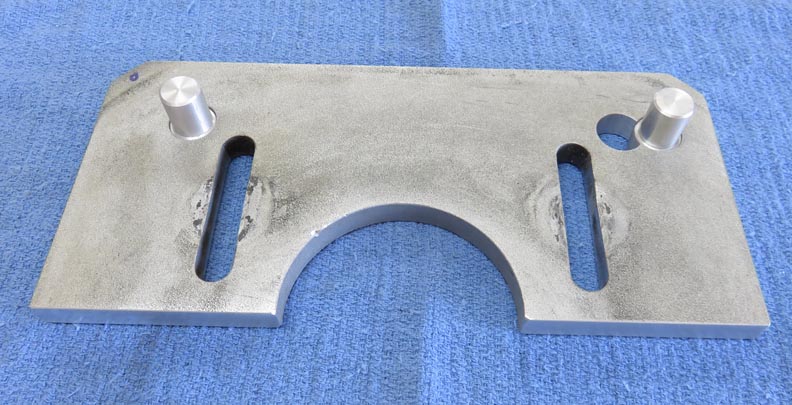 |
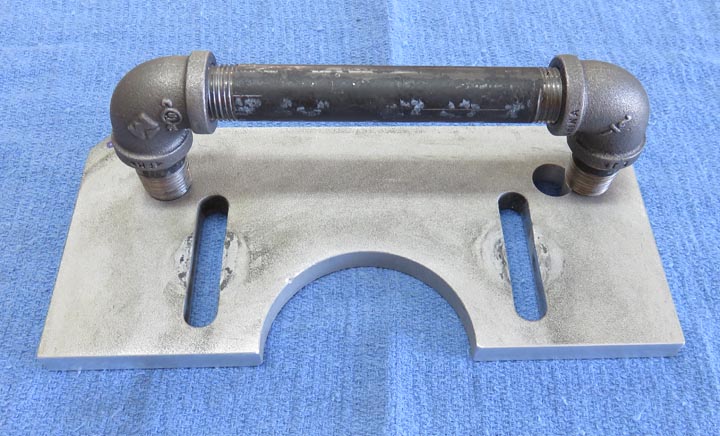
And here is what it looks like with the handle sitting on the pins. This
will make more sense soon.
|
|
 |
|
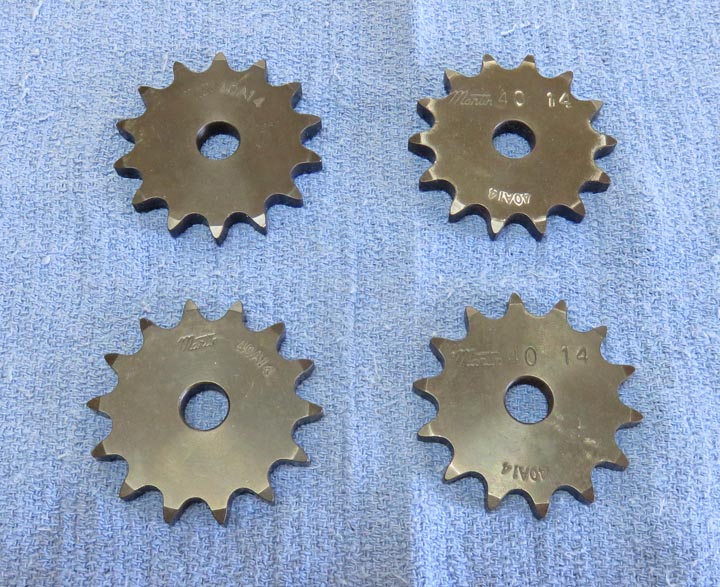
I bought these steel sprockets that will soon be
attached to the pipe nipples. However, these sprockets only have a 1/2"
hole through them and will also need to have some threads so I can screw them
on the pipe nipples. That's where the tooling comes in, which will help
me with the pipe threads and with drilling some bolt holes to mount them as well.
|
|
 |
|
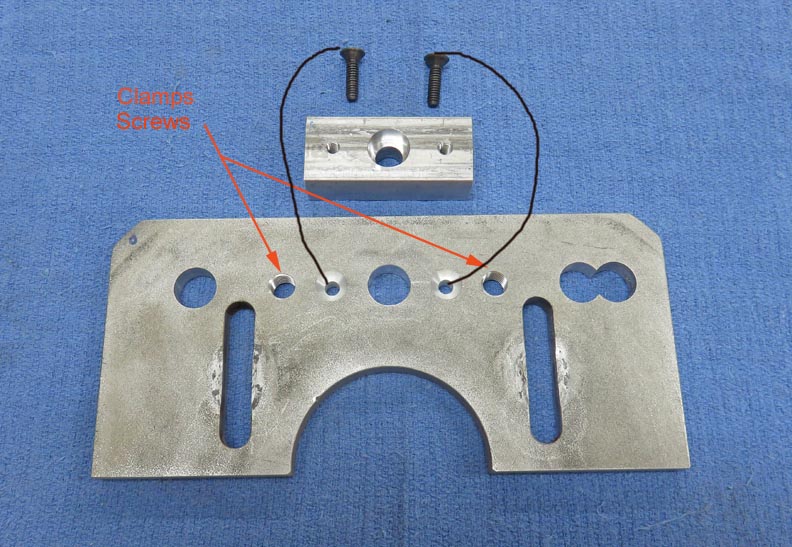
I have a few things going on here so let me explain:
first I drilled and tapped for some 1/2-13 threads that will be used for
some clamps (labeled in red). These clamps will help hold the sprockets
while I machine them.
Second: the smaller aluminum block will get attached to my plate
using the two 1/4-20 flat head cap screws (shown below using black lines)
and will help me with threading the sprockets. Now the pipe nipples are
threaded with 1/2" pipe threads so this is what I'll be putting inside
the sprockets. The center hole in the smaller block has two diameters. The
larger one is just over 3/4" diameter and will match up with the same
size hole in my tooling plate. This is just for clearance for the 1/2" pipe
tap.
But also notice the smaller hole in the block. This is
to locate a 1/2" diameter pin, which is the same size as the hole in the sprocket
(before machining).
|
|
 |
|
1
2
3
4 |