|
More Gluing
I'm getting ready to glue the top together and when I started
getting my clamps ready, I quickly found out that I needed more of the
same kind of clamps because I already have a nice variety as you can
see. And believe it or not, I used all of these for this glue-up.
However, when it came time to do the bottom, I had to improvise because
I needed larger clamps for that one. So guess what I did when I finished
gluing these pieces? Can you say...Internet!
|
|
 |
| Rework
What I'm doing here is removing a warped
area on one side. This was unexpected but was quickly fixed.
|
|
 |
|
Almost Finished
I sanded all of the outside surfaces starting with 150 and finishing
with 320.
|
|
 |
Next I used my router and a 5/16" roundover bit to put a radius on the
top surfaces only. This went quick and turned out nice. Then I did a
small amount of hand sanding to finish it with.
|
|
 |
|
Lots Of Blocks
Here is a sneak peak at what I've made. I separated the different
types of blocks with thin cardboard as a temporary
solution. I'll explain later.
|
|
 |
|
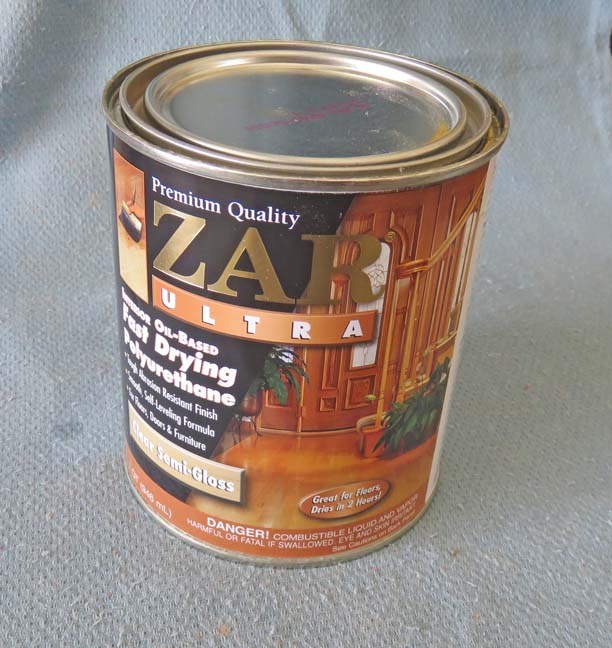
Clear Finish
I'll be using a Polyurethane on this project because I
want it to last for awhile. And using this oil based product made by Zar
should do just that. Now I've used this semi-gloss on many different
projects and it's always worked great. In fact, this is my second can.
Just for the record, I don't use a good brush for this, I use the cheap
ones and then throw them out after every coat. And I know I'm
sacrificing a better finish by doing this but I tried cleaning a good
brush once and it just took too long.
|
|
 |
|
I'm using my high-dollar finishing room to apply the
clear finish as you can see. I coated the inside and sides of both
pieces to start with. After waiting two hours I applied another coat and
let it dry. A few days later I set aside the top piece and coated the
back surface of the bottom only...for now. I'll show you why soon.
|
|

|
What a difference the polyurethane makes. And the grain of that poplar
sure does look nice. Now it's time to work on the lid.
|
|

|
|
1
2
3
4
5
6
7
8
9 |