|
I read a few articles before buying this case about people having trouble
with some off-brand cases not sealing properly. The cases in question
were similar in looks and construction but were not built the same as a
Pelican. One
guy talked about having his case in the back of a pickup truck, driving
through some rain and it leaked leaving his gun very wet. Needless to
say he was pretty mad and when he got home he performed a test to see
why. His test consisted of placing small
strips of paper all around his case, then closed and latched it but found that the paper could be
pulled out in numerous places. No wonder his case leaked.
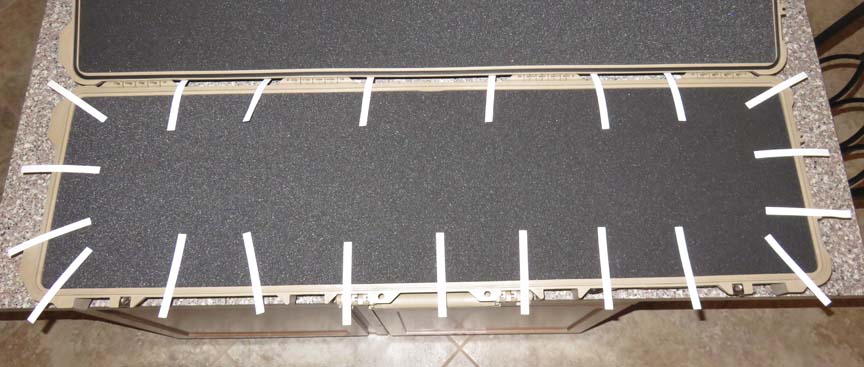
Well I decided to perform the same kind of test with my new case
and cut a bunch of paper into strips like he did, which is what you see
below. But before we do this test I have something I'd like to show you
first.
|
|
|
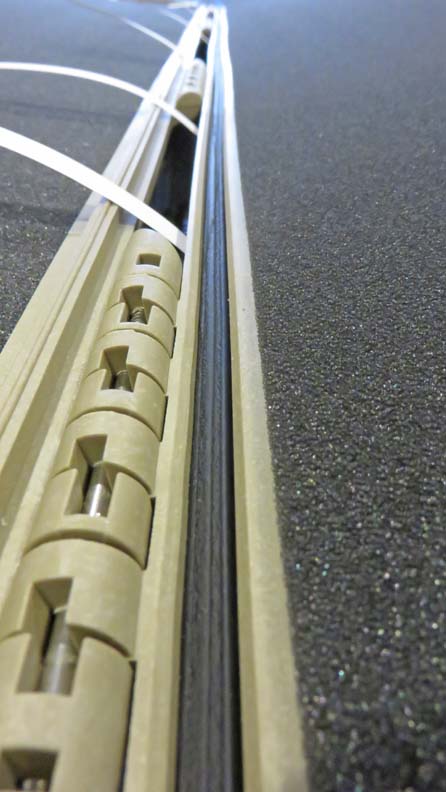
This Pelican case has a tongue and groove arrangement
along with an o-ring acting as a waterproof seal. In fact this case
has a IP-67 rating for temporary submersion of 1 meter (39") for 30 minutes.
With that being said I was very confident that mine would pass this
test. BTW, you can buy new O rings in case yours has a problem.
|
|
|
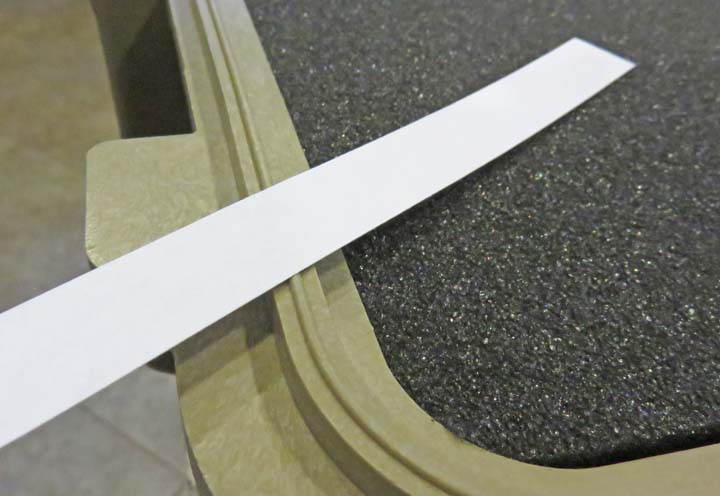
Here you can see one of my strips of paper resting on
the 'tongue' portion of the case. What I plan on doing is closing the case
and then pulling on each strip of paper to see if any slide out. Ideally
none of them should, but instead they should tear in two.
|
|
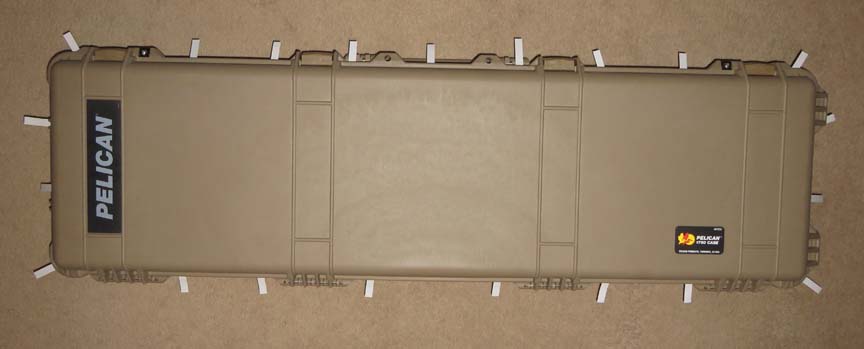
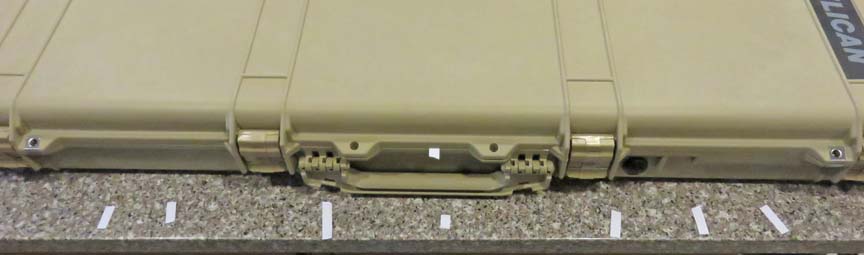
Here is my case closed and latched with all my paper sandwiched between
the top and bottom.
|
|
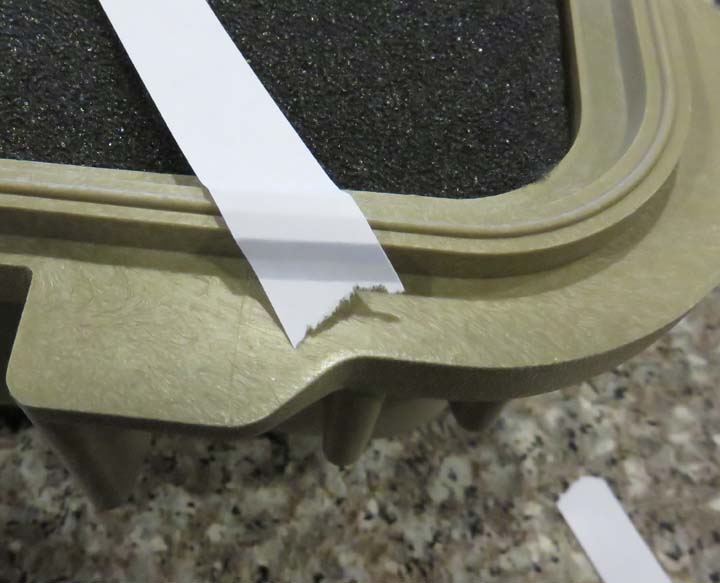
As I worked my around the case each piece of paper tore in half, which
means it should be water tight.
|
|
A close up of one of the torn papers which is very good news here. I
guess you get what you pay for in this case... (no pun intended).
|
|
|
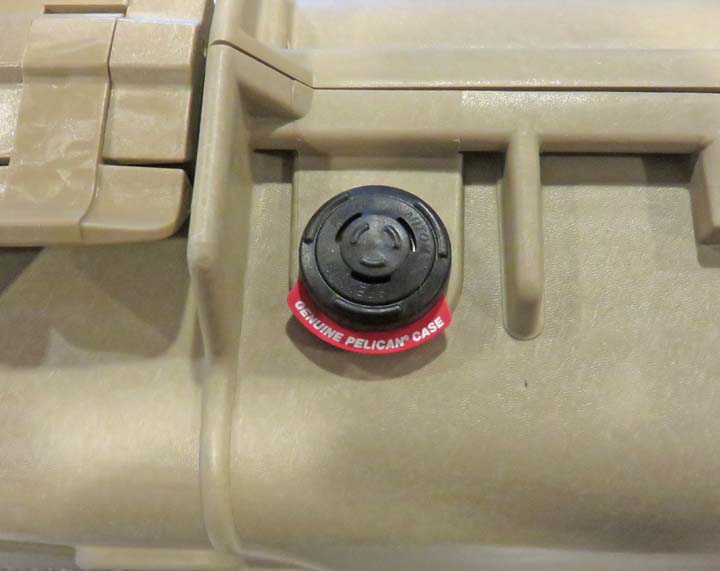
Another great feature is the automatic pressure
equalization valve. This valve releases built-up air pressure while
keeping water out, resulting in a watertight case that makes
it easy to open. Keeping the water out is handled by a Gore-tex membrane
that is guaranteed to keep things dry. This is a welcome feature if you
ever fly with it or if it falls into water.
|
|
|
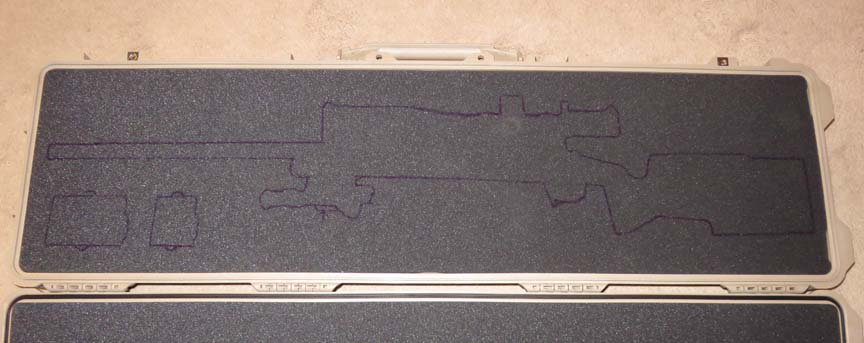
The interior measurements are 50 1/2" W x 13 1/2" H x 5 1/4"
and as you can see it will just fit my rifle. Now what I've done is
traced around my firearm with a felt marker but I laid it out in
reverse. The reason for this is so I don't see any felt marker lines
once I'm finished. Let me explain farther: what I plan on doing is
cutting on the 'inside' of the line slightly so everything has a nice
snug fit. And in theory this should leave the marker line when I'm
finished. However, by doing it this way that ugly line will be on the
bottom surface once I flip it over.
|
|
|
I poked a hole through the foam with a knife, pushed my
cutting wire through the hole and then reattached it. Once I started
cutting with it I quickly found out how hard it was to make a nice
straight line. You're at the mercy of your own abilities here, not like
using a machine that cuts perfectly straight, so it was a challenge
for sure.
I did a test fit with what you see below and noticed my
firearm didn't fit correctly. Not because it was to loose, no quite the
opposite, things fit to tight. I came back and took another cut around
the whole thing taking out a very small amount and checking it again. It's
much easier to make multiple cuts instead of gluing on more foam here so
taking your time is key. After a few times going back and forth and
working different areas, I had
the fit I wanted. On a side note, you can buy new foam just in case you
need it for any reason.....like messing it up while cutting for
instance.
|
|
|
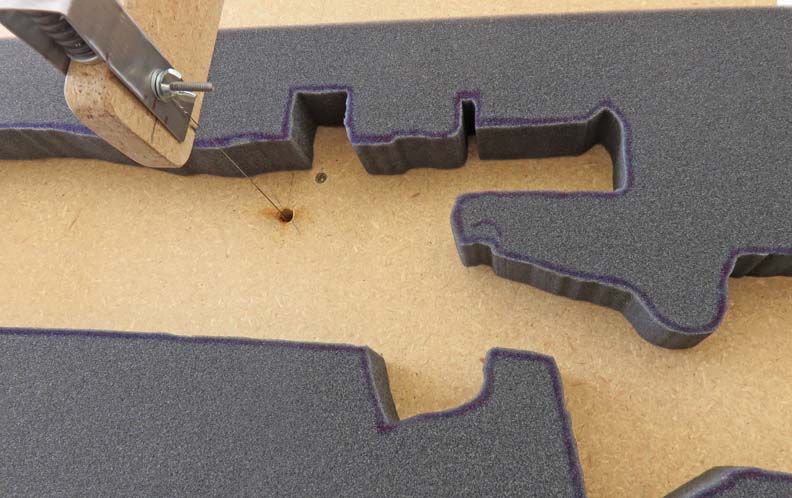
Here is what the cutout piece looks like and you can
also see where I started my cut, which was at the end of the barrel.
Another
thing I found difficult was holding onto the the large piece of foam while
feeding it through the cutting wire and having it droop over the end of
the base (my working surface). In hindsight, I should have made the base
longer, much longer, to accommodate the long piece of foam that I worked
with. But to help with this problem I placed a cardboard box at one end
of the base to help keep the foam at the same height as my cutting
surface. This worked pretty good but the box had a tendency to move
while I was cutting so adding some weight to it helped. At the end of
the day this worked for what I wanted.
|
|
|
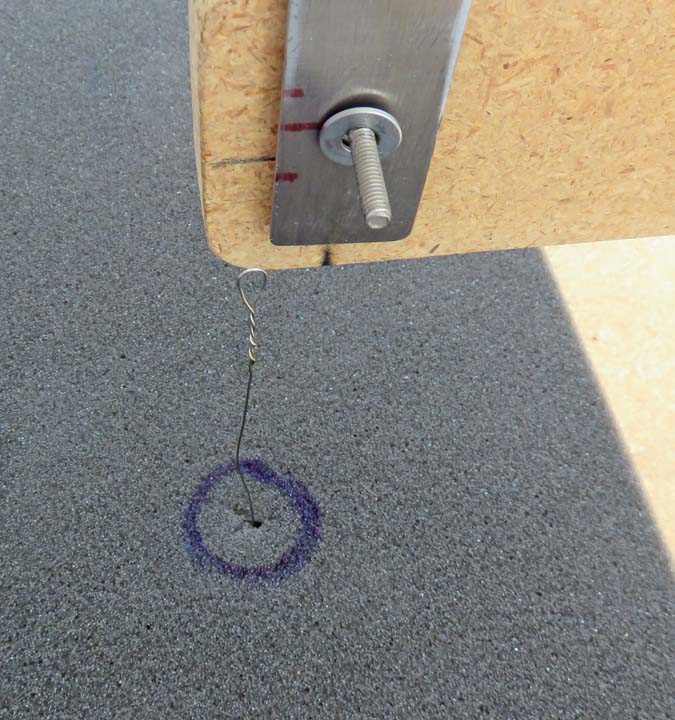
After doing a few cuts, I changed the top of the cutting wire and put an eye at
this end of it, just like the bottom has. With this new 'eye' it's much easier to attach the Nichrome wire
now that it's under spring pressure. You can also see the small slits in
the foam so the cutting wire can pass through it.
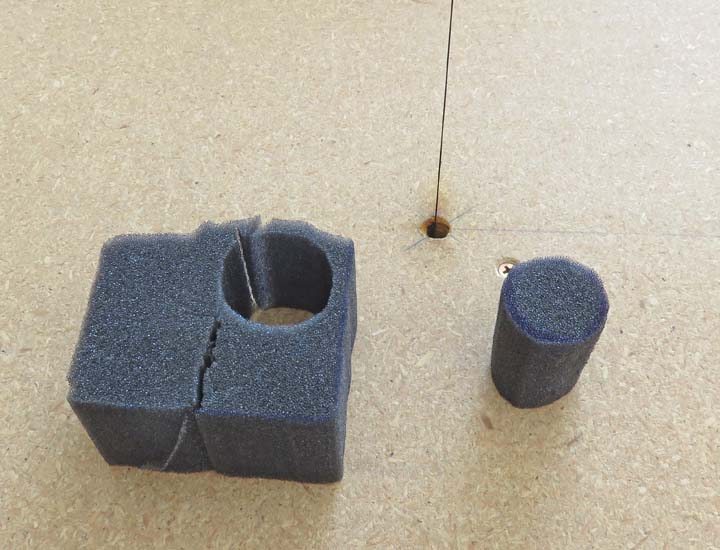
The foam that you see here is the cutout from the
picture above (the stock area). What I'm doing is cutting out a small
plug that will be used to fill a hole that I cut out for the scope turret.
I made two of these and they will go
in the top and bottom half of the case because the turret is much higher than the
remainder of the gun when it's laying on it's side.
|
|
The piece that I cutout only needs to be half this height so I laid it
on it's side and cut it to length.
|
 |
|
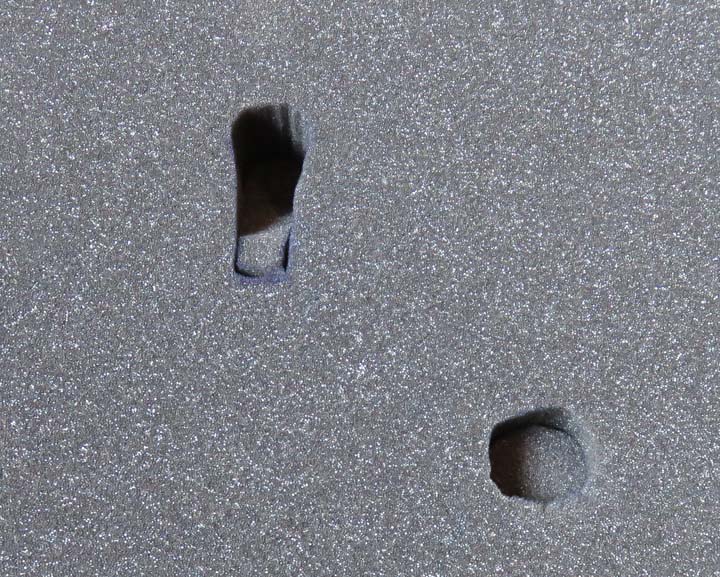
This is the lid of the case here. The top cutout is for
the bolt of the gun and the lower one is for the scope turret. I cut
both of these areas all the way through and then pressed
in the other pieces. The gun bolt piece is cut at a taper and was tricky
to cut because of the small radius and big piece of foam. But remember, this piece of foam is
over 51" long and even though it doesn't look the best, it works great!
|
|
|
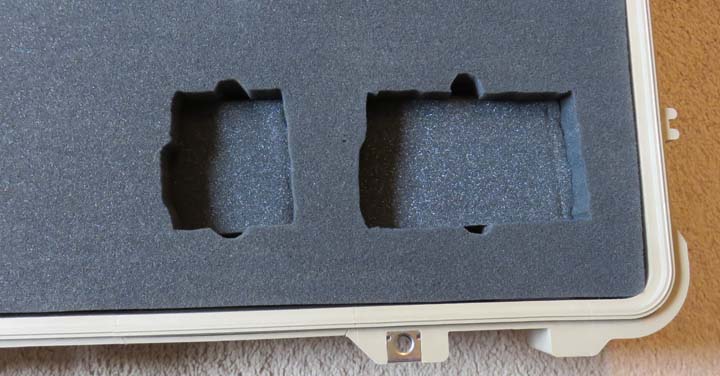
These two cutouts are for the magazines. These were done
the same way: cutout all the way through and then press fit in another piece that
allows the magazine to sit flush with the top surface. I made some
finger slots to aid in removing the five and 10 round magazines.
|
|
|
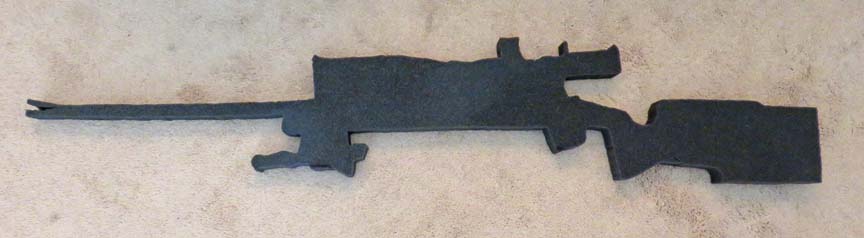
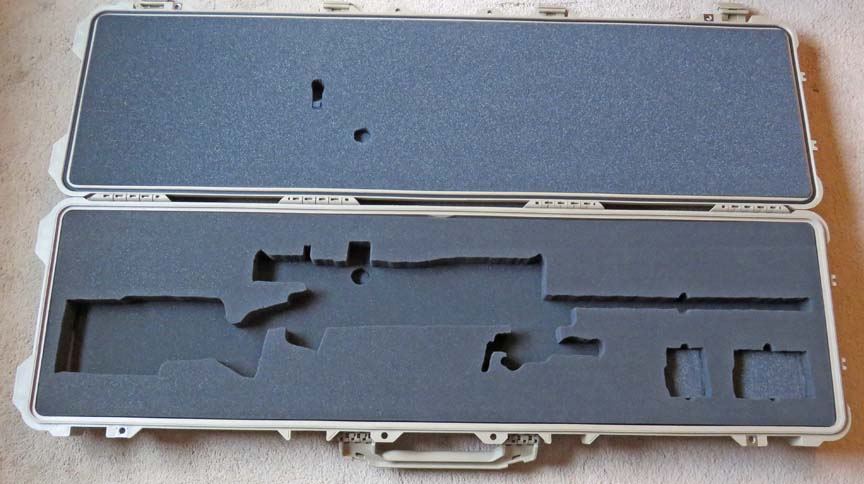
Here is the finished gun case and everything fits great.
I added some finger slots to the middle of the barrel which really helps. The funny looking cutout
between the barrel and gunstock is for my
bipod in case you were wondering. Note the matching cutouts for the
scope turrets in the bottom section that lines up with the one in the
top. These small details make the rifle rest without any added pressure
to these key points.
Well there you have it, a hot wire foam cutter made on
the cheep. How much you ask? All of the electrical components cost under
30 dollars and the wood I already had, so this wasn't a very expensive
project at all. And it worked better than I expected. I don't know if
I'll ever use it again but if any of my friends need one they can borrow
it.
|
 |
|
1
2
3 |