The fuel system is going to consist of
two different types of fuel lines. One will be 1/2" diameter
aluminum tubing and the other will be #8 AN braided steel line. The
aluminum tubing will be used to run along the frame rail under the car
while the braided steel will be used in the engine compartment and then
connect to aluminum. I'll also be using the braided steel line to go
from the fuel cell, which will be mounted in the trunk, down to the
frame where the aluminum tubing is. Installing the fittings are hard to
do but looks good when your done so I hope nothing leaks. This is a
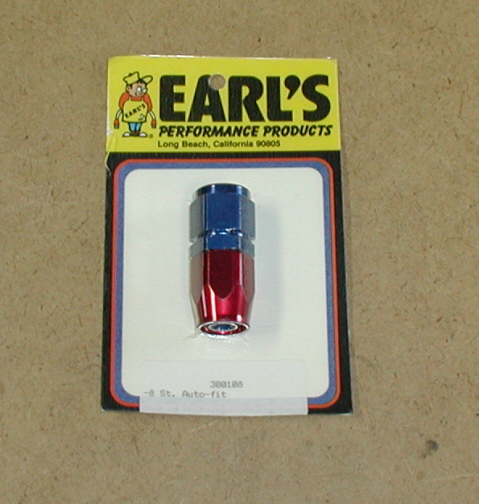
Swivel-Seal hose fitting made by
Earl's
for the braided steel line. It has threads in one end for mating with
other #8 fittings and the hose gets assembled in the other.
|
|
|
The hose that I'm using is also made by
Earl's and is called
Auto-Flex. Earl's makes another type called
Perform-O-Flex which is a grade above the one I'm using but much more
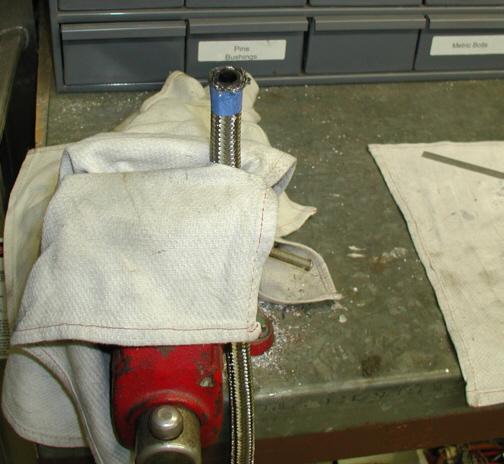
expensive. The first thing that has to be done is
to cut the hose. The way you do that is to place some tape (electrical
or masking) around the area that will be cut and
then cut through it. I used a Dremel with a thin cut-off wheel which works
good, but you could use a hack-saw with a blade that has 32 teeth. Now
you trim any loose or frayed ends that might be sticking out with some
wire cutters.
|
|
|
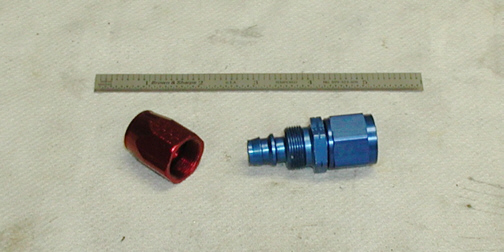
These two pieces screw together to
make a hose connection. The socket (red part) goes over the end of the
hose first which is easier said then done. You have to work the end of
the hose a little at a time till you get all the loose ends inside the
socket. I used a small flat screwdriver to help insert all the loose
ends. If your not bleeding at the end of this procedure, you did good!
The ends of the braided steel hose are not very forgiving. The other end
is called a nipple (blue piece). You can see the barbed piece on the
small end that swells the hose and the socket tightens against all this
to make a seal.
|
|
|
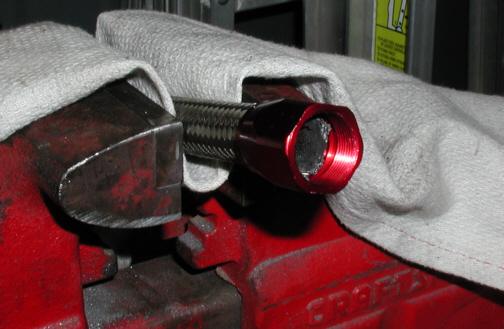
Once the hose is inserted into the
socket, you have to make sure it isn't to close to the threads. You want
about 1/16" to 1/8" of clearance between the two before
inserting the nipple. At this point, I make a mark on the hose next to
the coupler with a red Sharpie marker to see if the hose has moved once
the two have been assembled.
|
|
|
|
1 2
3 4
5 6
7 8
9 10
11 12
13 14
15 16
17 18
19 |