|
My oldest daughter, Stefanie, expressed interest in an unusual project
that I just couldn't pass up. She wanted to know if I could make her a
box that held baby teeth? I thought, sure...I could do that. But that
was over a year ago and I finally decided to make it and give it to her
as a Christmas present.
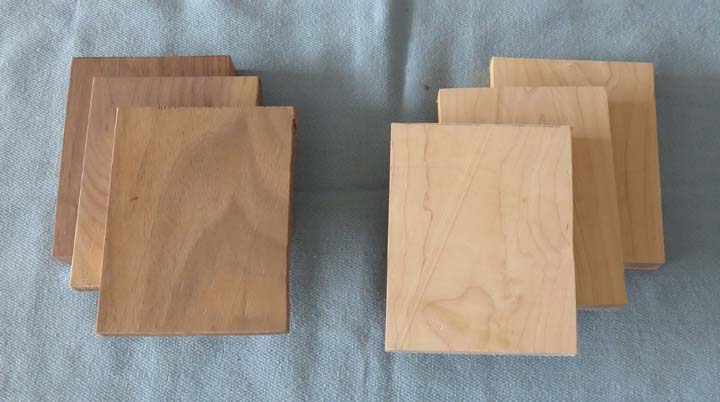
I'll be using black walnut and hard maple as these two species have a
nice contrast together. I'll be putting the pockets for the teeth in the
black walnut, again for contrast so they can be seen easier when
viewing.
As you can see I'll be making three of them: one for Stefanie, one
for my daughter Angela, and one for the future (we have four kids). It's
easier to make a few the first time (whatever I'm making), than to re-think and
re-engineer something at a later date.
|
|
 |
|
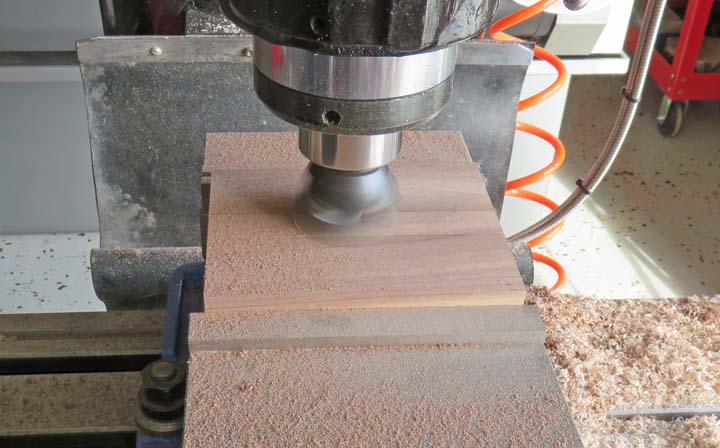
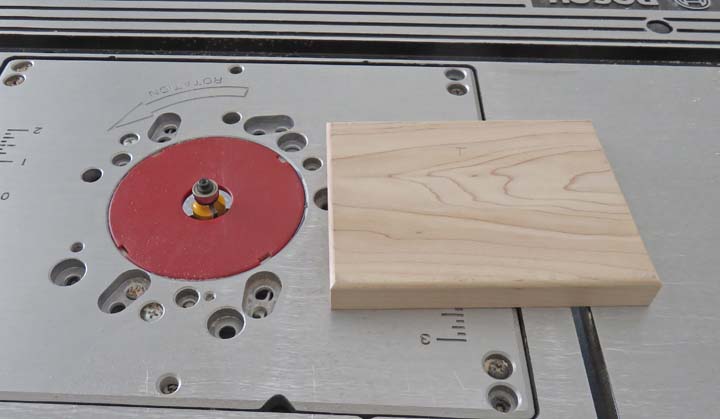
The first order of business is squaring all the
pieces. Here I'm surfacing the tops and bottoms.
|
|
 |
|
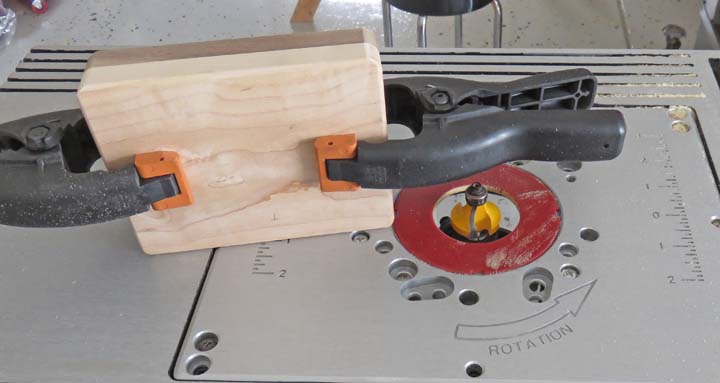
Next I machined all the pockets for the teeth using a
1/2" diameter ball end mill.
|
|
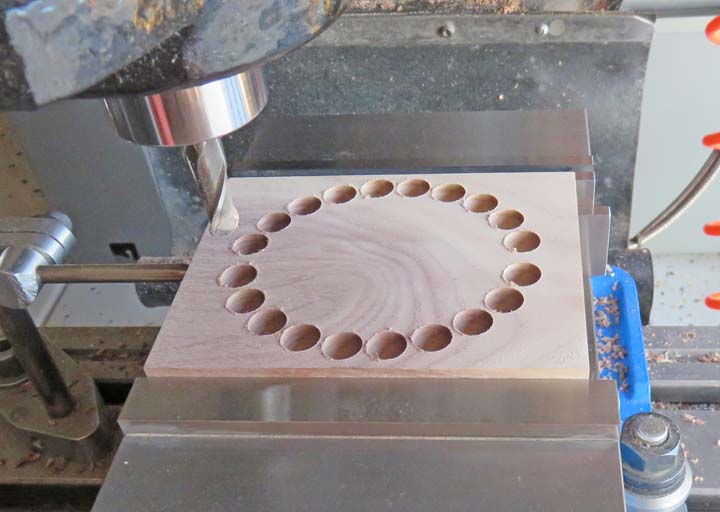 |
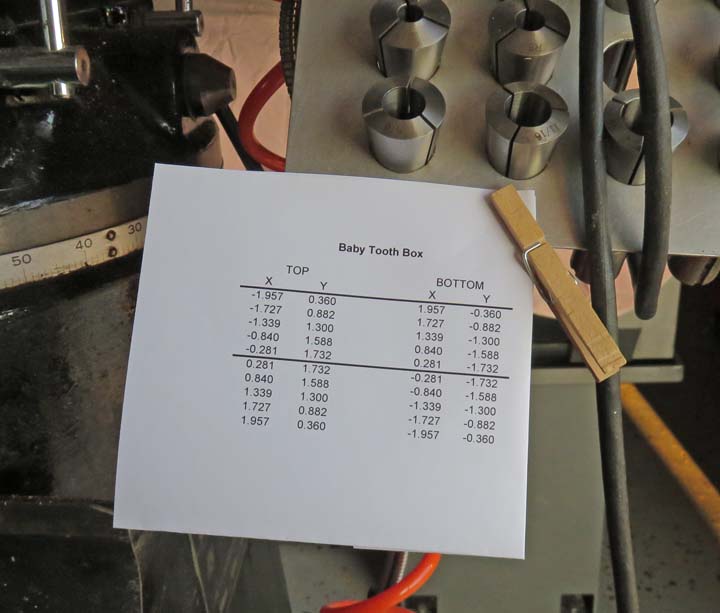
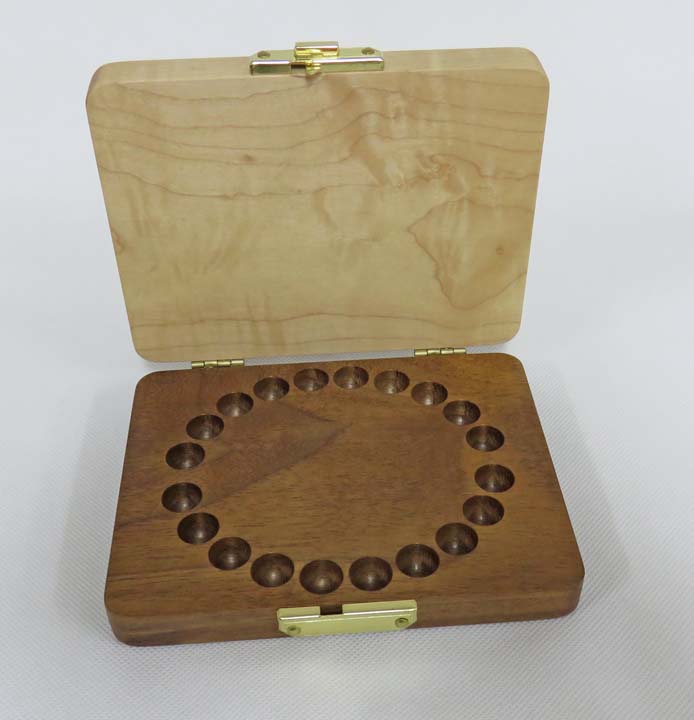
Here are the X and Y coordinates for the pockets. I drew the shape in my
CAD system and then plotted the points that would be used for each
pocket. Once I was happy with everything, I transferred each pocket
location into Excel and printed it out. If you noticed in the picture
above, the shape that you see isn't a circle, it's an ellipse. The
ellipse shape seems to be a better representation of the human mouth
than a circle.
|
|
 |
|
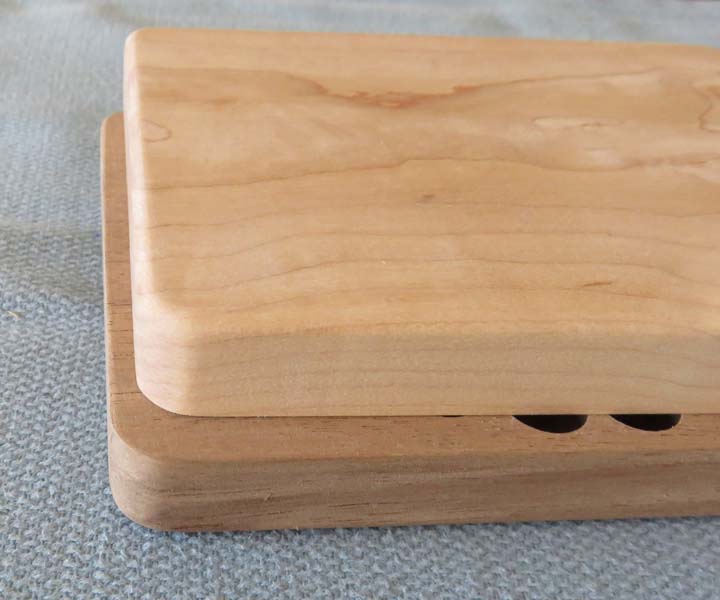
I used a 3/16" roundover bit for the top and bottom
surfaces only. The opposite sides are just going to be lightly sanded.
|
|
 |
|
I used a 3/8" roundover bit for the four corners.
|
|
 |
|
Once they were sanded they looked much better and
easier to handle.
|
|
 |
|
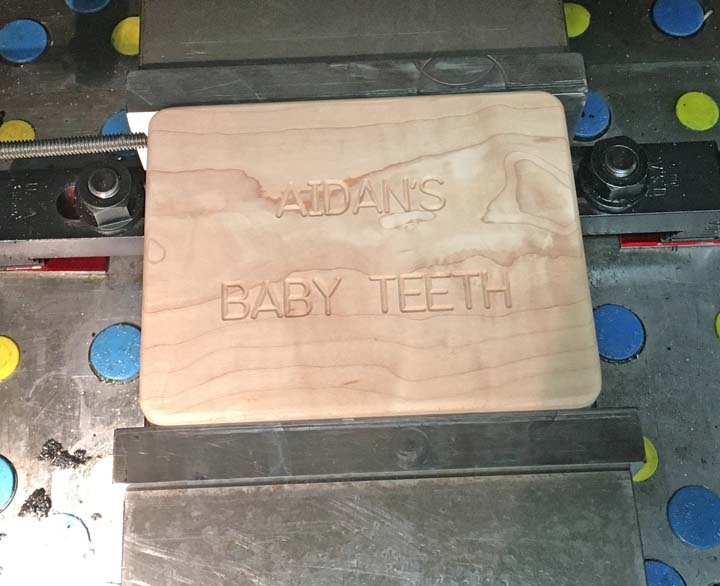
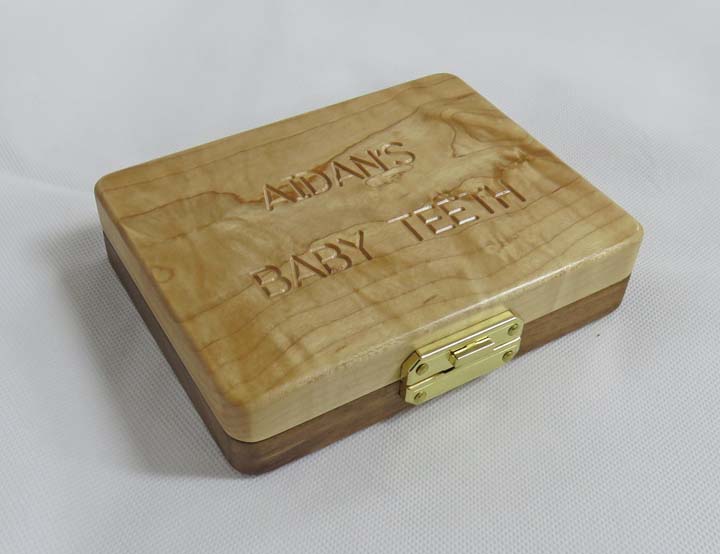
I engraved each one with the appropriate name on the
lid for a personal touch. I did this at my work on our CNC milling
machine.
|
|
 |
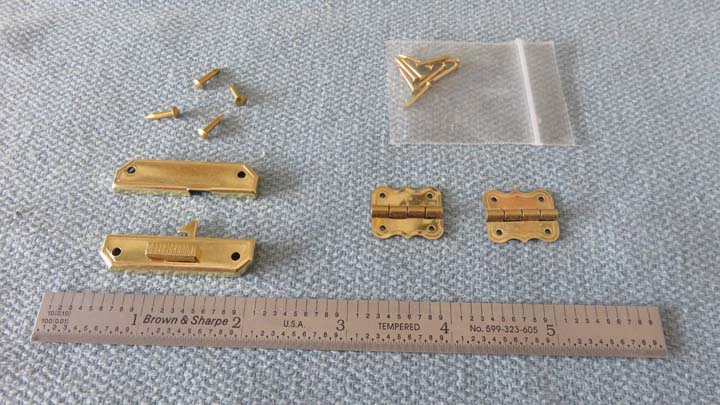
The hardware for this project is the smallest I've ever used. In fact,
the holes in the hinges and latches were so small that they came with
nails in place of screws.
|
|
 |
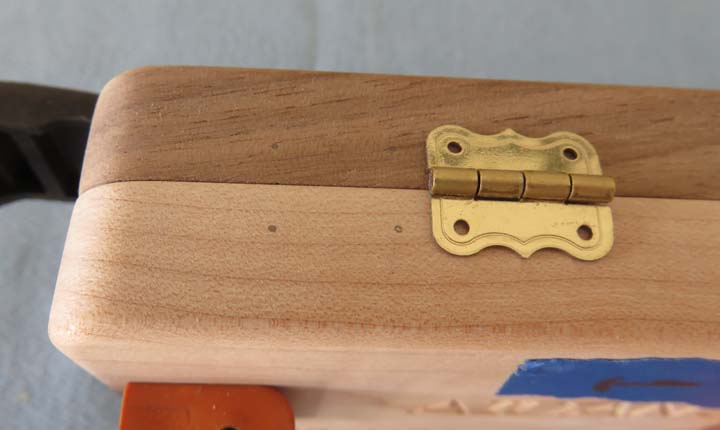
I'm laying out the location for the hinges here. Once I had them in the
right place I used a pencil to make the spots for the holes.
|
|
 |
Here you can see the pencil marks for the nails.
|
|
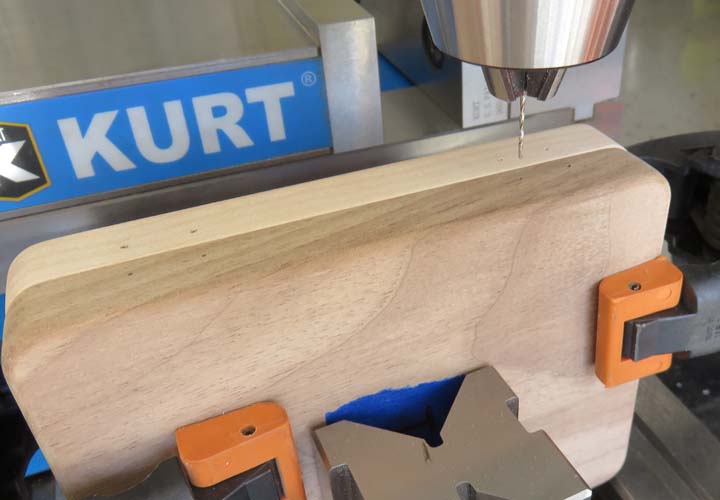
I pre-drilled the holes undersize so it won't split the wood.
|
|
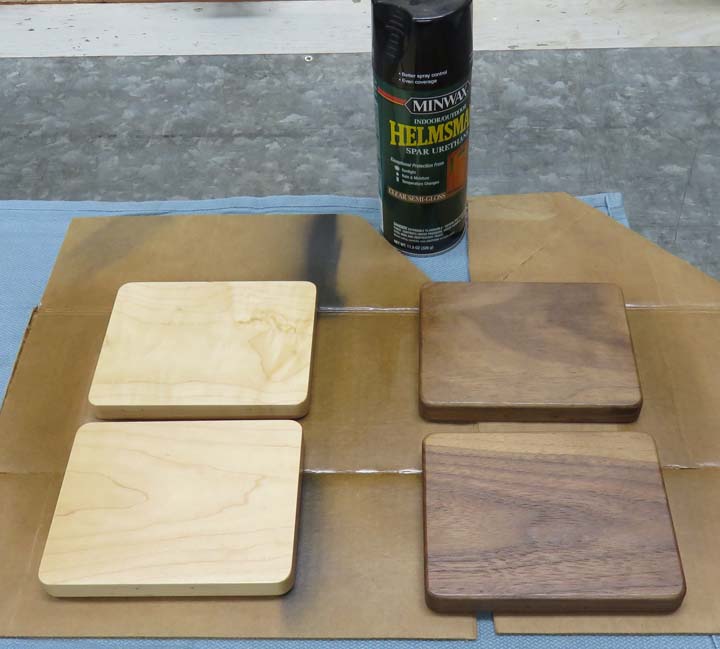
After all the holes were drilled, I gave them all five heavy coats of
semi-gloss clear.
|
|
|
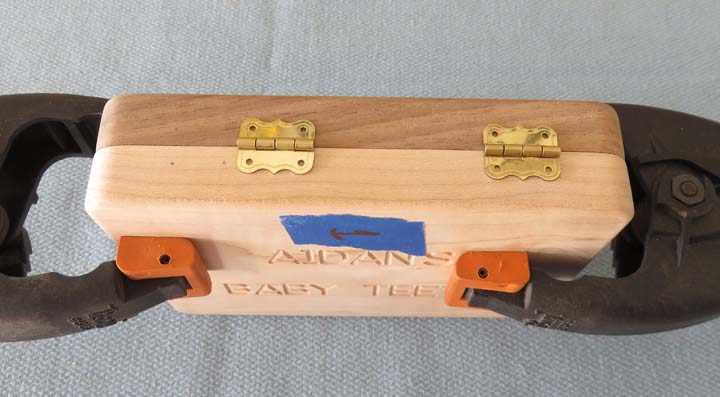
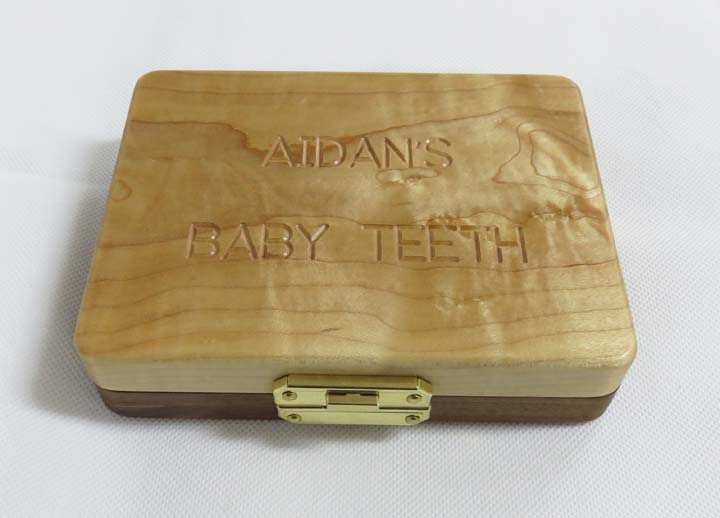
Here is the finished box for Stefanie's little one.
Aidan is nine years old now and I had Stef open her present well before
Christmas day so he didn't ask any questions....if you know what I
mean!!
|
|
Here you can see the ellipse shape a little better. Notice the small gap
between the upper and lower pockets. This will help mom with putting the
teeth in the right spots.
|
|
Stefanie really liked her gift and I hope my daughter Angela likes hers
too.
|
 |
|
|