|
Precision
Vises 1
10-2018
|
What you see below has been many years in the making....let me explain: I've
been a machinist all my life and I've made a lot of tools for
myself over the years. And just so you know, these tools that I make are
to help me while doing my job as a machinist. Now one of the tools that
I've always wanted to make was a 'precision vise', which is what I'm
making this time. However, there's a back-story that goes along with
this project, which is where I got the idea in the first place.
I started working for my current employer way back in 1983. Yes you
read that right, I still work for the same company after 35 years of
employment. But I started my machinist career in 1974, right after
graduating High School. Anyways, in about 1985, my work received a contract to make
some test specimens for an aerospace manufacture. This aerospace
manufacture was a very large well known company back then and they
supplied us with a bunch of steel to make these parts out of. Now this
material was very good stuff, which was 4340 steel, and it came to us in
round bar and square stock of all different sizes. My job was to make a
few test specimens out of each piece of this material, which was not
that big a deal. However, we ended up with a bunch of leftover material
and that big aerospace company didn't want it back.
Well this worked out pretty good for me because after looking at all
this extra steel laying around, I could envision a vise or two that
could be made from it. With the largest piece of of this leftover steel
being about 6" square by 15" long, this had a nice large precision vise
written all over it. And with some of the smaller chunks being 4" square
by 16" long, that put the idea of two smaller ones in my head as well.
A couple of months went by and I started cutting up this material so I
could start working on it. And as luck would have it, we had some slow
times in the shop back then so I took this opportunity to work on my new
vises. After a few months had gone by, I had my vise bodies roughed
out but for some reason I never did rough out the vise jaws. However, I
did cut the material for the jaws, squared them all and then stuck it my
toolbox hoping to work in them again soon.
Slowly the years went by and my new project became a distant memory.
But every now and again I would be reminded of my old project when I
would open the bottom drawer to my toolbox. Why you ask? Because this
bottom drawer was really hard to open with all that weight in it.
Fast-forward to December of 2017, Christmas time to be exact...this
is when my work closes down for the holidays (for at least a week). And I
like to take an extra week of vacation time during this time of year.
Well for some reason I used this down-time to work on my old project, It
was like they were calling me! And during that time off I got all three
vises ready for heat treat. However, while working on this project
(during my time off), I didn't take any pictures, except for the one
below. Yeah, yeah....I know....sorry.
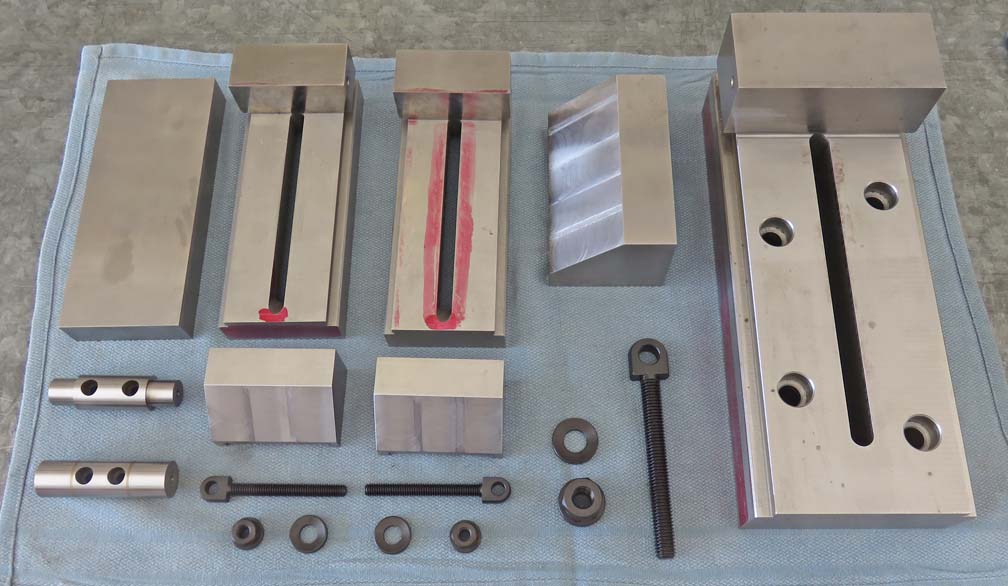
One more thing, when I took the picture below, I still had a long ways to
go before anything was ready for heat treat. I mean, just look at the
jaws, they don't have any holes in them, along with many more details
that need to be done first. Yes, I should have taken my more pictures
along the way but I got into 'high gear' and didn't even think much about.
Oh...I almost forgot, I'll be making two smaller vises. Why two? One of
them will be a 'sine vise'.
|
|
 |
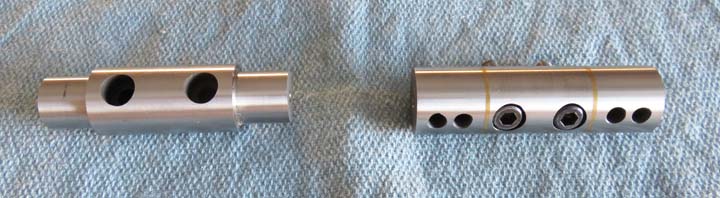
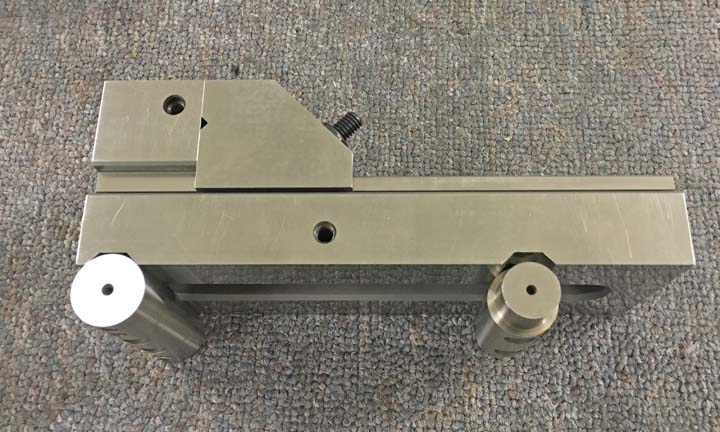
| But wait, what's a sine vise? A sine vise sits on two
cylinders (below), with one cylinder being the hinge (right) and the other is
placed at a precise distance from the other. The hinge (or axis of
rotation) needs to be very precisely made, with no slop in it what so
ever. If you look close you can see it's made from multiple pieces. I
used brass between the each piece because everything has been hardened.
In fact, I made these pieces back when I first started on this project,
but
they are not made from the same material as the vises. These two pieces
are made out of oil hardening tool steel and I ground them on an O.D. / I.D
(outside diameter / inside diameter)
grinder. However, that grinder is long gone now so I'm glad I was able
to finish them before my work sold it.
The larger holes are for cap screws, which are used to hold them to
the vise body. And the smaller holes on the hinge are tapped 1/4-28 and again
are used to hold them to the vise. I'll talk more about the step that
you see on the solid piece in a bit.
|
|
 |
|
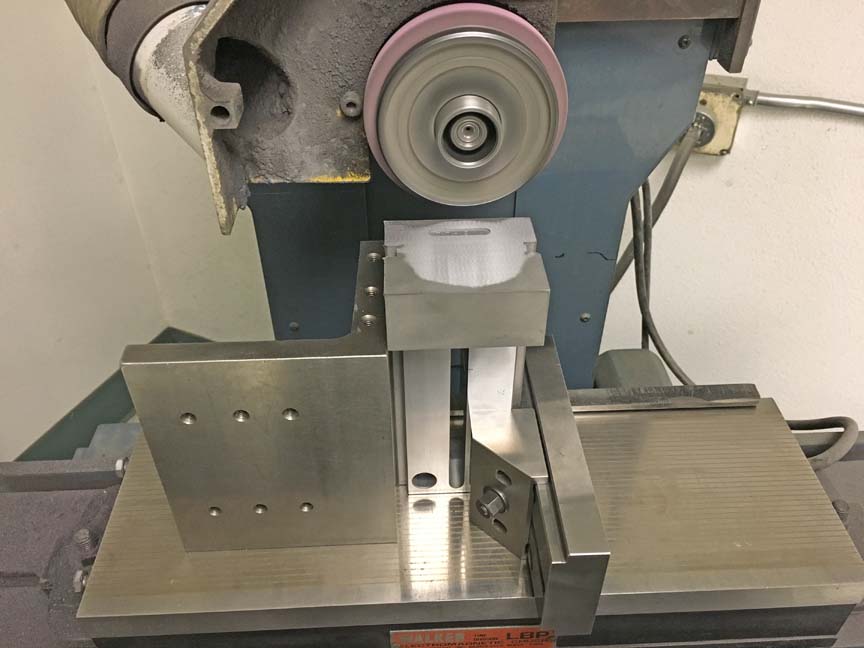
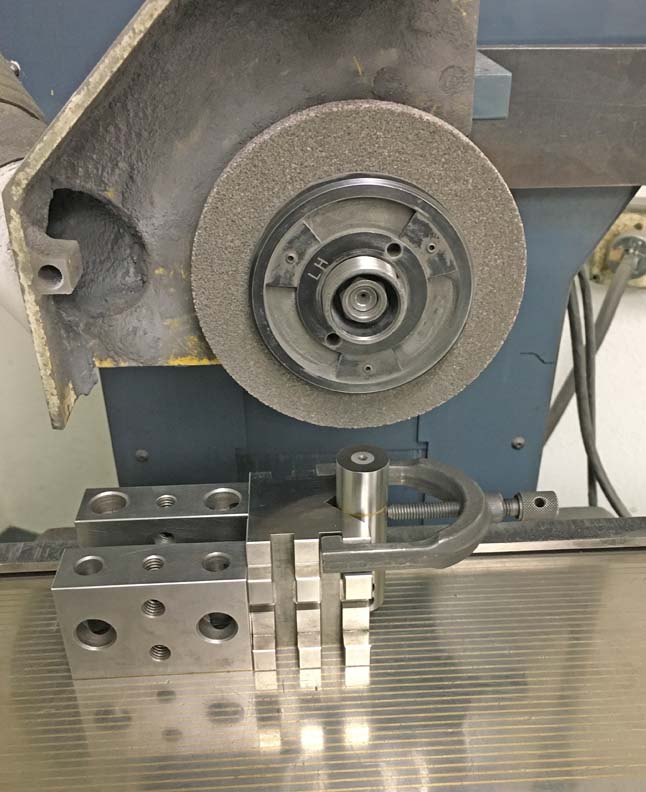
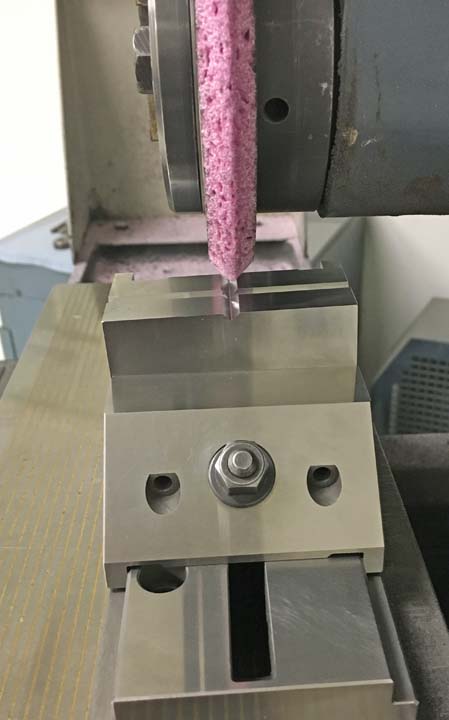
I've got all the pieces back from heat treat and now it's time to grind
everything. What you see below is a surface grinder, which is a
precision grinding machine that uses a magnet to hold your work piece
from moving.
In this case, our work has a Jones & Shipman surface grinder with an
electric magnet. An electric magnet works great and if you need to vary
the amount of magnetism, you can that too. Here I'm grinding the end
of the smaller vise and making it square to one of the sides. To unsure
that your work piece comes out square, you grind two surfaces before
removing your work piece (in this case, one side and one end). Once
those are cleaned up, you remove your work piece and place either one of
the newly ground surfaces on the magnet and grind it, making it parallel
to the opposite surface. This step is essential and has to be done right
or you end up with something that is just...well...close. However, close it not
good enough when it comes to a precision vise, it has to be done right!
You can see below that I have a little more material to remove so it has 100%
cleanup. It's funny but I'm using another precision vise to grind my
precision vise with. BTW, surface grinding is a very slow process and
takes time if you want things to come out right.
|
|
 |
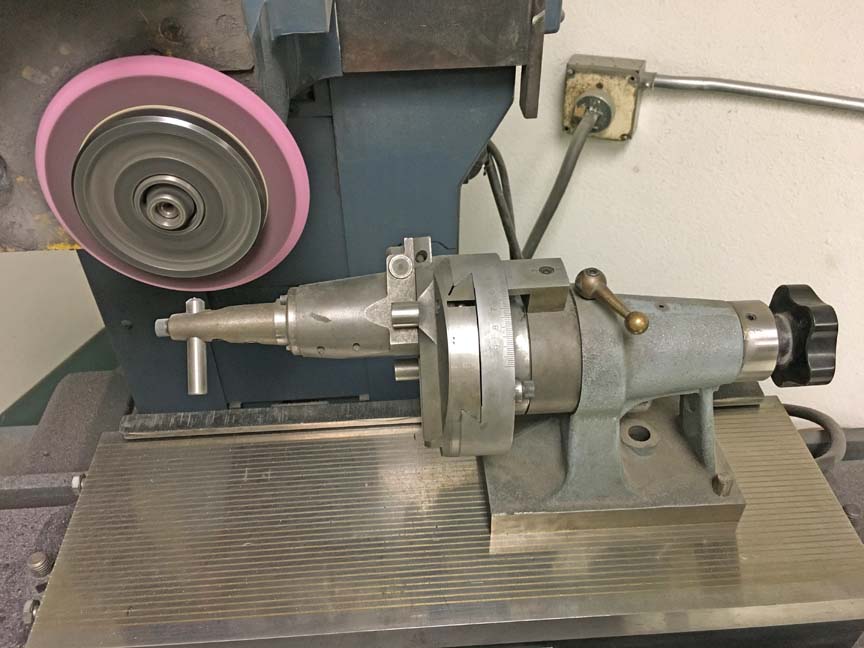
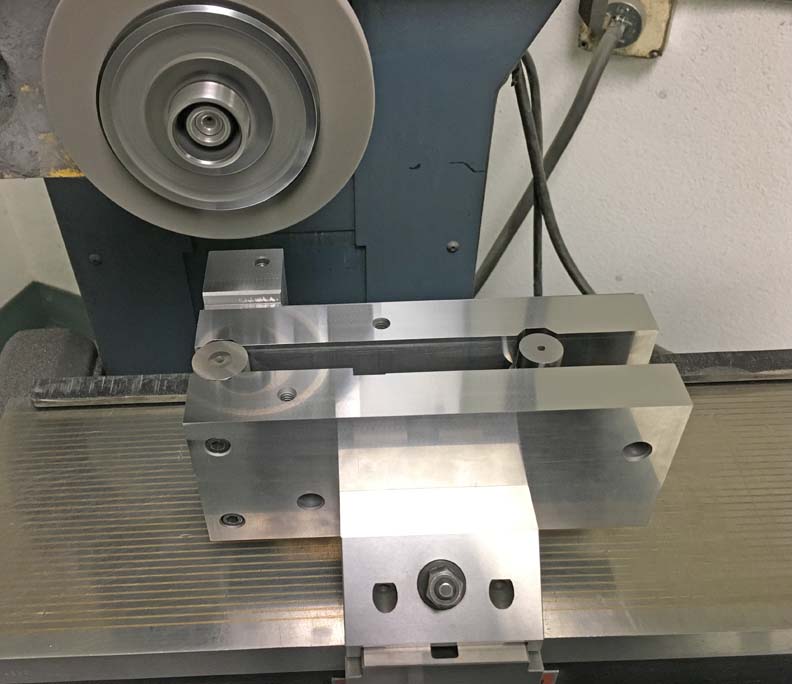
Here I've changed grinding wheels and now I'm working on the movable
vise jaws. I'm grinding both at the same time and once I have them both
cleaned up, I'll measure them and grind the vise body to fit. Note:
I've dressed the wheel so the sides of the wheel are not parallel with
each other. Instead I left the outer portion of the wheel a little
larger than the rest of it so the outer edge only does the work. With
the grinding wheel dressed this way, it cuts more freely on the sides
with less chance of any problems while working on the inside locating
edge of the jaw.
|
|
 |
|
I made these two cylinders a little long years ago so
now I'm removing .010 and .015 from them so they fit right. I'm
holding them in a V block and backing it up with a pair of 1" X 2" X 3"
blocks. Side note: I made both of these tools a long time ago (V blocks
and 1 X 2 X 3 blocks) and they
have come in very handy over the years.
|
|
 |
Here I'm test fitting the two cylinders to see how they fit. After
measuring them, I needed a few more thousandth's to come off of each one
so they would end up just below the sides of the vise body.
|
|
 |
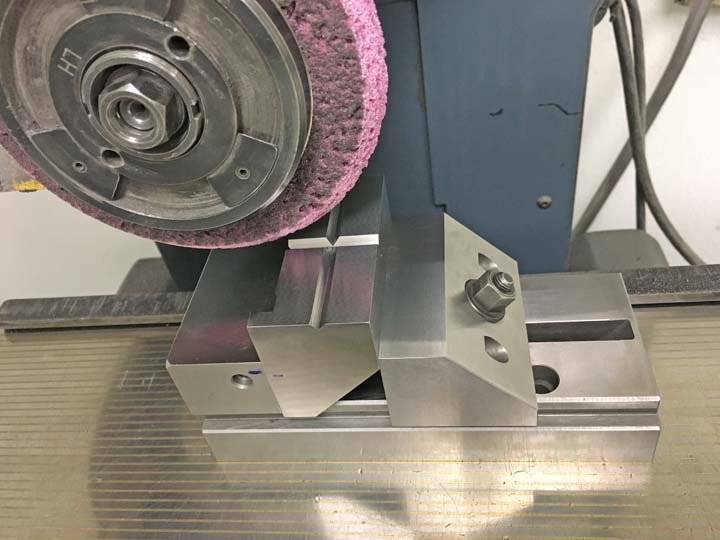
Now that the jaws fit vise body, it's time to grind in the V's that I
put in the movable jaws. The V's in the jaws are to hold small diameter
pins, or some other kind of small items. And what you need/want is for
the V to be right in the middle of the jaw when your finished. Here I'm dressing the wheel
at a 45 degree angle (both sides) and then I'll be able to work on the
jaws.
|
|
 |
Here you can see the V that I'm working on. This is a slow process because after making a 100% cleanup on
the V, I have to remove the vise that's holding the jaw, then remove the jaw, install it on my
new vise body, place
a pin in the V, tighten the vise so it clamps on the pin and then
measure the pin with an indicator from both sides of the vise to see how far it's off
center. Once I have a number of how far it's off, I clean everything
very good, place my jaw back in the vise and grind a small amount of
material from the V. Then
I repeat the process above to check my progress again.
|
|
 |
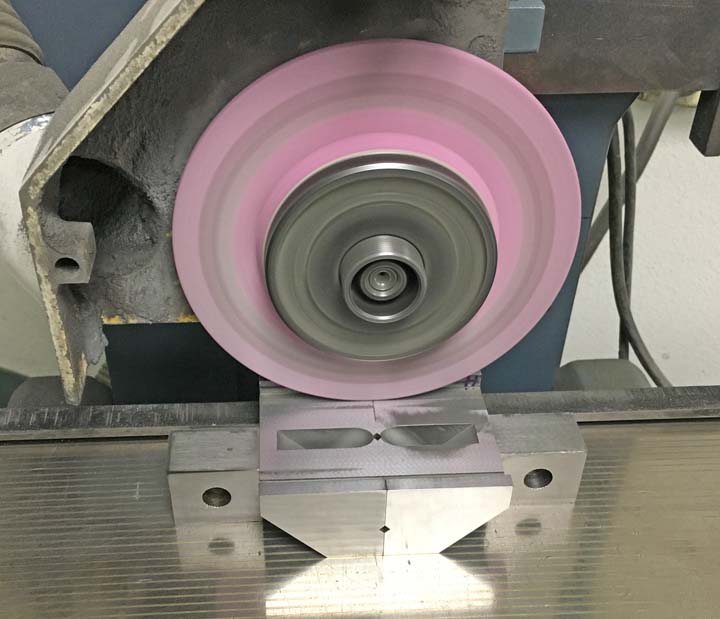
A close-up view of the V and grinding wheel. This process took about 45
to 60 minutes per jaw but it came out right where I wanted it. BTW, the other V that runs 90
degrees to this one didn't take long at all to grind because all it
needs to be is cleaned up.
|
|
 |
|
Here I am doing some final grinding on the sine vise.
|
|
 |
|
1
2
3 |
|