|
like to keep busy making different projects and when it comes to
something that I've never made before, that's my favorite kind. For
instance, when something
gets worn out or broken, it can be challenging and fun making it.
And
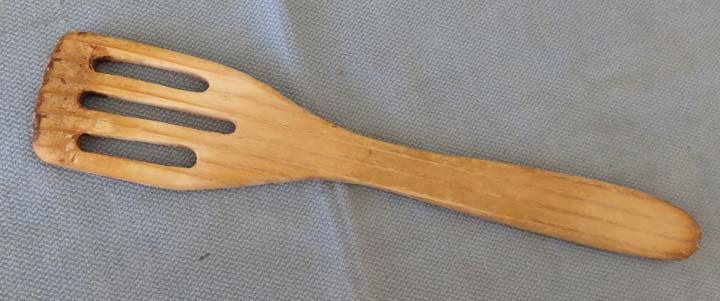
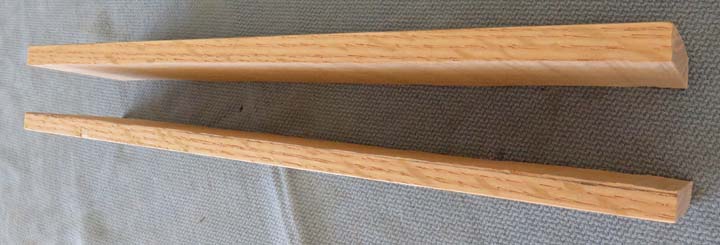
as you can tell, this kitchen tool has been used for years and was made
by my father-in-law. He made it out of a 2 X 4, in other words probably
some kind of spruce or douglas fir. I had a request to make another one
because it seems that we always need it when it's dirty. We use this for
breaking up hamburger or turkey meat, making scrambled eggs, etc; and it
works much better than a normal spatula because the end on this one is rounded.
As I was thinking about how I was going to make this piece, I
couldn't help but think of the wood guru Norm Abram, from the TV show 'The New
Yankee Workshop' because he could duplicate anything and everything. Now
I'm nowhere close to being in Norm's league but it did cross my mind for
a minute because of the same situation, making another piece of
something that already exists.
|
|
 |
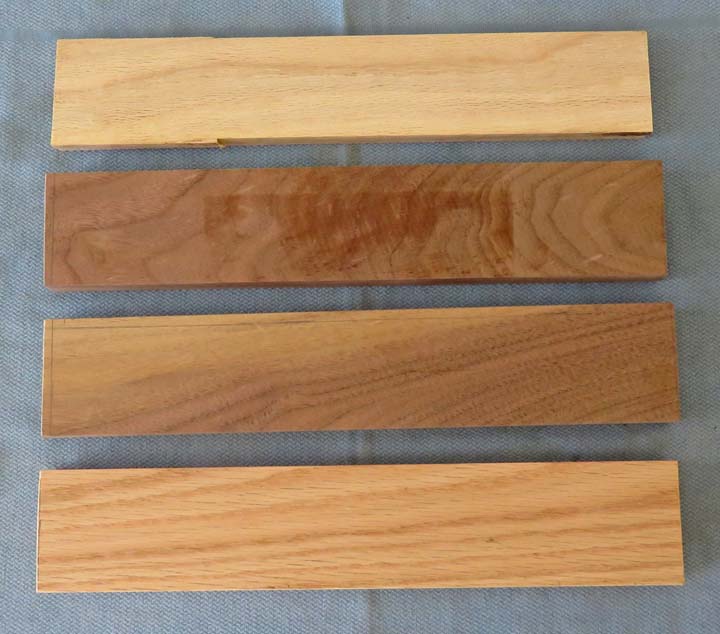
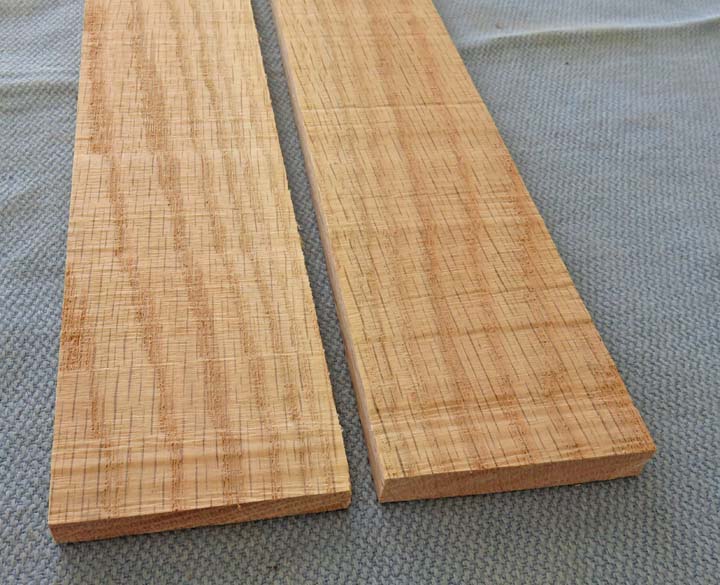
Here is the rough cut wood that I'll be using. From the
top down is: maple, 2 black walnuts and oak. I'm not sure how these
species of wood will work so it will be a learning curve for me here. All
of these pieces are 3/4" thick and will need to be milled down to 1/4"
thick so they match the original. That means the first order of business
is to mill the sides parallel. By making them parallel I'm able to hold
them in my vise which will enable me to mill the thickness. Yes I
know...it's a process that I have to go through every time I make
something. Anyways, I'll be making four of these kitchen tools which
should be plenty.
|
|
 |
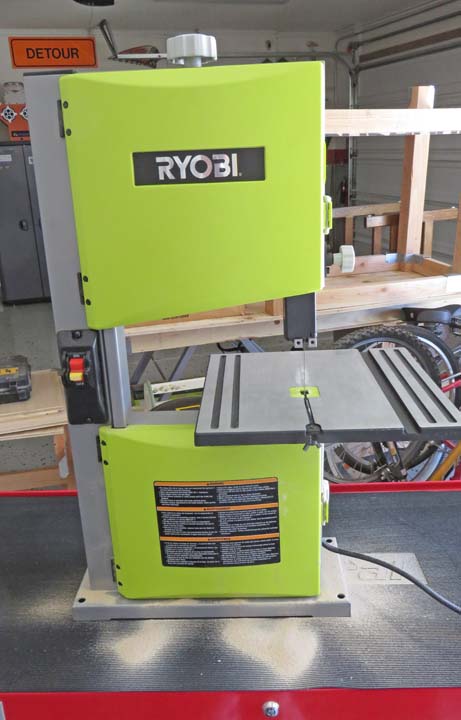
As I was looking at the original piece that I was getting ready to make
and I happen to mention
that a bandsaw would work really good for this project. Well.... a few
hours later I got one as an early fathers day gift from my son Tony and my
wife. Way cool!!! This will make life much easier, and now I'll be
changing my game plan on how I go about this project.
|
|
 |
Like I said above, I would normally use my milling machine to remove the
excess material from this 3/4" thick piece but now that I own a bandsaw
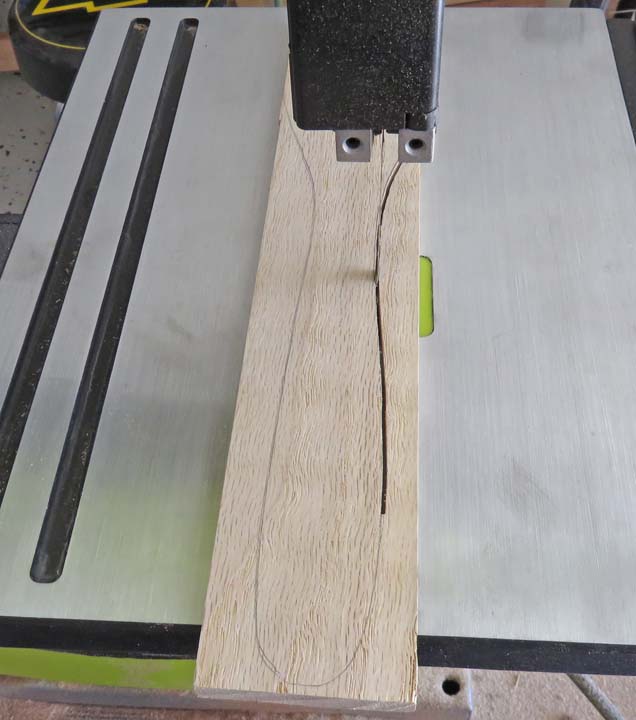
this operation is going to change. I drew a pencil line slightly larger
than 1/4" from the edge and used my new bandsaw to cut right next to the
line. In other words, leave the line.
|
|
 |
If you look close you can see the pencil line at the bottom right which
is what I was after. But something else hit me right after I made this
cut, I now have two pieces that I can work with. Well this
changes everything ....again.... because instead of making four I can
now make eight.
This leftover piece is slightly larger (thickness) than my cut piece which means I'm
good to go here. BTW, my new bandsaw works pretty good!!
|
|
 |
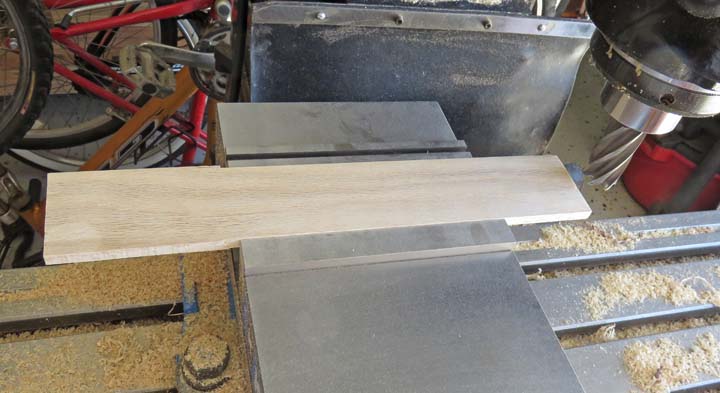
Here are both pieces again and now I'm getting ready to mill the
thickness on my planer....er...well...I mean...my milling machine.
Maybe I'll get one of those for Christmas this year if I'm a good boy
:-]
|
|
 |
|
Here is a piece of curly maple that I'm milling down to
1/4". I have to make two passes with my 1" cutter for this operation
which
takes about five minutes per piece. But a planer would do the same
thing in only a few seconds.
|
|
 |
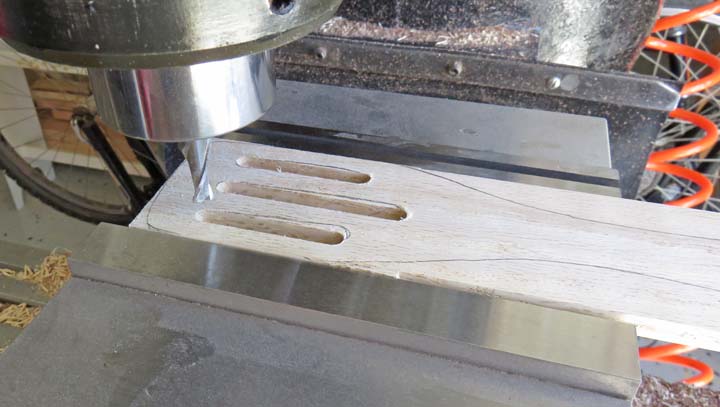
I traced around the original to get an idea of what the slots and
periphery would look like. As you can see the original slots aren't
straight but that's because my father-in-law used a hand held router. I
used a 1/4" end mill in my milling machine for my slots. And as you
can see it's close to his.
|
|
 |
|
My new bandsaw worked great for cutting out these kitchen
utensils which I cut right to the line again.
|
|
 |
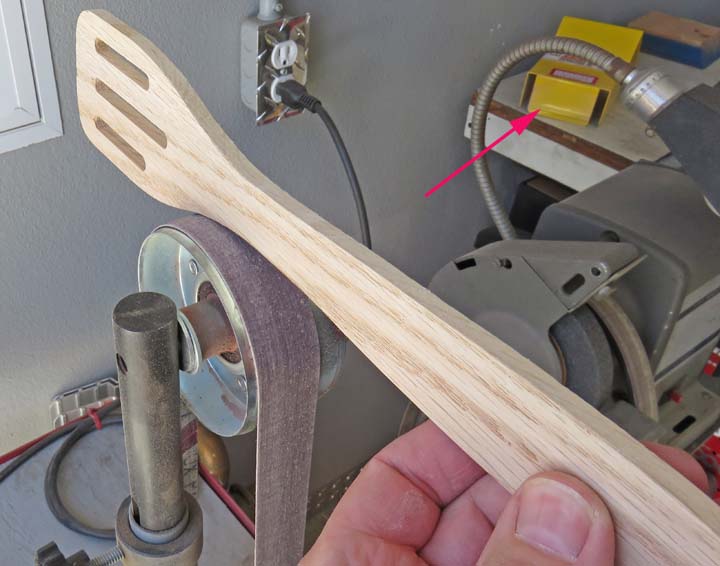
I used my belt sander to do most of the periphery but when I tried
sanding this concave radius I ran into trouble. After I removed the
guard (arrow) I was able to sand this area much easier and it worked
great.
|
|
 |
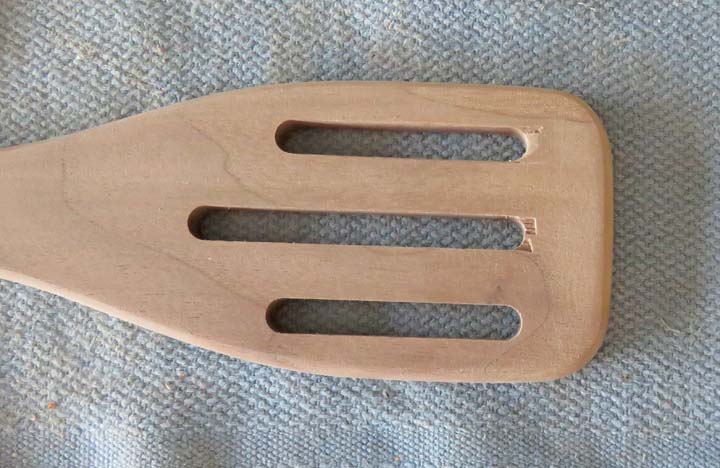
The chipped slots that you see were the result of my 1/4" end mill
breaking through the bottom surface. This seemed to happen to most of the
black walnut pieces.
|
|
I sanded those chipped areas by hand giving the end of the slots a slight
taper. This worked out great!
|
|
|
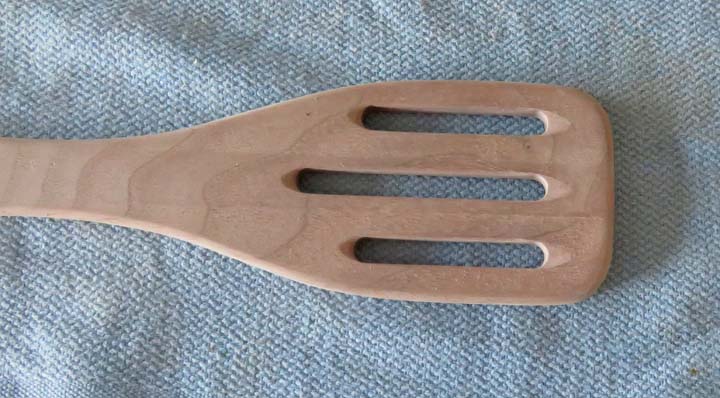
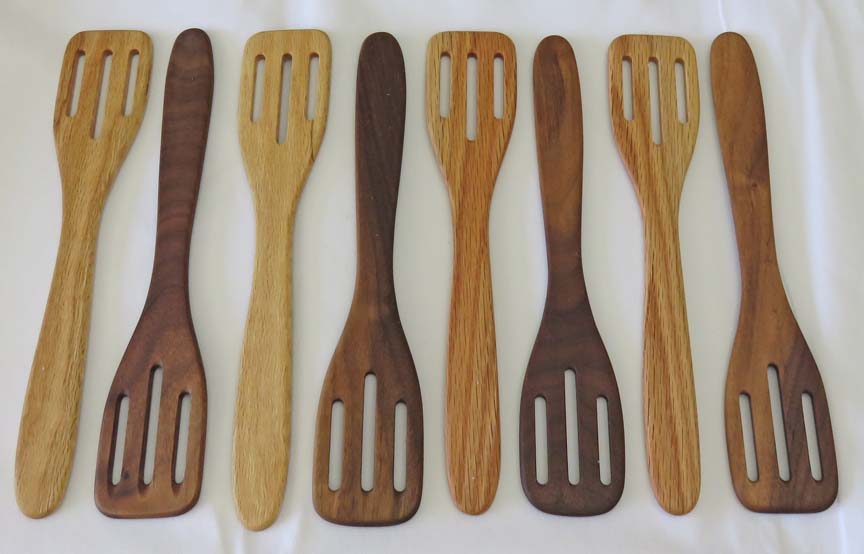
Here they are all finished. Two curly maple, two oak and four black
walnut. I put mineral oil on them which made them darker but that will
protect them as well. The size is 11 1/2" long X 2 1/2" wide and the
handle is 1 1/8" at the widest part.
|
|
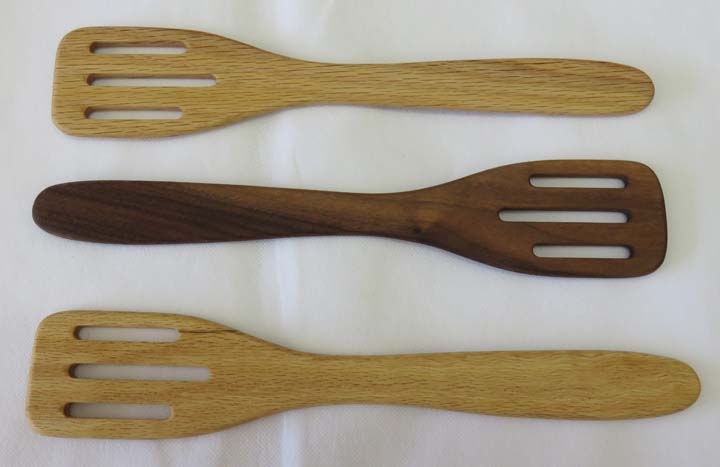
One of each flavor here.
|
|
|
I used my router table to give them all a full radius on periphery. This
makes them easy to hold and work with. I'm going to give each kid
one (four kids) and now we'll have a few extra. This was a fun project
and I hope the kids like them as much as we do.
|

|
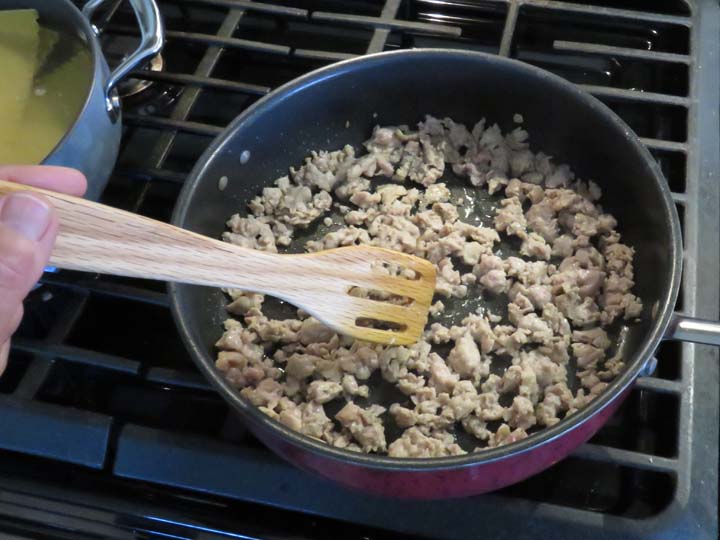
Here's one of them being used to make my wife's world famous lasagna
which turned out great...as always!
|
 |