|
I'm going to make a hat rack for our son Tony, and I'll
be using two materials that I normally wouldn't use. Yes I'll be using
wood for it which is normal, but there's a back story about this piece.
When I was growing up in the 60's, my parents had their
turntable, amp and radio (all mono I might add) set up on bricks and two
redwood boards. The 78 rpm records were on the bottom along with the amp,
and the turntable and radio were on top. The length of these redwood
shelves were 6 feet long and were 14" deep. To get this depth my dad had
two boards stapled together, which worked out pretty good. I mean as a
kid I didn't know that we were the only ones that had our sound system setup
like this. That is until later in years I went to
a few friends houses and could see how the other half lived.
In case you were wondering, my parents were hippies and
lived the 60's and early 70's as such. My sister seemed to fit right in
with them, but as for me I was the black sheep of the family and
tried to seek out a more normal life style whenever I could, like most of my
friends had.
Fast-forward a few years and I ended up with this old
school entertainment system when my parents moved. Well I tossed the bricks but for some
reason I stored the wood in the garage rafters. Two houses and
many many years later, I still have those two redwood boards so I
thought I'd finally make something out of them. However, I normally wouldn't
use redwood because of how light weight and soft it is so this is the
first of the two materials I mentioned earlier. And I'll get to other one in a minute.
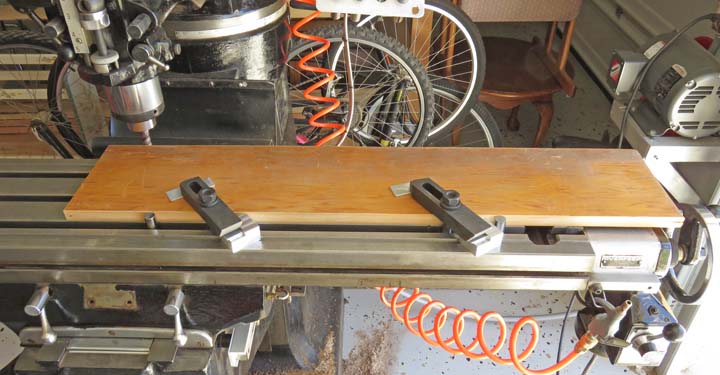
What I'm doing below is machining the long sides so
they're parallel. Now I couldn't do this in one setup because the piece
is 34" long so I had to move it when I got to the half way point.
Notice the two 5/8" diameter round pieces in the slots. I use these all
the time because the slots run parallel with the table and when you bank
your work against them, the cut is parallel as well.
|
|
 |
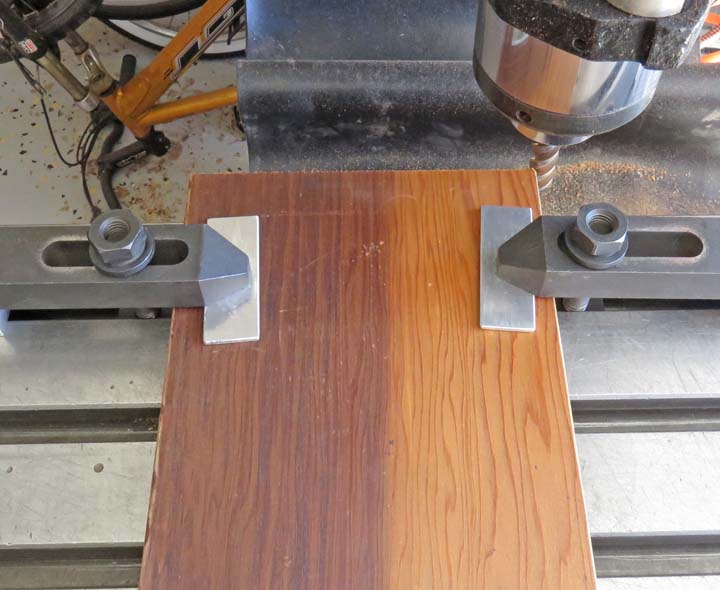
After the sides were cleaned up, I squared
the ends. The width is 7 inches.
|
|
 |
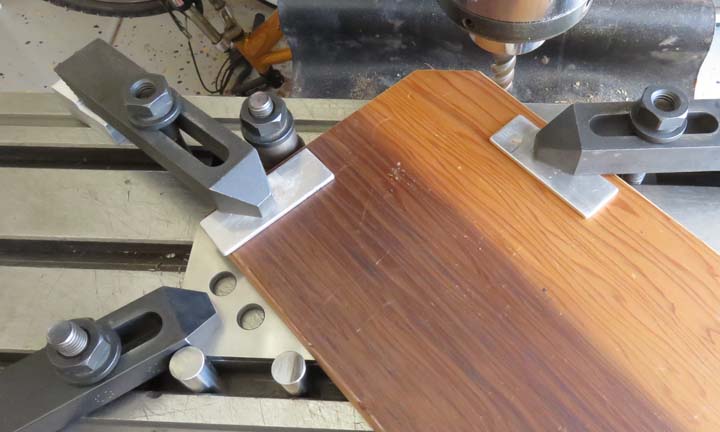
I decided to give the corners an angle so I placed a 'work stop' at
the end and banked my work piece against my 45 degree angle block. I did
this for all four corners.
|
|
 |
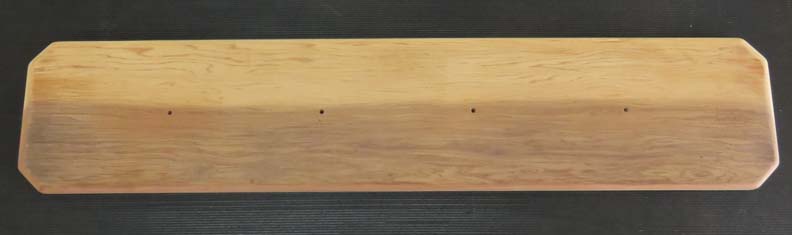
I used my router table and put a 3/8" radius around the top surface. And
notice the four holes I have equally spaced, this is where the hats will
be placed later.
|
|
 |
|
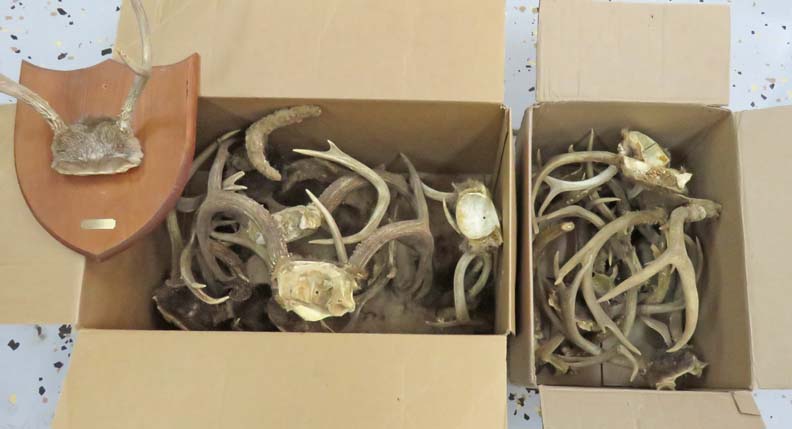
What you see below is many years of deer hunting that
I've done. I thought I'd use some of the smaller antlers to hang the
hats on. As you might have guessed, this is the second item that I
wouldn't normally use on a project. Oh and the one mounted on the plaque was my first deer that I
ever shot so I won't be using that one. On the other hand, once it was
out of the box I decided to hang it on my garage wall.
Using antlers for this project is very fitting because a
hunter will use the term, "did you see the size of that hat rack on
that deer"? This might be said while talking to a fellow hunter in the
field or just in passing.
|
|
 |
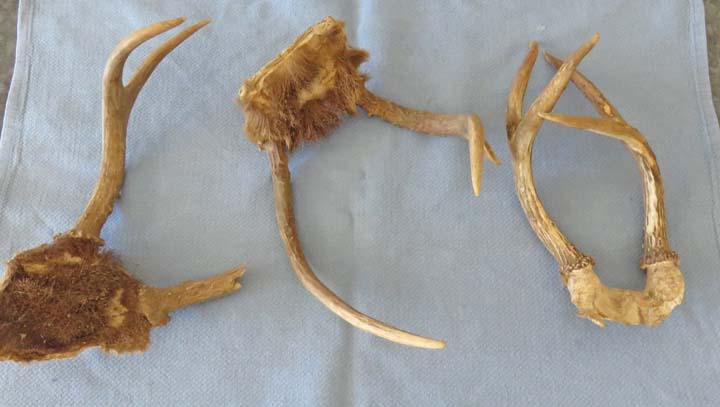
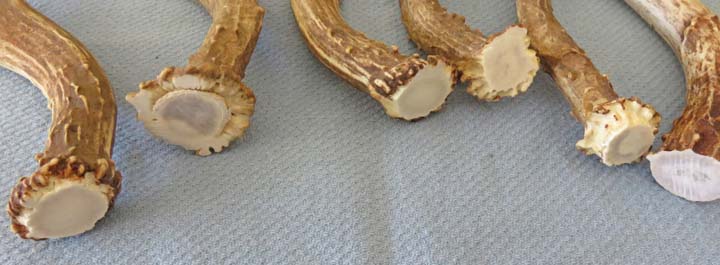
I started with a few of the of the smaller ones to get an idea of what I
wanted. The one on the right is broken in the middle which is why the
antlers are touching. However the one on the left was broken while the
deer was alive.
|
|
 |
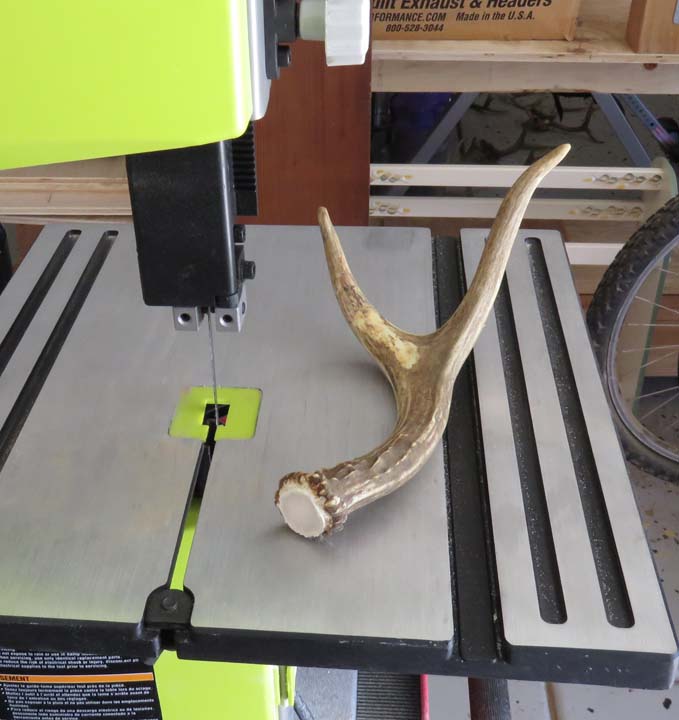
My new bandsaw made quick work of separating them from the skull. But I
had no idea how bad antlers smelled when being cut. Let me put it this
way, I held my breath till I cut through each one. Yeah I know...who
knew!!
|
|
 |
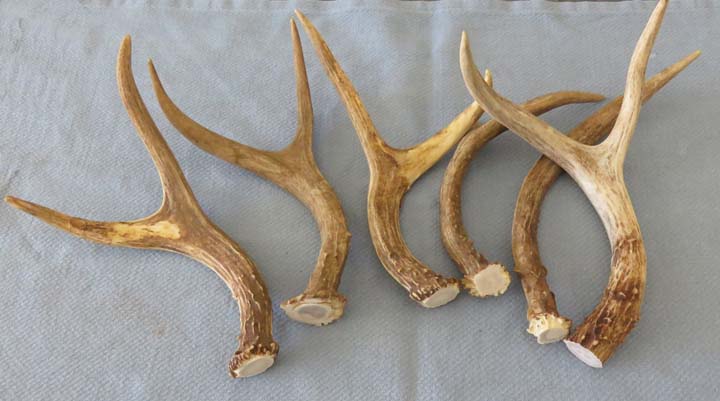
I cut more than I needed and will choose four that I think will work for
my hat rack.
|
|
 |
|
I'll need to attach the antlers somehow and after
practicing with one, I decided to use some screws to hold them to the
wood base. I also found out that antler material is much harder than I
imagined. I mean the last thing that I thought was that I'd have trouble
drilling them. But I guess that makes sense because when deer end up
fighting each other (during the rut), those hat racks on their heads hit
really hard against each other which you can hear for a very long
distance. And if you're ever lucky enough to hear this while you're
hunting, it makes the adrenalin flow at a very high rate.
|
|
 |
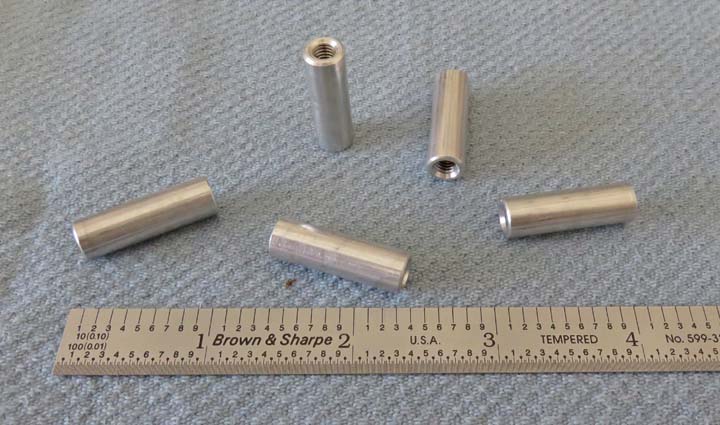
I found these threaded aluminum pieces at the hardware store. They are
5/16" on the outside and have 10-32 threads on the inside. I'm
going to use these to attach the antlers to the board.
|
|
 |
I started experimenting to make sure my threaded inserts were
going to work. Once I confirmed that things were looking good, I came
up with a plan.
|
|
|
|
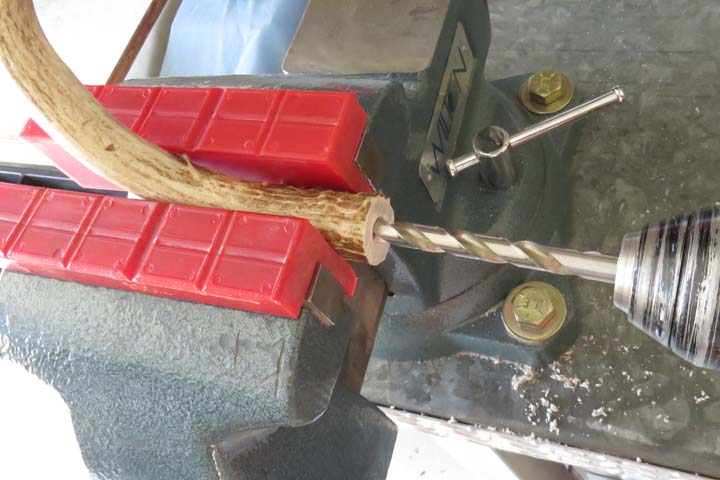
I cut the threaded inserts in half with my hacksaw which
made them 1/2" long. Then I drilled the antlers with a 1/8" drill first
and followed that with the 5/16". The tape was my crude way of making
sure I didn't drill to deep.
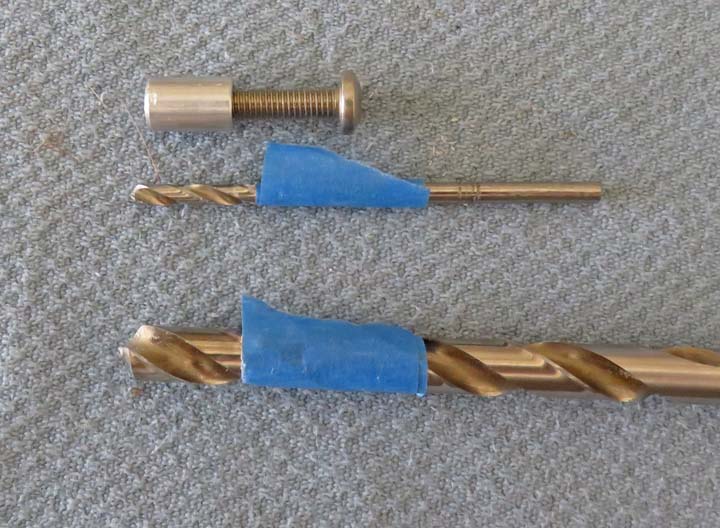
A quick note about drills: this type of drill is known
as a 'twist drill' and isn't ideal for this project. A twist drill wants
to grab when used in a hand drill and when it does it tends to force
its way instead of cutting its way. A better choice here would be a
spade type drill or one with a flat bottom and a pilot to help guide it.
|
|
To keep the threaded inserts in place I used some epoxy. This is a test
screw and not the one I'll be using.
|

|
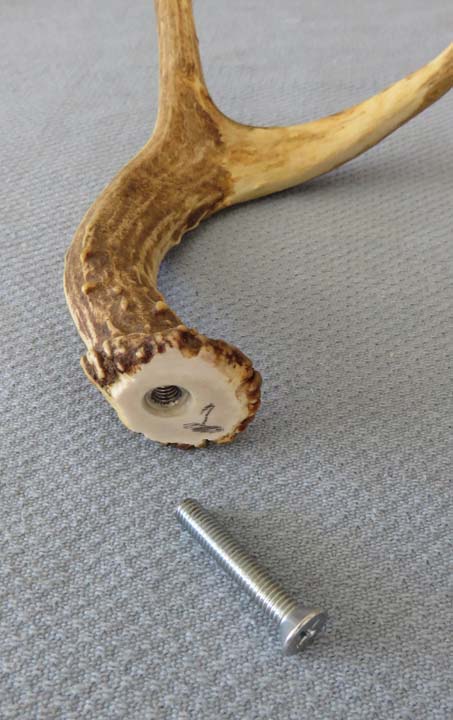
Here you can see the insert is just below the surface so the antler base will sit
flat against the board. I also numbered each one so they went back like
I wanted.
|
|
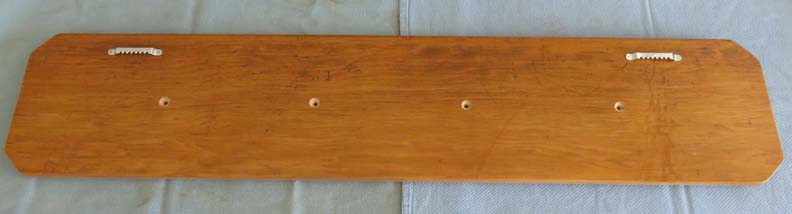
To hang the hat rack on the wall, I used two picture hanging brackets
and some small nails. Also notice the countersunk holes which are for
some flathead screws.
|
|
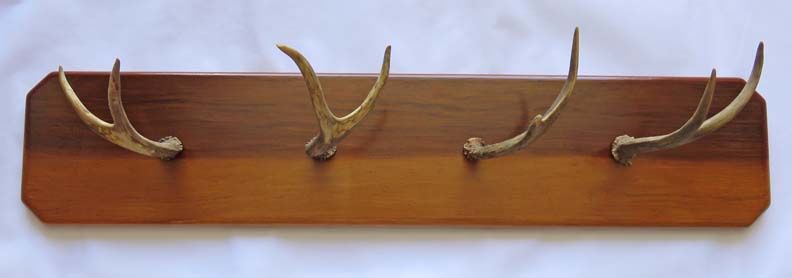
Here is the finished hat rack. No two antlers are the same which makes
it that much better. I used two coats of semi-gloss polyurethane which
should make it last for many more years.
|
|
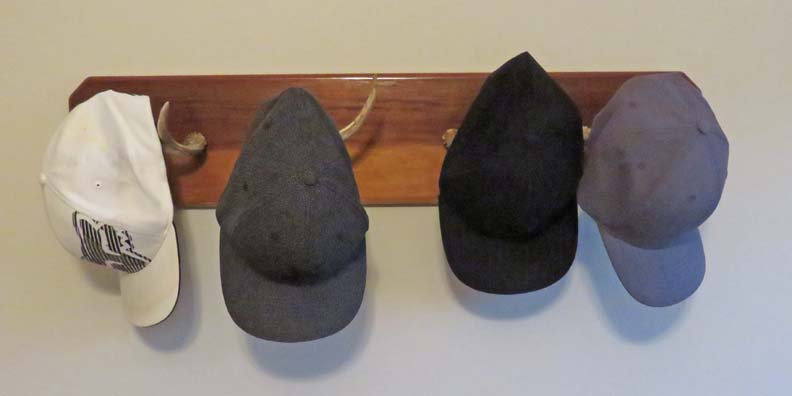
I hung it on the wall and placed some of Tony's hats on it before he
came home from work that day. He seemed to like it and it was a fun
project to make.
|
 |