Aidan's Weights & Measures  1           11-2016


My grandson, Aidan was visiting us awhile back and he brought over something that he was really proud of. Aidan is eight years old now and is at that age where he can build stuff, put things together, start to reason things out and he's learning how to read well too. With all this new found knowledge, one of the things he's been doing is building Lego kits and having a blast doing so.

The latest kit that he put together was some kind of transformer/robot thing called "Ninjago Titanium Dragon". He was telling me how great this Lego dragon was and how this 'titanium' was the strongest metal ever. Well...I told him that there were other metals that were much stronger and harder than titanium, but he didn't seem to believe me. What I mean is...at first he didn't. I told him to follow me out to the garage so I could show him a few different kinds of metals which might give him an idea of what I was talking about.

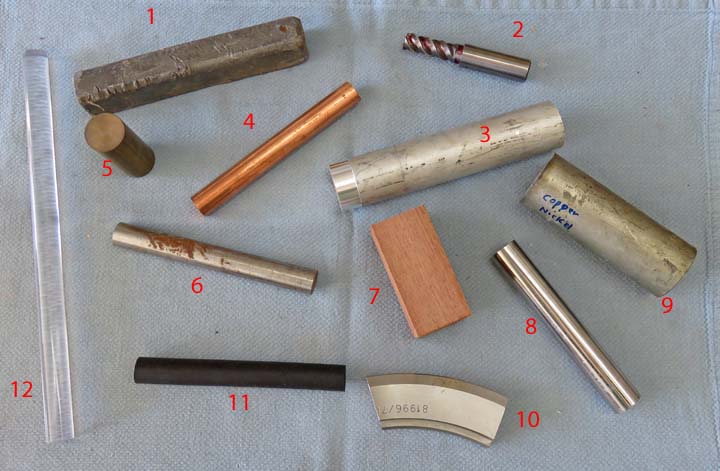
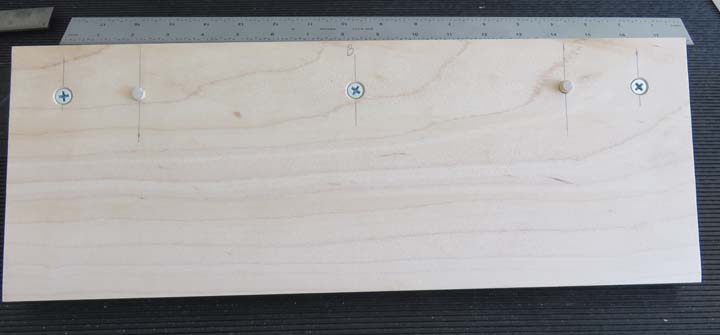
I started digging around in my scrap bin full of different kinds of materials to show him the difference between aluminum, steel, etc; which only confused him farther because all of the pieces that I had were various sizes. After letting him hold a piece of steel that was 2" long X 3" wide X 3/4" thick and try to compare that with a piece of aluminum that was 1 1/4" diameter X 6" long, this wasn't going to work. You see, I wanted to show him the difference between some metals but I really needed them all to be the same size. Otherwise he wouldn't understand.

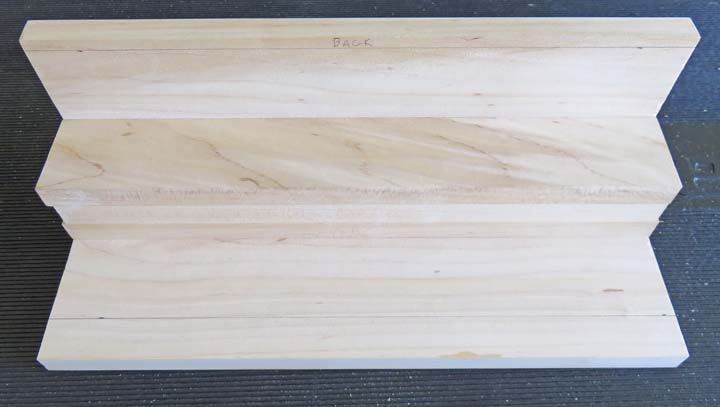
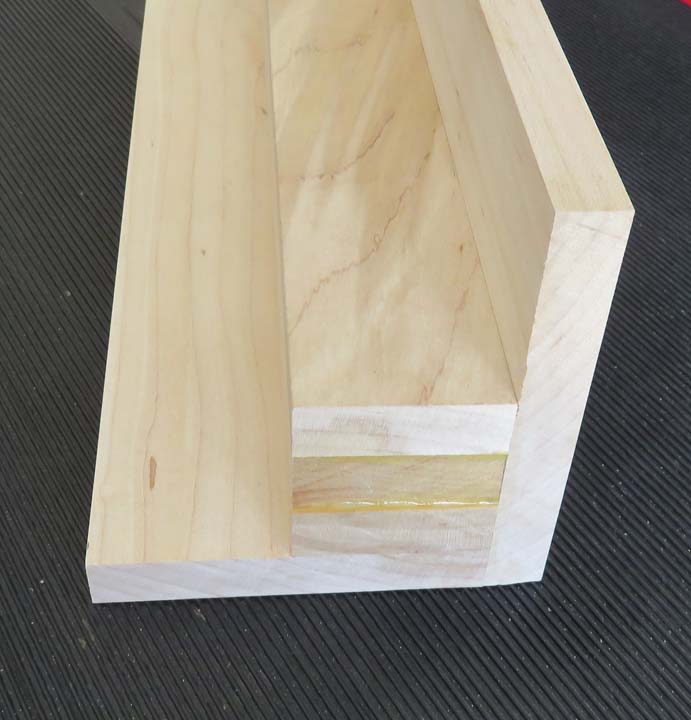
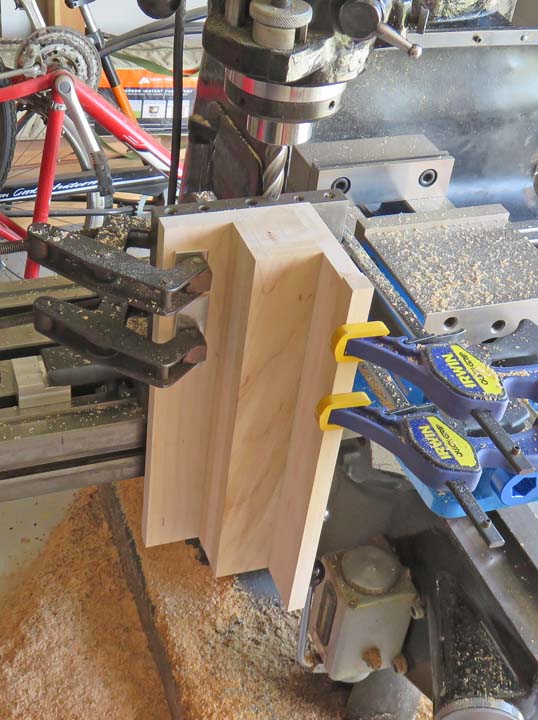
Then it hit me...I could make him something that would include a variety of different materials and they could all be exactly the same size. I could even make something to display them on, include all their names and the weights of each one too!

So there it was, a project in the making. I told Aidan that I would build this for him but it would take me a few weeks. He liked that idea so now it was time to decide what type of materials I would use.

Speaking of materials, the one type of material that I wanted to include in this project was carbide, but I'm not able to machine this stuff. You see, carbide is an extremely hard material and is what cutting tools are made out of for the metal working industry. We use them to cut steel with, both hard and soft. So how am I going to get a piece of that for my project?

Well as it turns out a company that makes cutting tools for my work was kind enough to send me a small piece of carbide after telling him about the project that I had in mind for my grandson. And this piece, whatever 
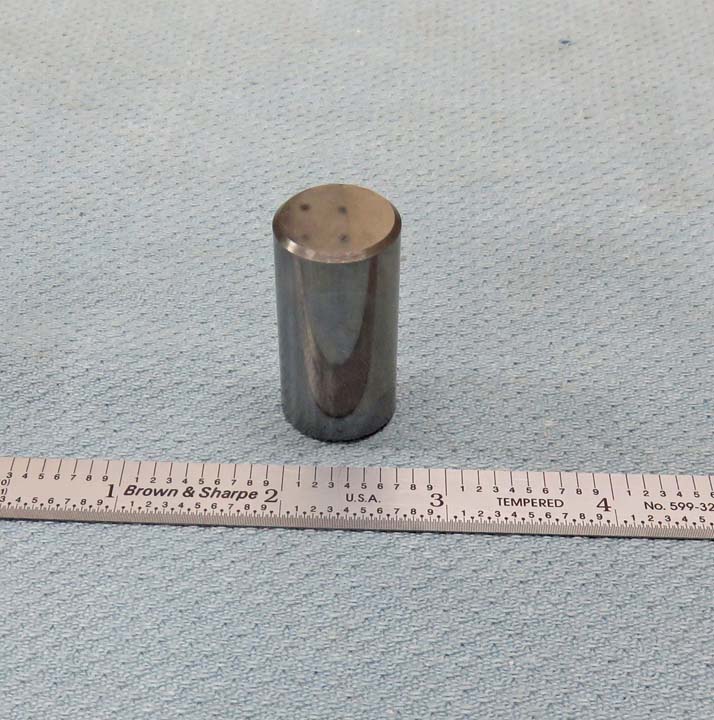
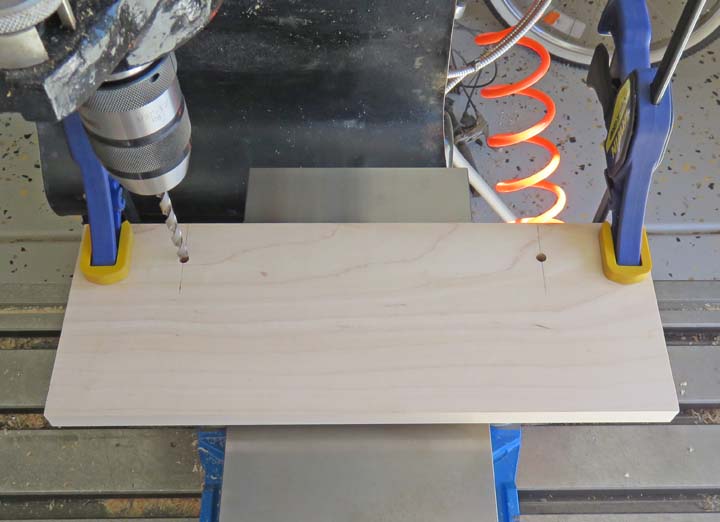
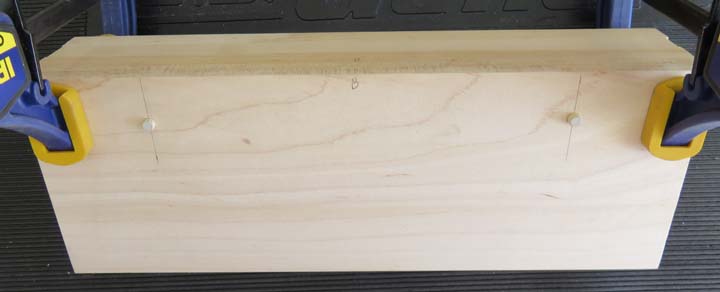
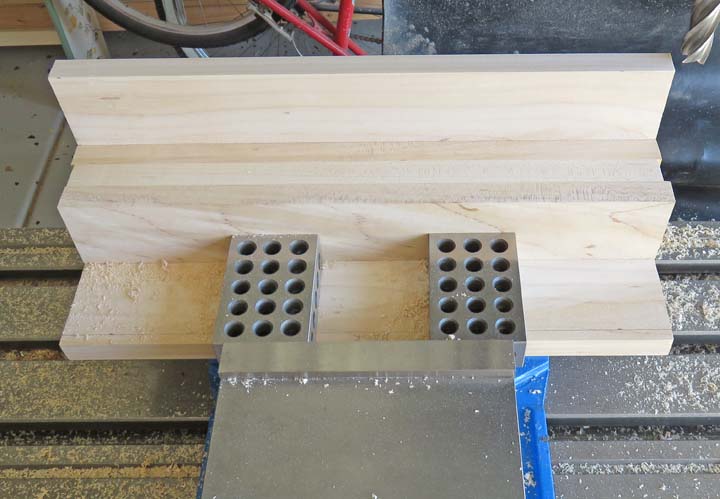
size it was, would dictate the dimensions for all the other pieces. The size that was sent to me was 3/4" diameter X 1 1/2" long (in the picture below). This is the perfect size and now it's time to start making all the other pieces. 


After thinking about what other materials that I wanted to use, I came up with 12 different materials that you see in the picture below:

1. Lead
2. Carbide
3. Aluminum
4. Copper
5. Brass
6. Mild Steel
7. Wood
8. Stainless Steel
9. Copper Nickel
10. Titanium
11. Rubber
12. Plastic

I had to buy three of these items: plastic, copper and rubber. I had everything else so now I just needed to make them all the same size which I'll talk about later.


I needed some kind of stand or base to display them on so I started sketching out some drawings with a pencil. After a few different ideas, I came up with a plan and decided to make the base out of wood. The type of wood I'll be using is maple and what you see below is one of three pieces that will be glued together. The length of the base will be 13 1/2" long.


After machining the surfaces to be glued, I placed them in some clamps and let them sit over night. Note: the long pieces touching the clamps are clamp blocks and not part of the project.


The three pieces that I glued together are ready to be machined square and will end up at 2" X 2" when I'm finished. To make sure my work piece is really square I'll be using a 'roll' placed against one side (arrow). This roll only contacts a very small area which helps make sure it forces the opposite side against the solid jaw of the vise. And the side against the solid jaw will be square to the surface being cut. All you do is keep rotating your newly cut surface against the solid jaw using the roll three times (or three surfaces). On the forth side you can remove the roll and machine the last side without it.

To explain this concept farther: say I was machining a piece that was rough saw cut and it had an irregular surface. If you were to try to machine it as is, you would end up clamping on this irregular surface which would not end up being held correctly. By using this 'roll', your contact surface ends up being very small compared to the the whole vice jaw (the movable jaw) and forces the opposite side to be held much better than if you didn't use one at all. Now you can't take a big cut while using this method but once you have your work piece square you can do what you want on your last cut. 


I'm drilling two dowel holes here to make sure nothing moves once it's assembled. The blue clamps are holding the 2" X 2" block that I just machined to the bottom surface of my base. The vise is holding the 2" X 2" block.


The size of the wooden dowels are 1/4" inch diameter and will end up being 1 1/2" long. I used my hacksaw to cut them with.


I inserted the dowels through the bottom of the base and into the block. Now I need to sand them flush.


The stand is starting to take shape. The pencil lines are 2" from the middle step, which is my 2" X 2" piece from above. I'll be cutting off this excess in the next step.


I used three screws each to hold the back and bottom to the 2" X 2" piece along with the dowels (four dowels total).


After saw cutting off the excess, I machined both surfaces to size. Speaking of sizes, the dimensions for each step is 2" high X 2" deep. The thickness of the back and bottom pieces are 5/8", making the overall height and depth 4 5/8".


Now it's time to machine the ends square.


I clamped the base to an angle plate so I could machine the ends. I had to hang the base over the edge of the milling machine table because it was to tall. While I was cutting this end, I ran out of travel on my Y axis (front to back) so I'll need to rotate the base 90 degrees and machine off the part that I couldn't get to.


1   2   3   4